The Quality Control feature will help you better manage your Readymix Quality inspections.
To start using Quality Control, we first need to register your laboratory.
In summary, the laboratory registration in the system is essential for the management of your samples and inspections, allowing you to have a physical control of where the Readymix inspection was made.
Initially, open the menu on the left side of the screen and select "Quality Control">"Laboratory".
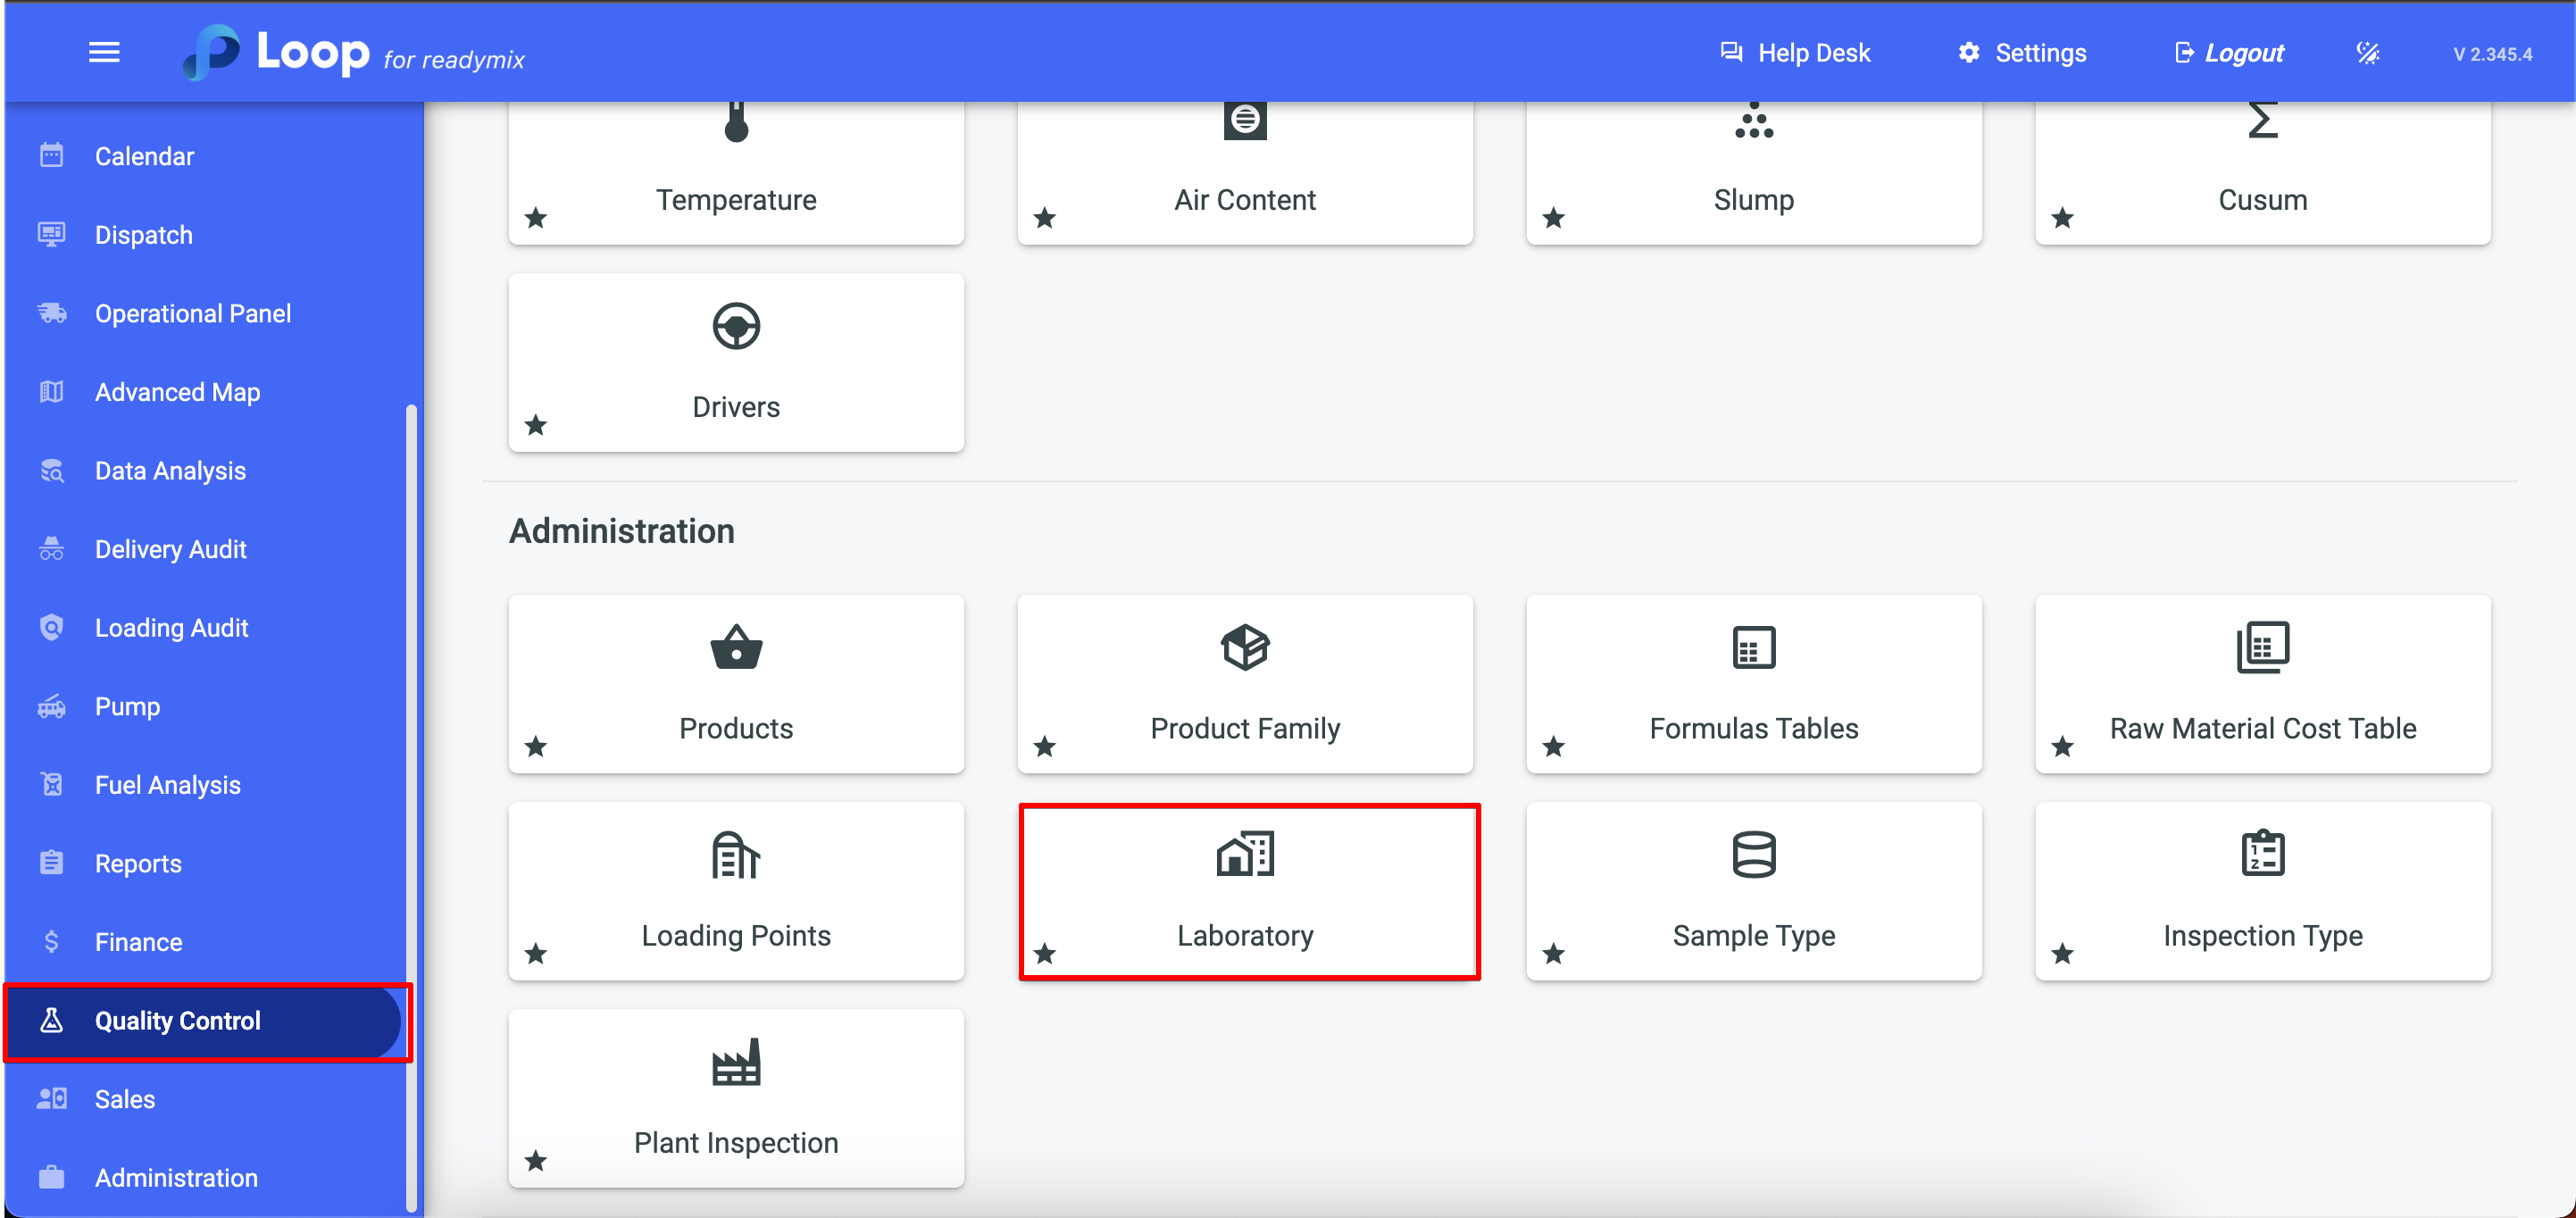
By clicking on add laboratory you can enter the location of the laboratory, code, name, U.D.M. rupture load, U.D.M resistance, label type and days to collect.
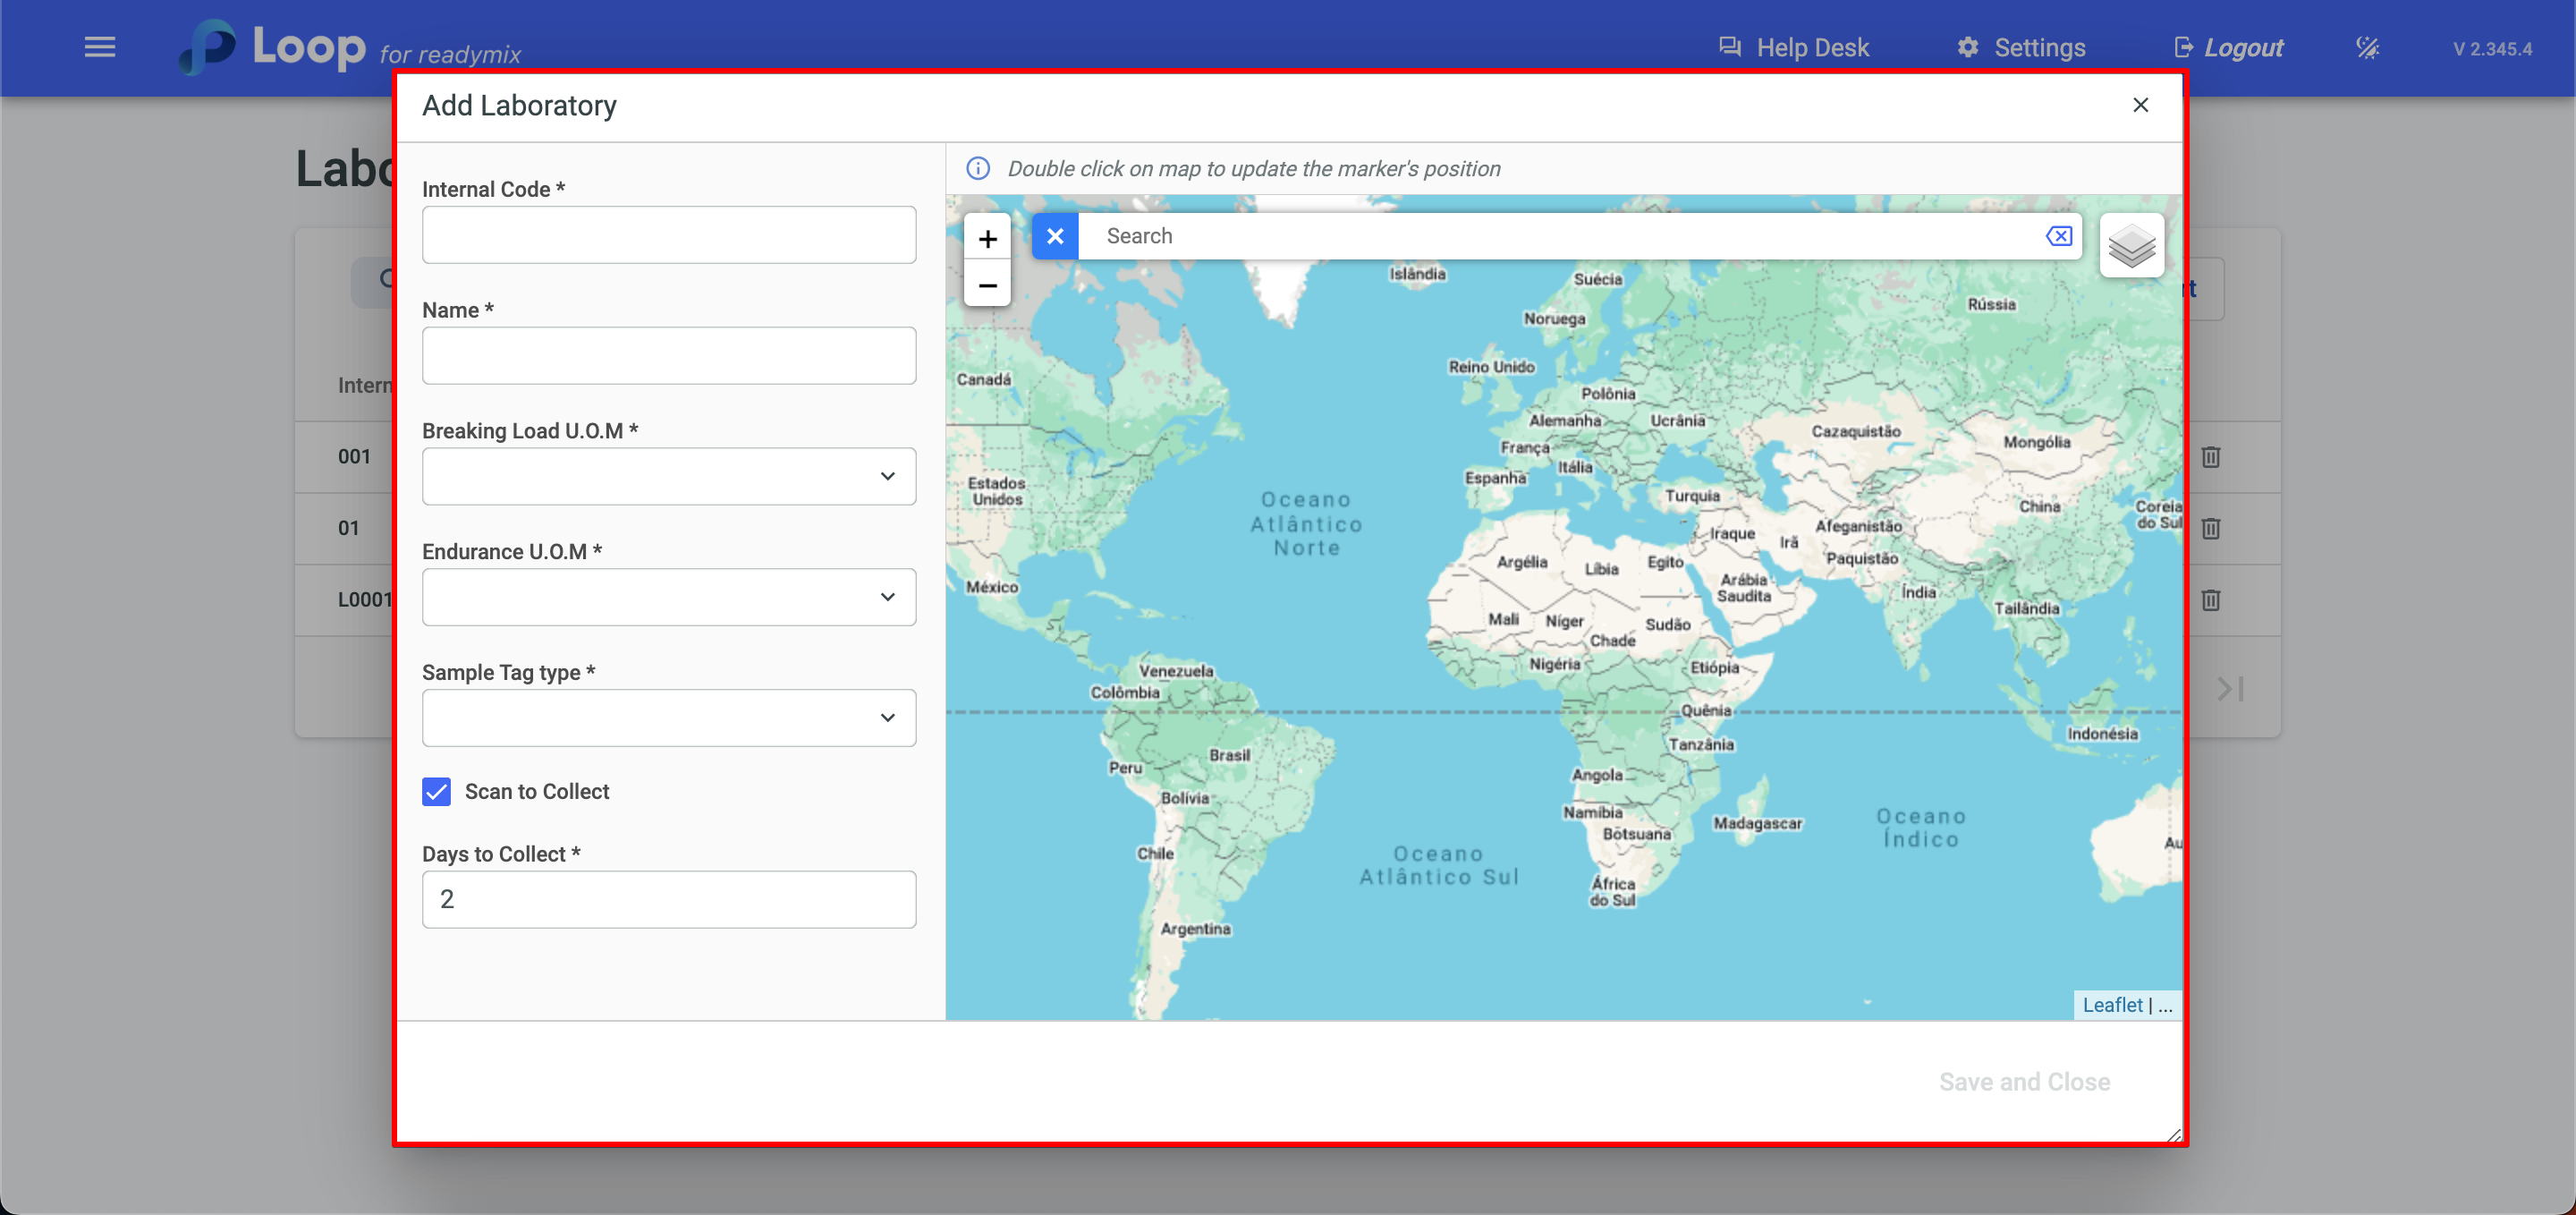
Now just fill in the data related to the laboratory:
After filling in all the information click on save and close.

The second step to use Quality Control is to register in the system the types of samples to be collected.
Sample: refers to a Readymix cylinder or block taken from an existing Readymix structure or a newly produced batch to evaluate its compressive strength.
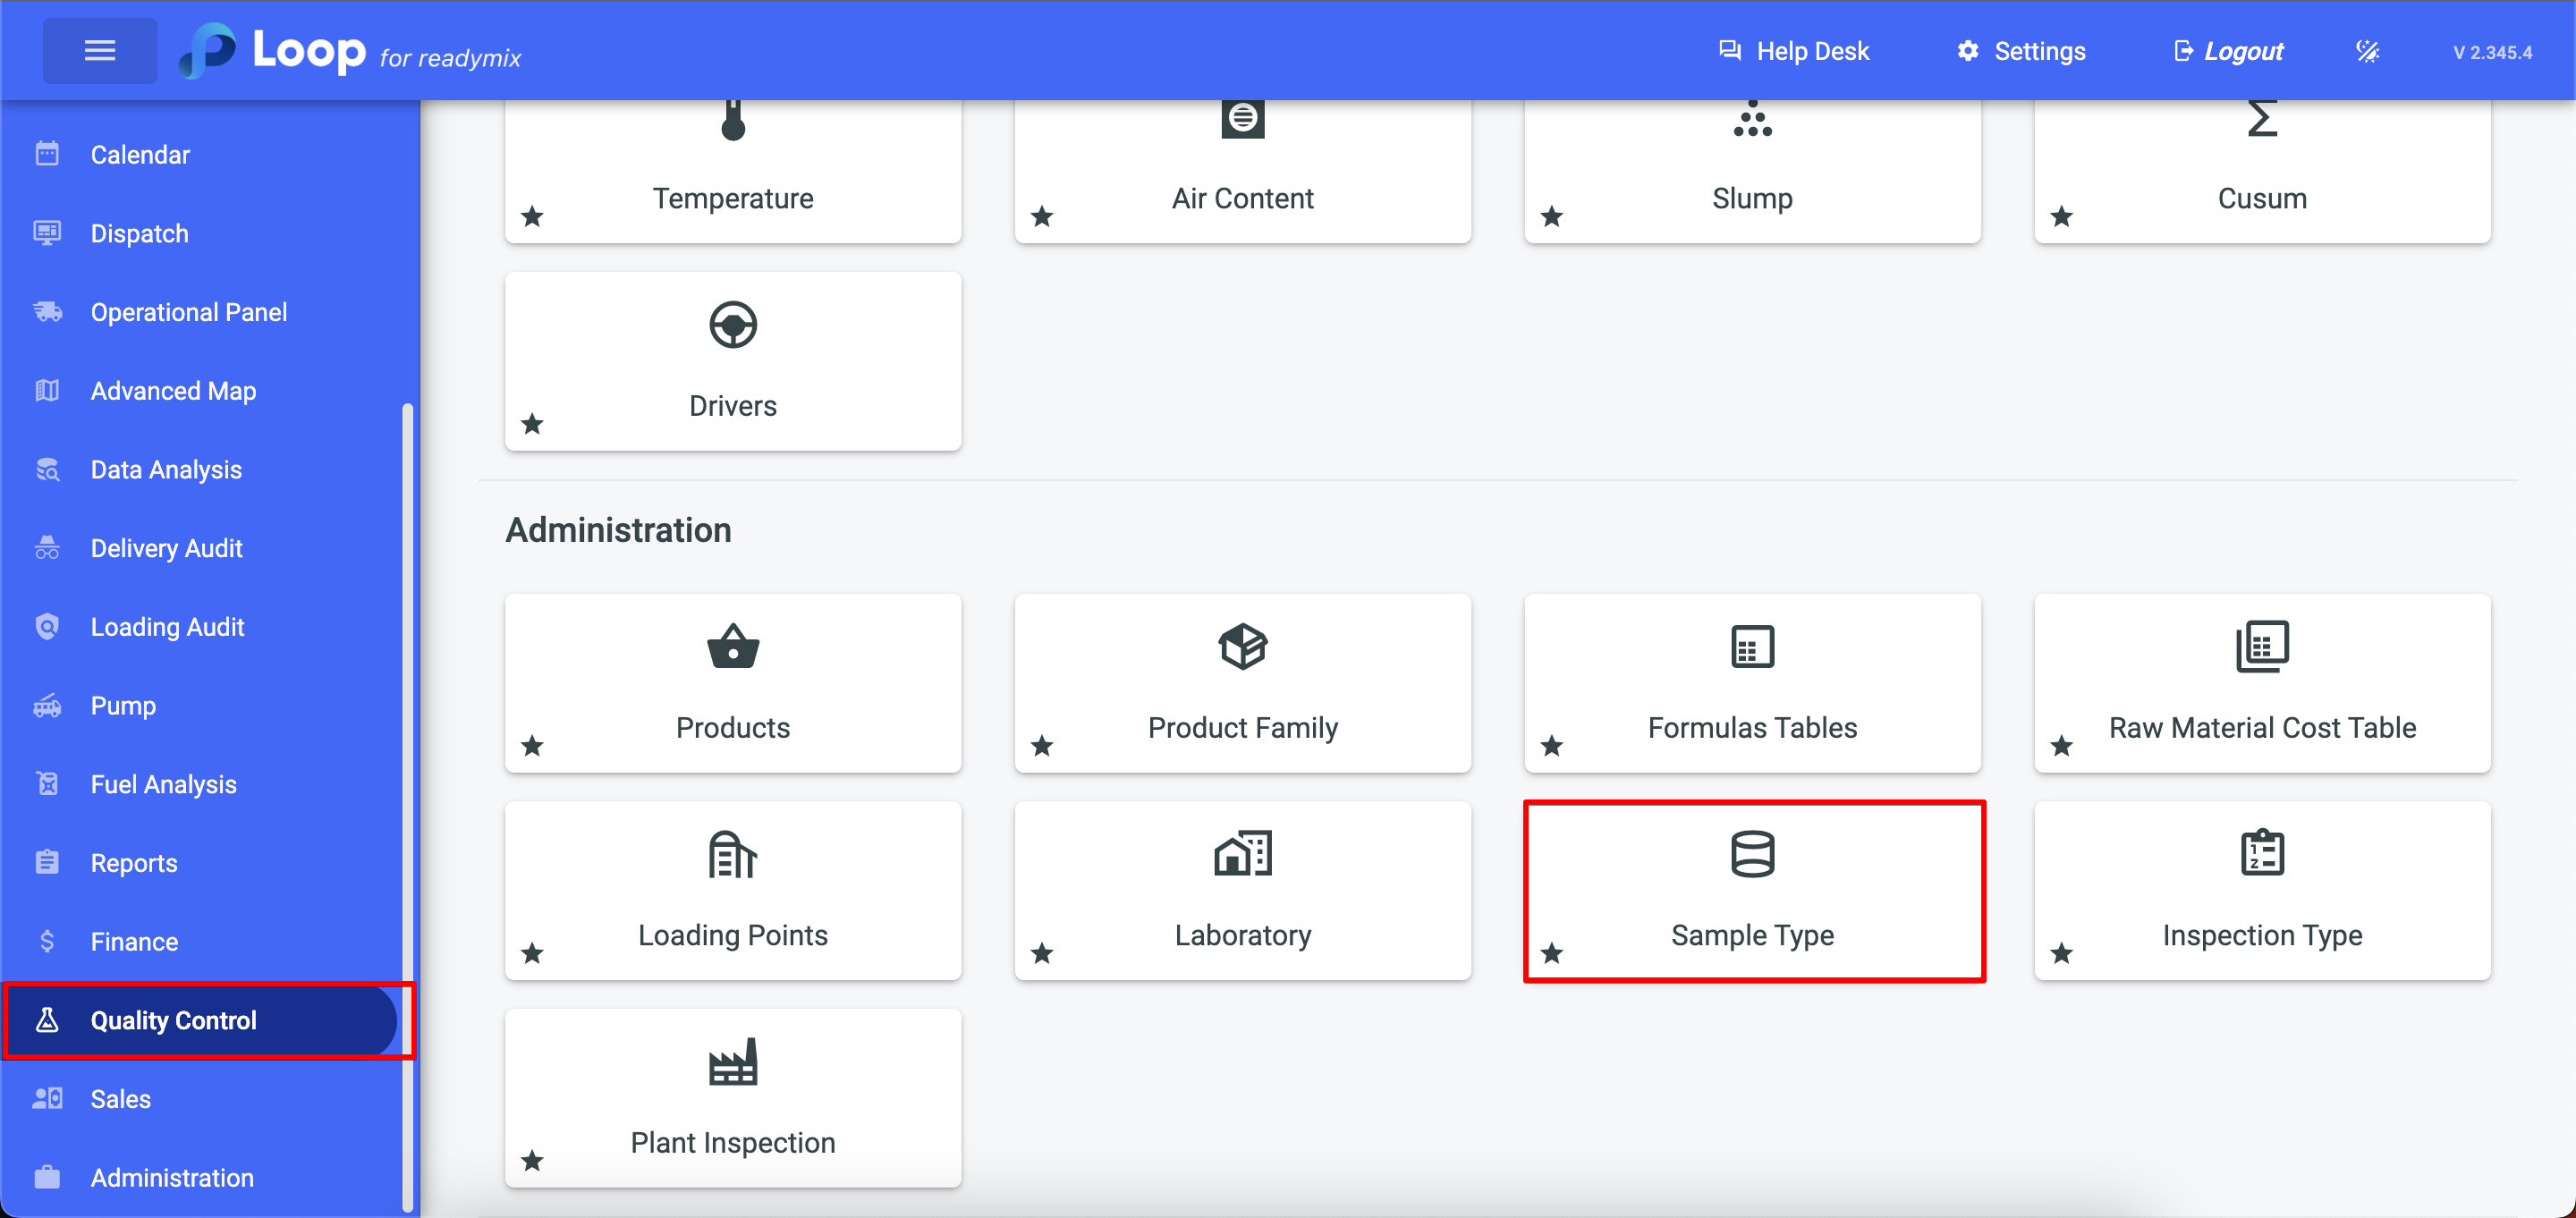
To do this, simply open the menu on the left side of the screen and select "Quality Control">"Sample Type".
Now click on Add Sample Type and fill in the necessary data:
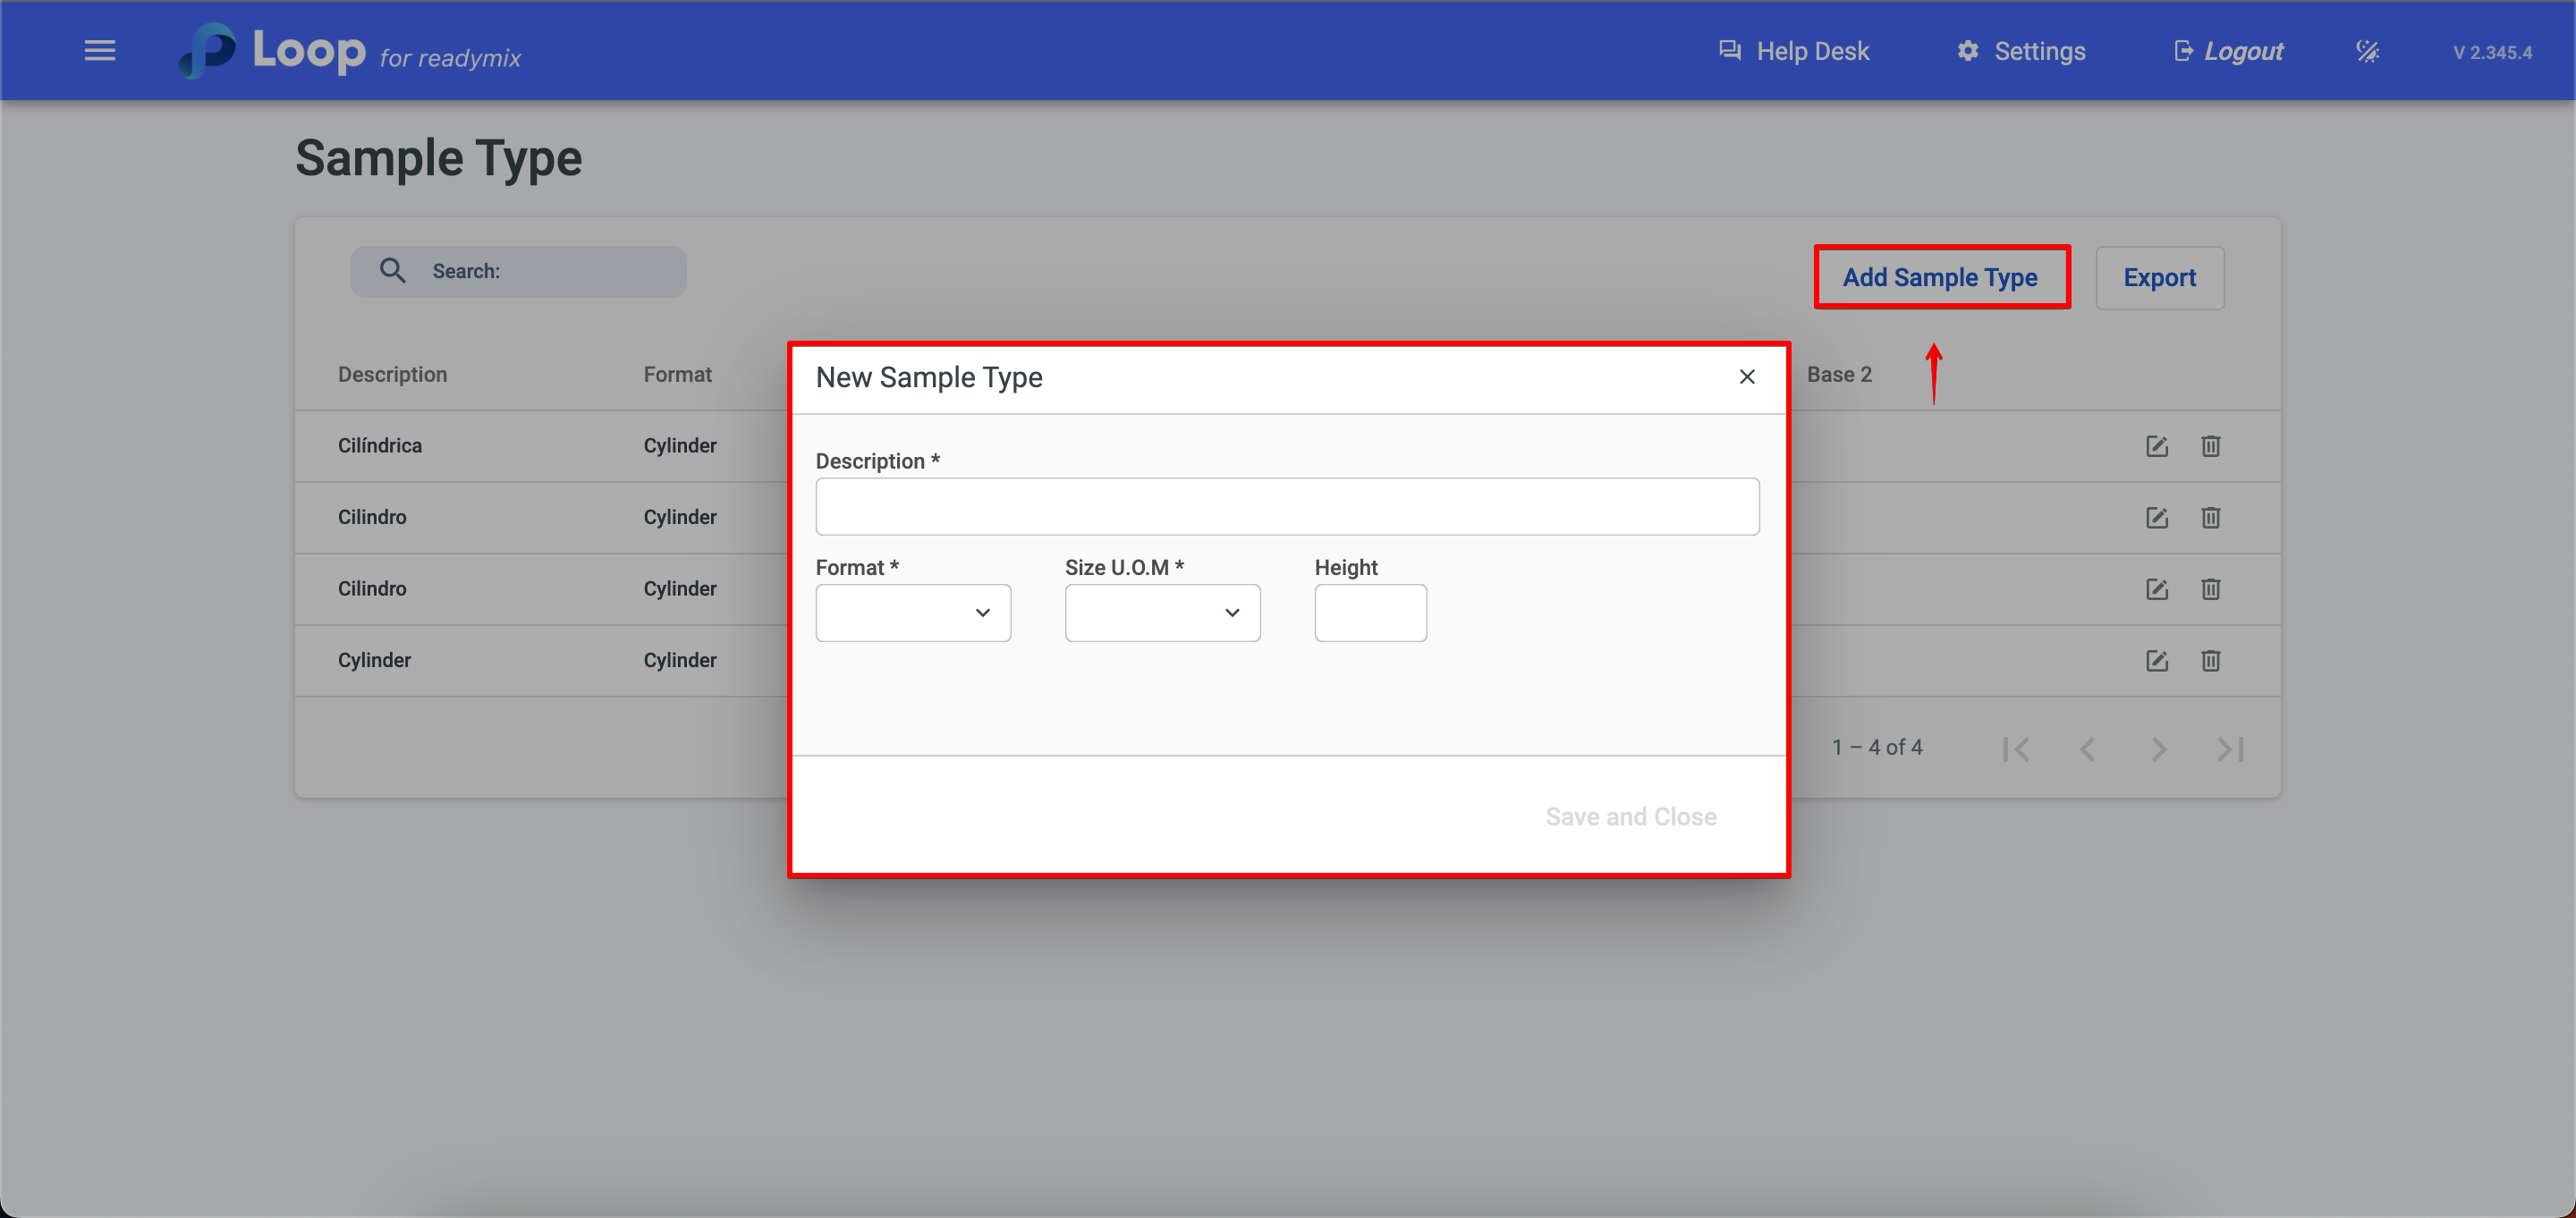
Once finished, click on save and close.
The third step is to define the type of inspection to be carried out.
Inspection: refers to the process of evaluating and analyzing the properties of Readymix based on the results of the tests carried out on the samples. The inspection aims to obtain information about the quality, integrity and performance of Readymix in a specific structure or lot.
To do this, open the menu on the left side of the screen and select "Quality Control">"Type of Inspection".
To get started, click Add Inspection Type and fill in the fields with the necessary data and its rules.
After filling in the necessary information click Save and Close.
As a fourth step we will create the inspection of a sample.
Inspection plays a crucial role in ensuring the quality and strength of Readymix. Through it it is possible to determine if the Readymix fits the demand of the final customer, ensuring quality and safety.
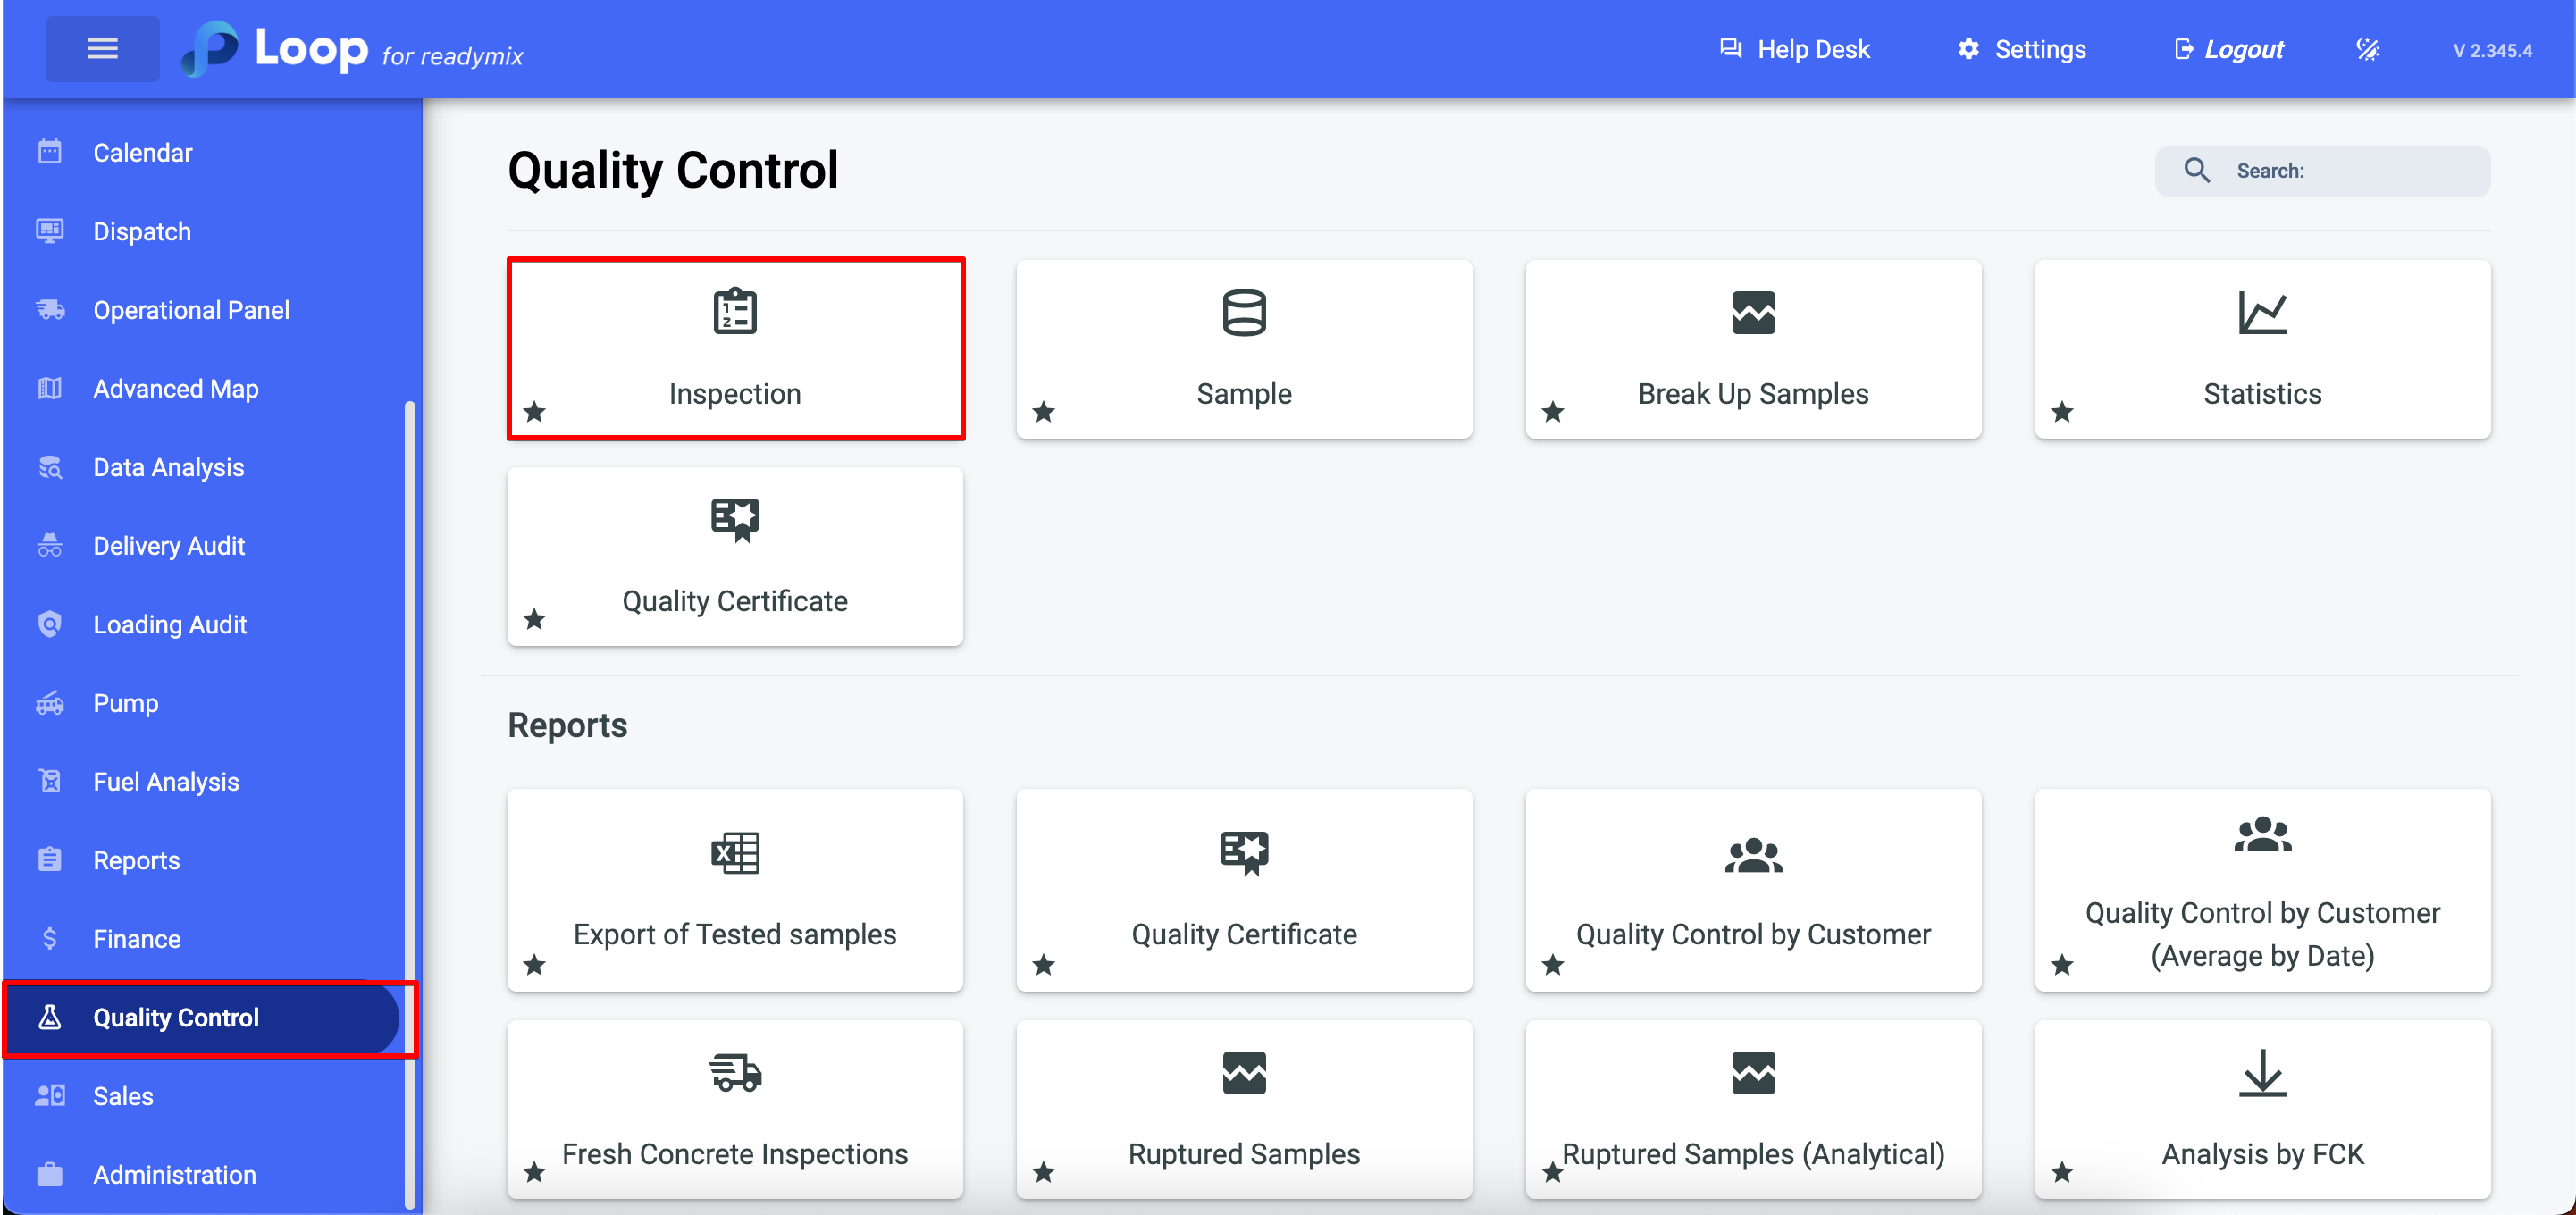
Stop creating it, open the menu on the left side of the screen and select "Quality Control" > "Inspection".
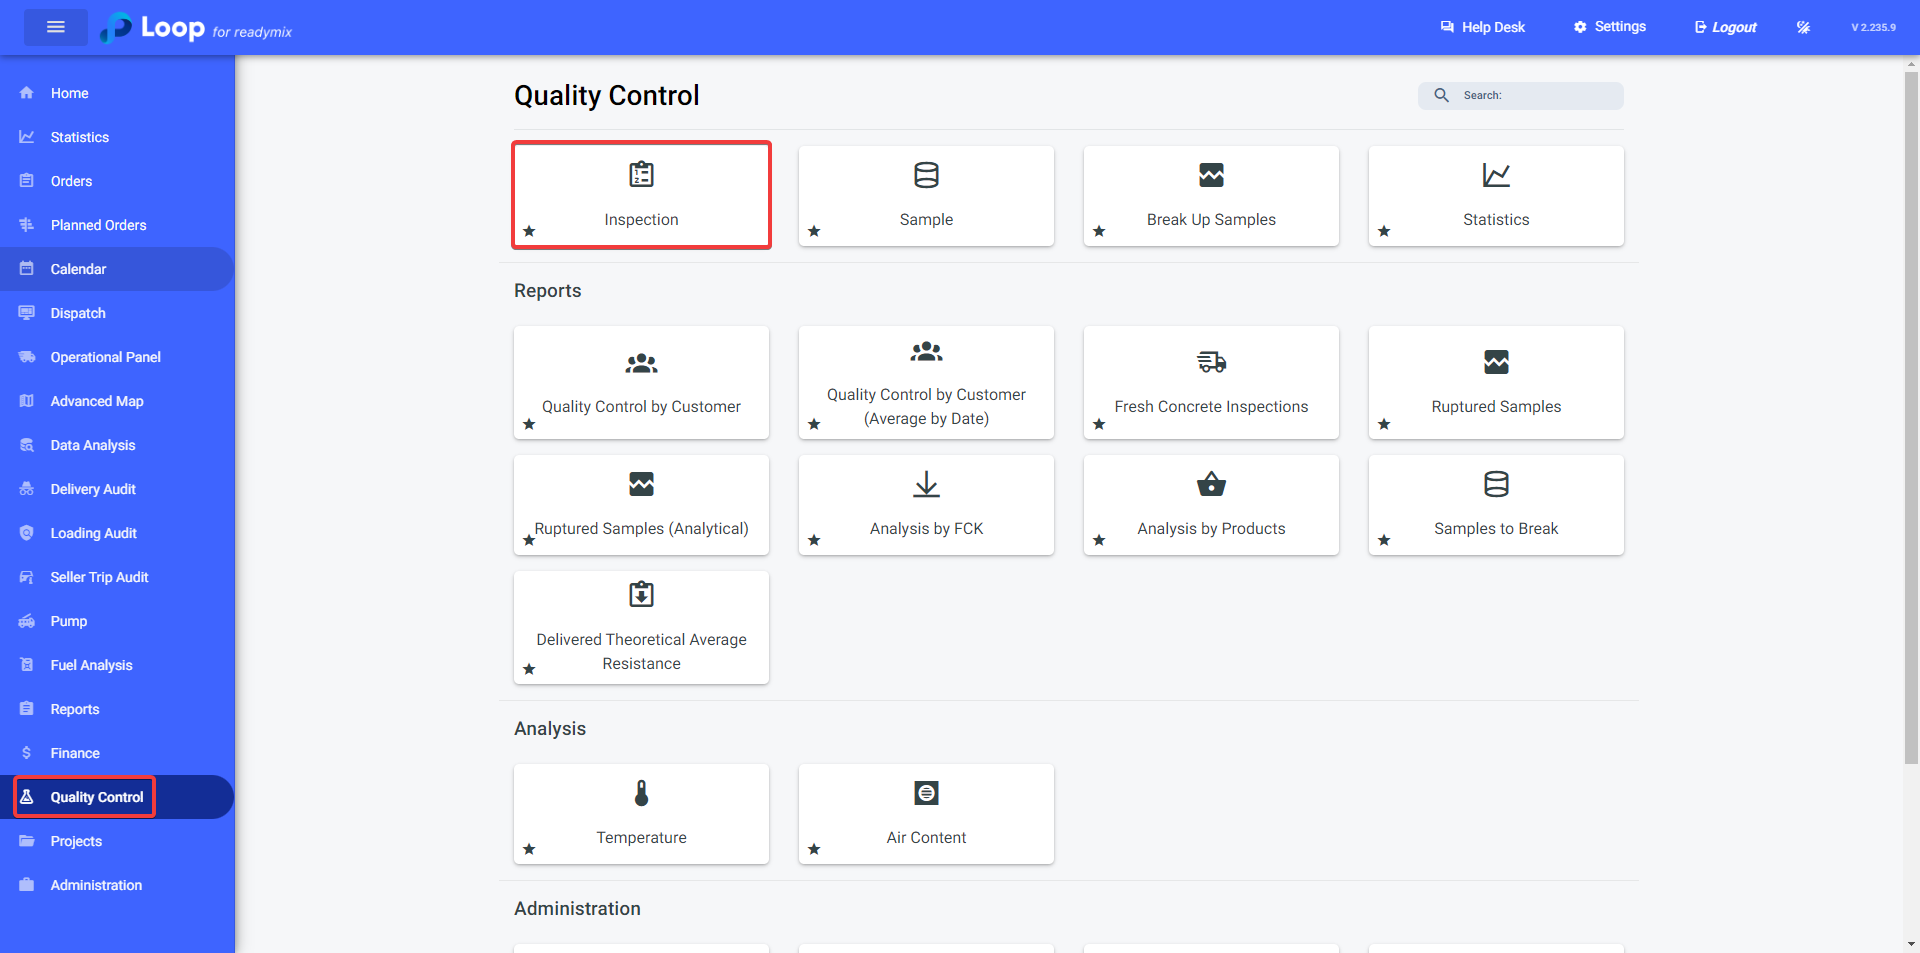
Now click on the "Add Inspection" option to start the addition process.
We can create two types of inspection:
1 - Single Inspection - Refers to an occasional evaluation or verification of Readymix samples taken from a specific structure or lot. This single inspection can be carried out outside a predefined schedule and aims to analyze the quality and compliance of the samples with the applicable standards and specifications.
2 - Delivery Inspection - Refers to the systematic verification of Readymix samples at the time they are delivered or subjected to laboratory tests. This delivery inspection aims to ensure that the samples comply with the specifications before being used in resistance tests or other analyses.
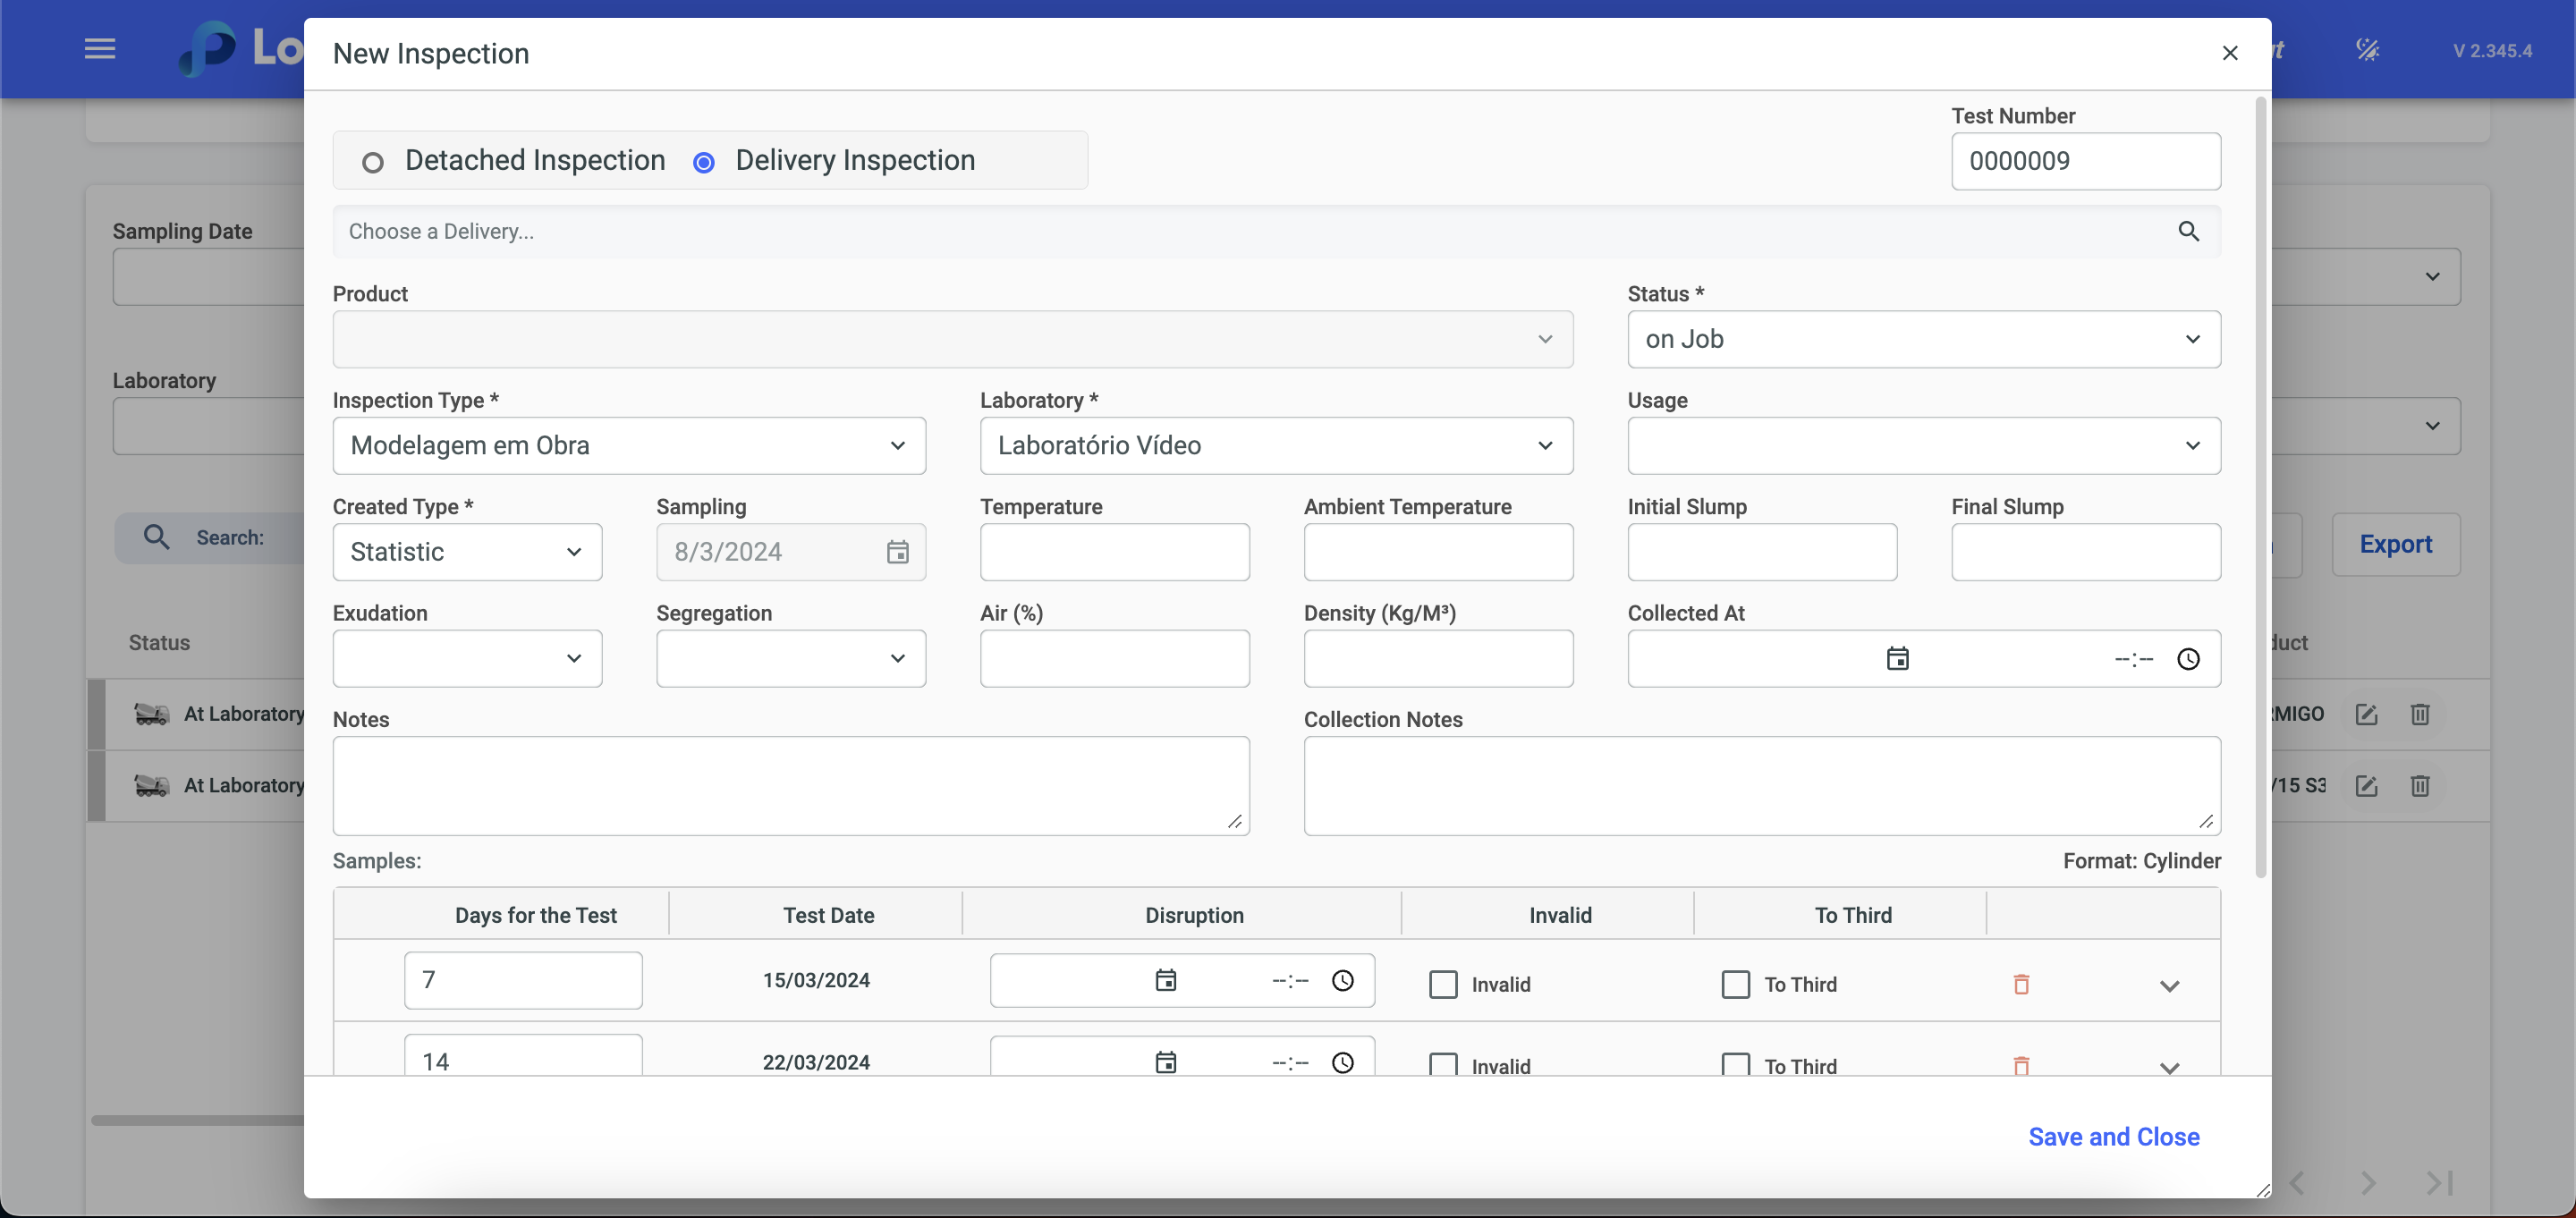
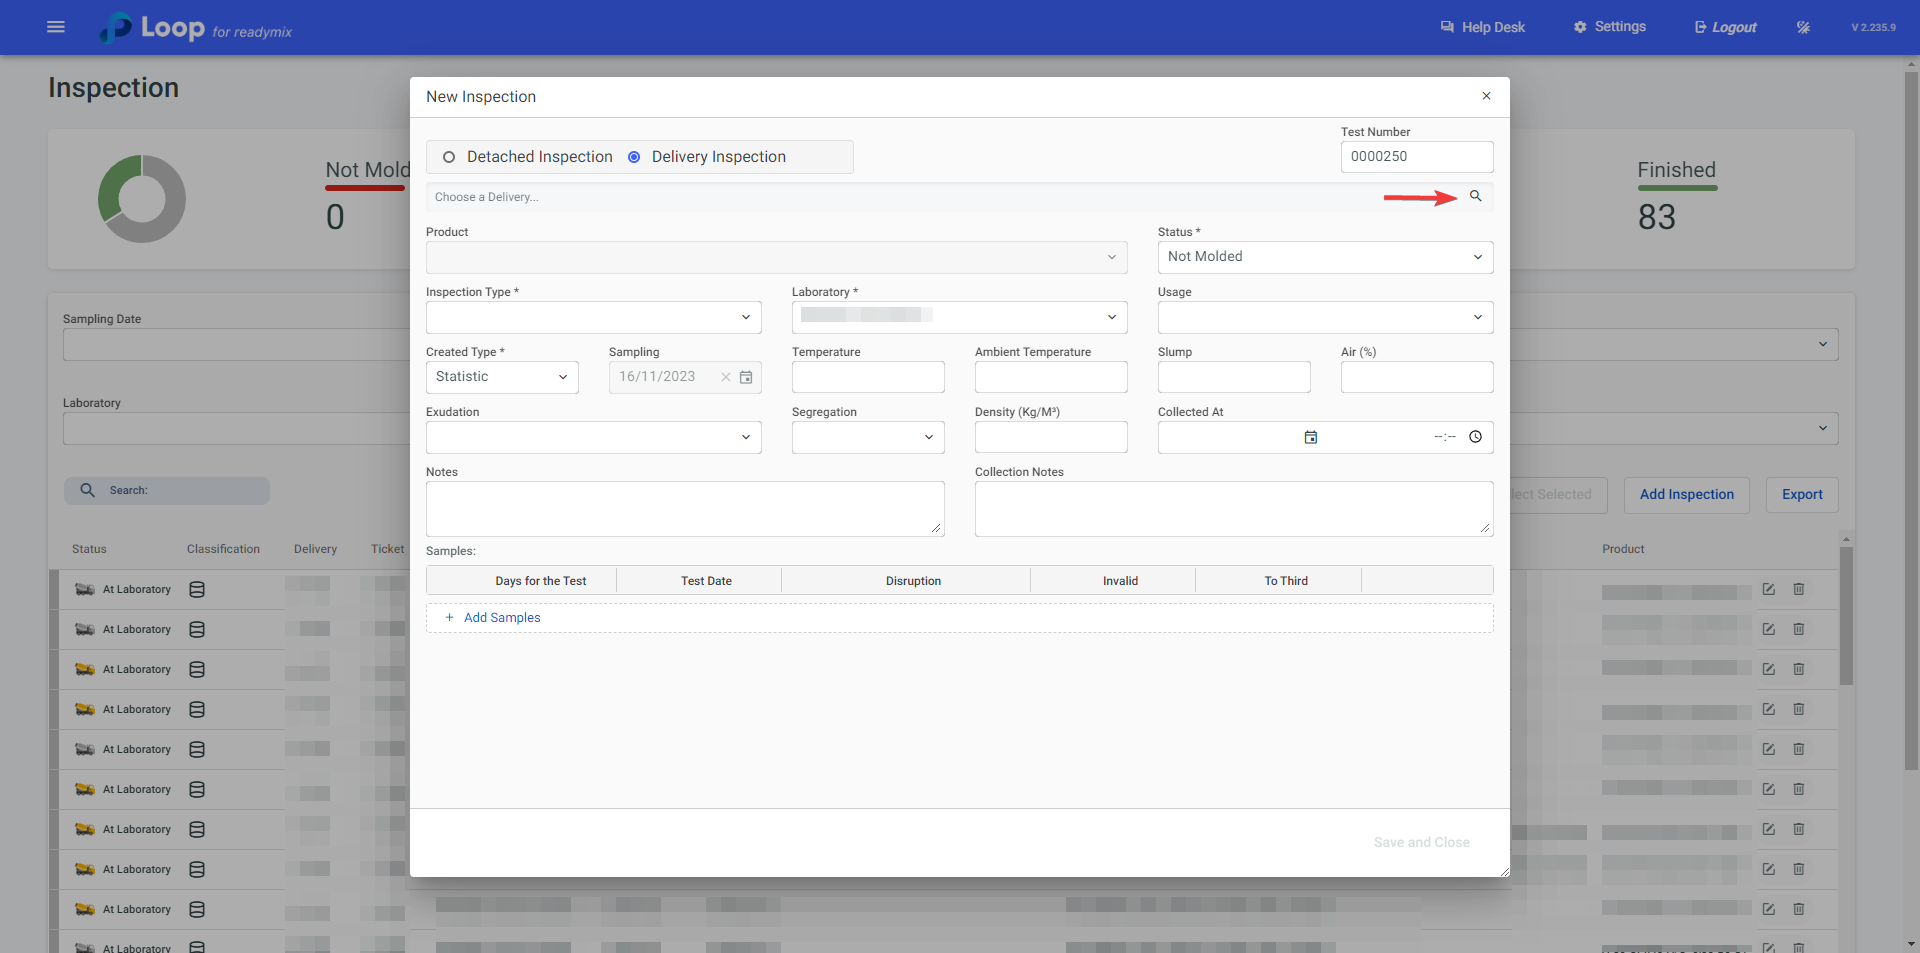
In this example, I will show you how to do a Delivery Inspection
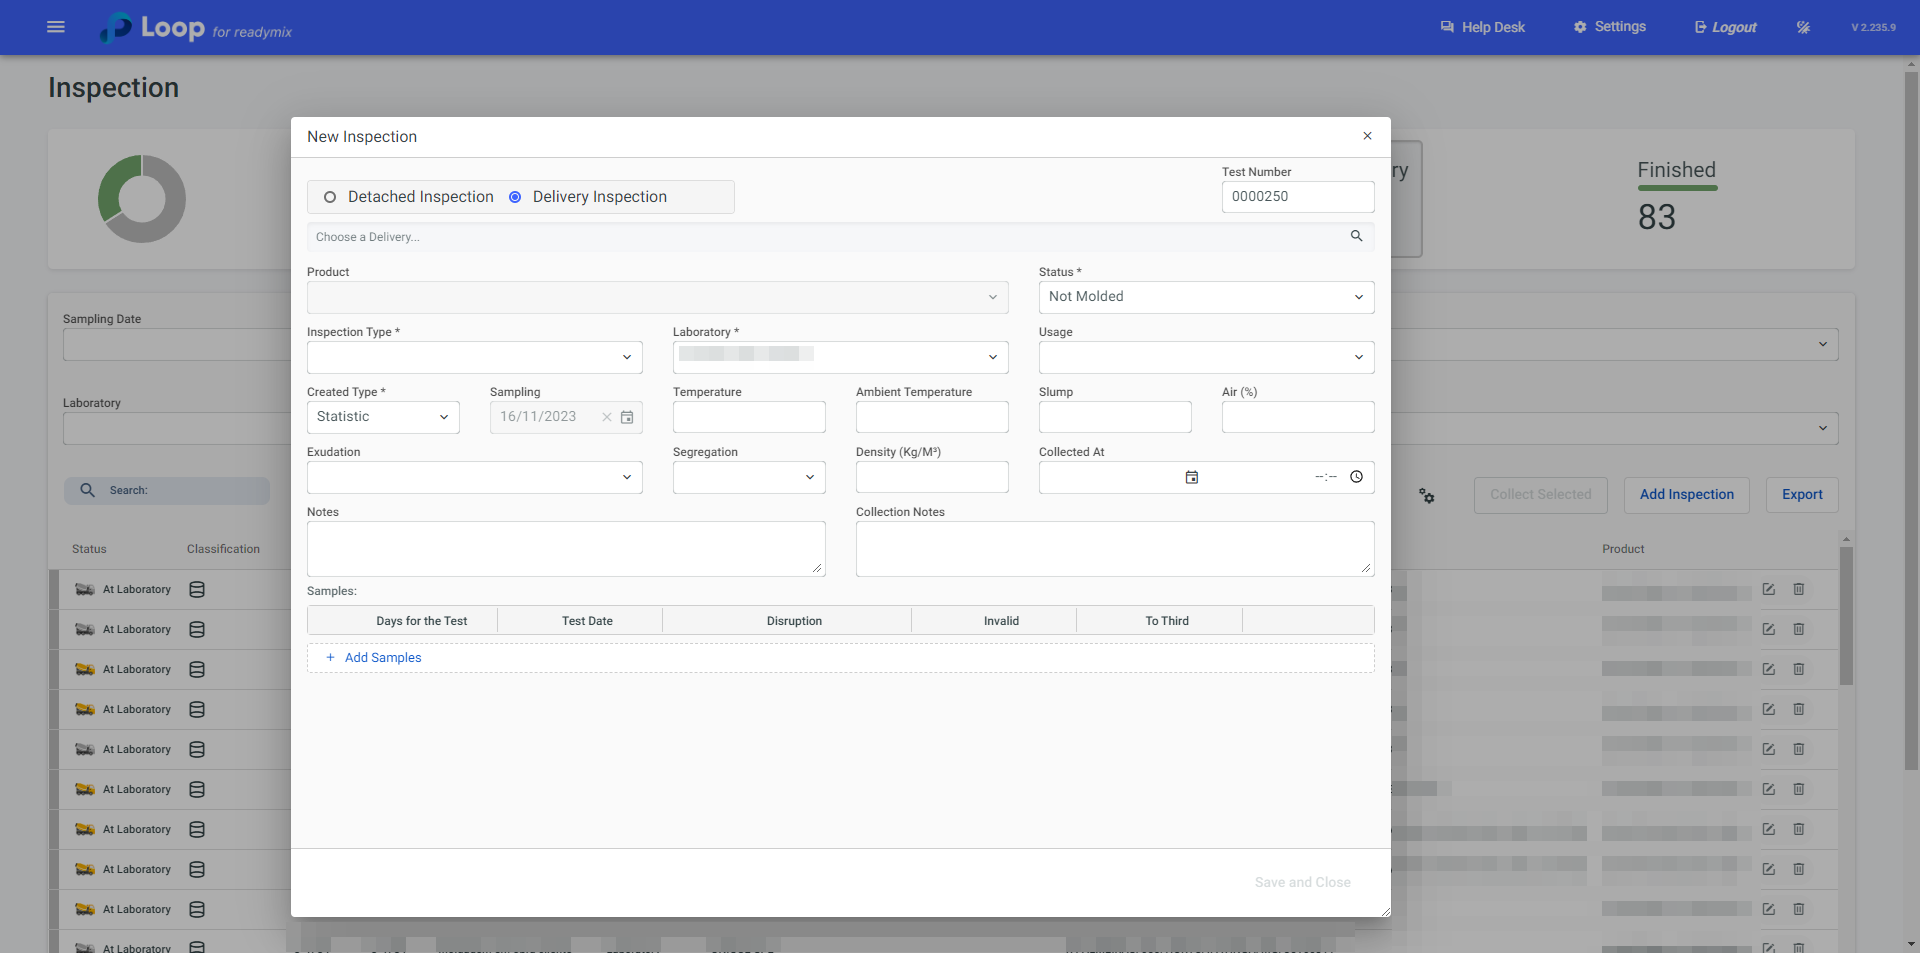
Cline on the "magnifying glass" icon to select the delivery to which these samples belong:
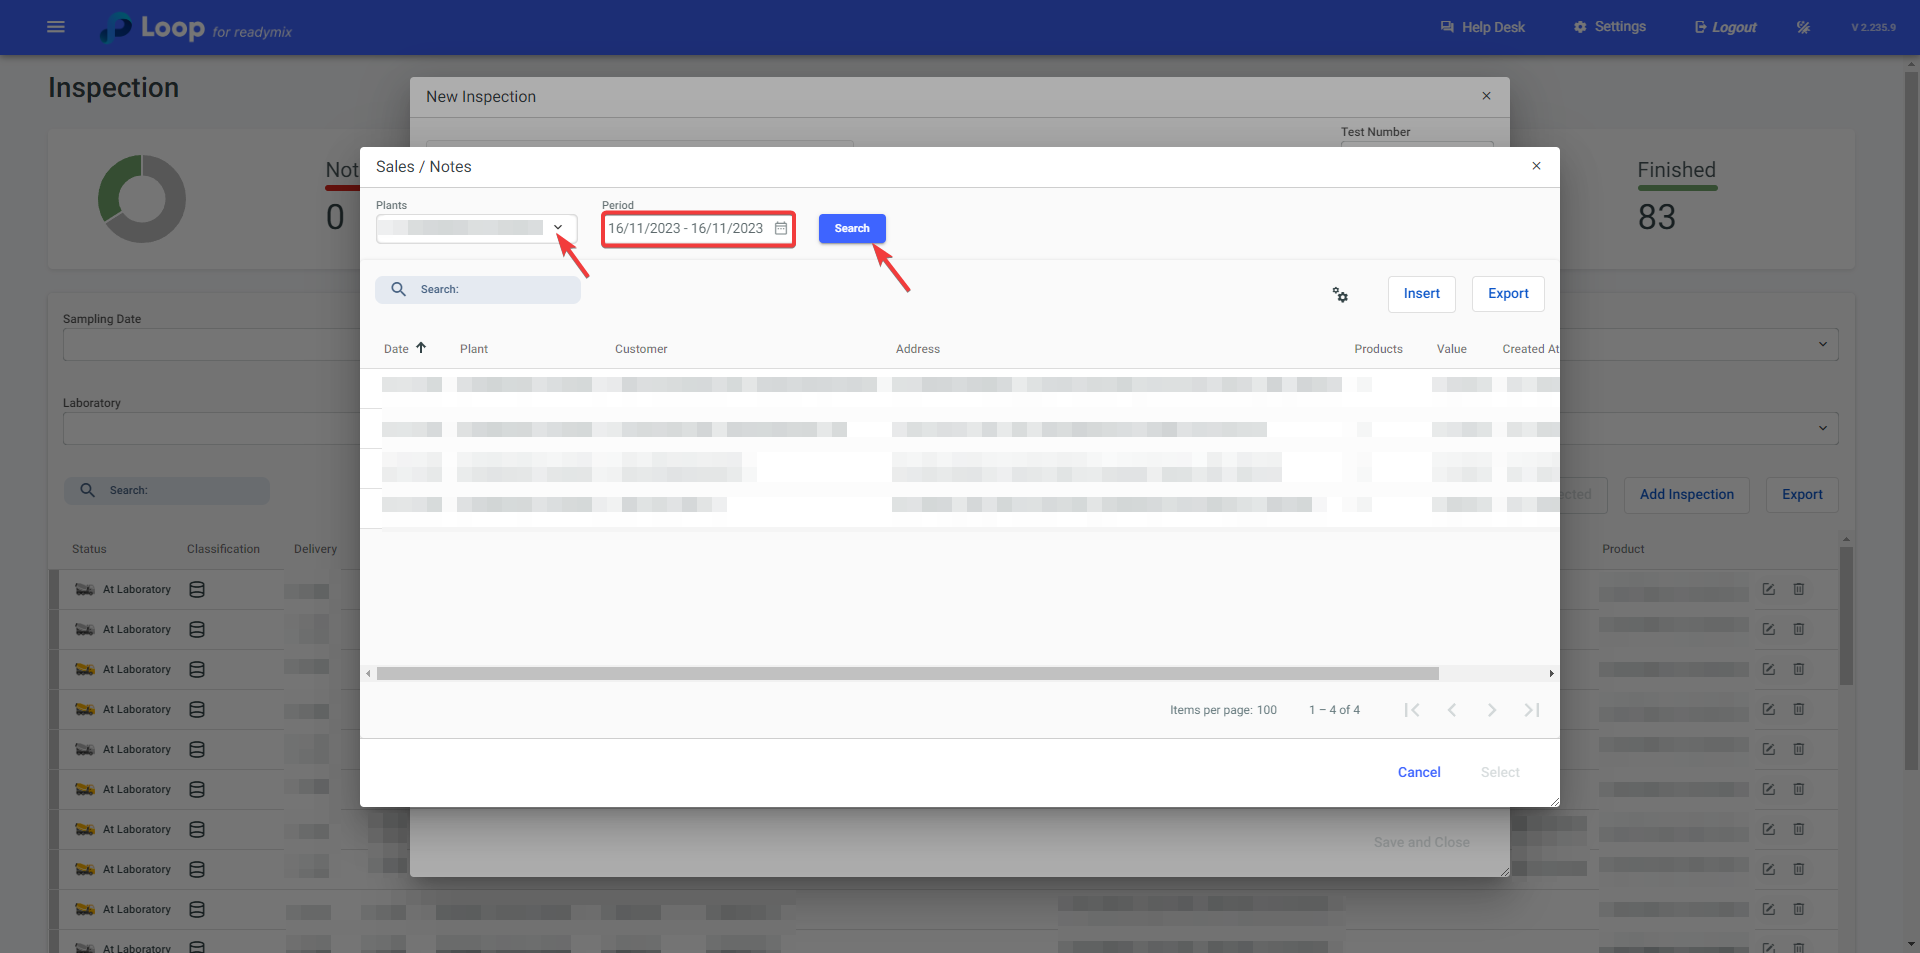
When locating the delivery, click on it to mark it and then click "Select".
Once this is done, fill in the required fields and click Save and Close.
As a final step, we will break the sample created.
Break Sample: this is the action of subjecting these samples to a load test until the rupture or fracture occurs. The rupture test is crucial to evaluate the quality of Readymix, especially its structural strength.
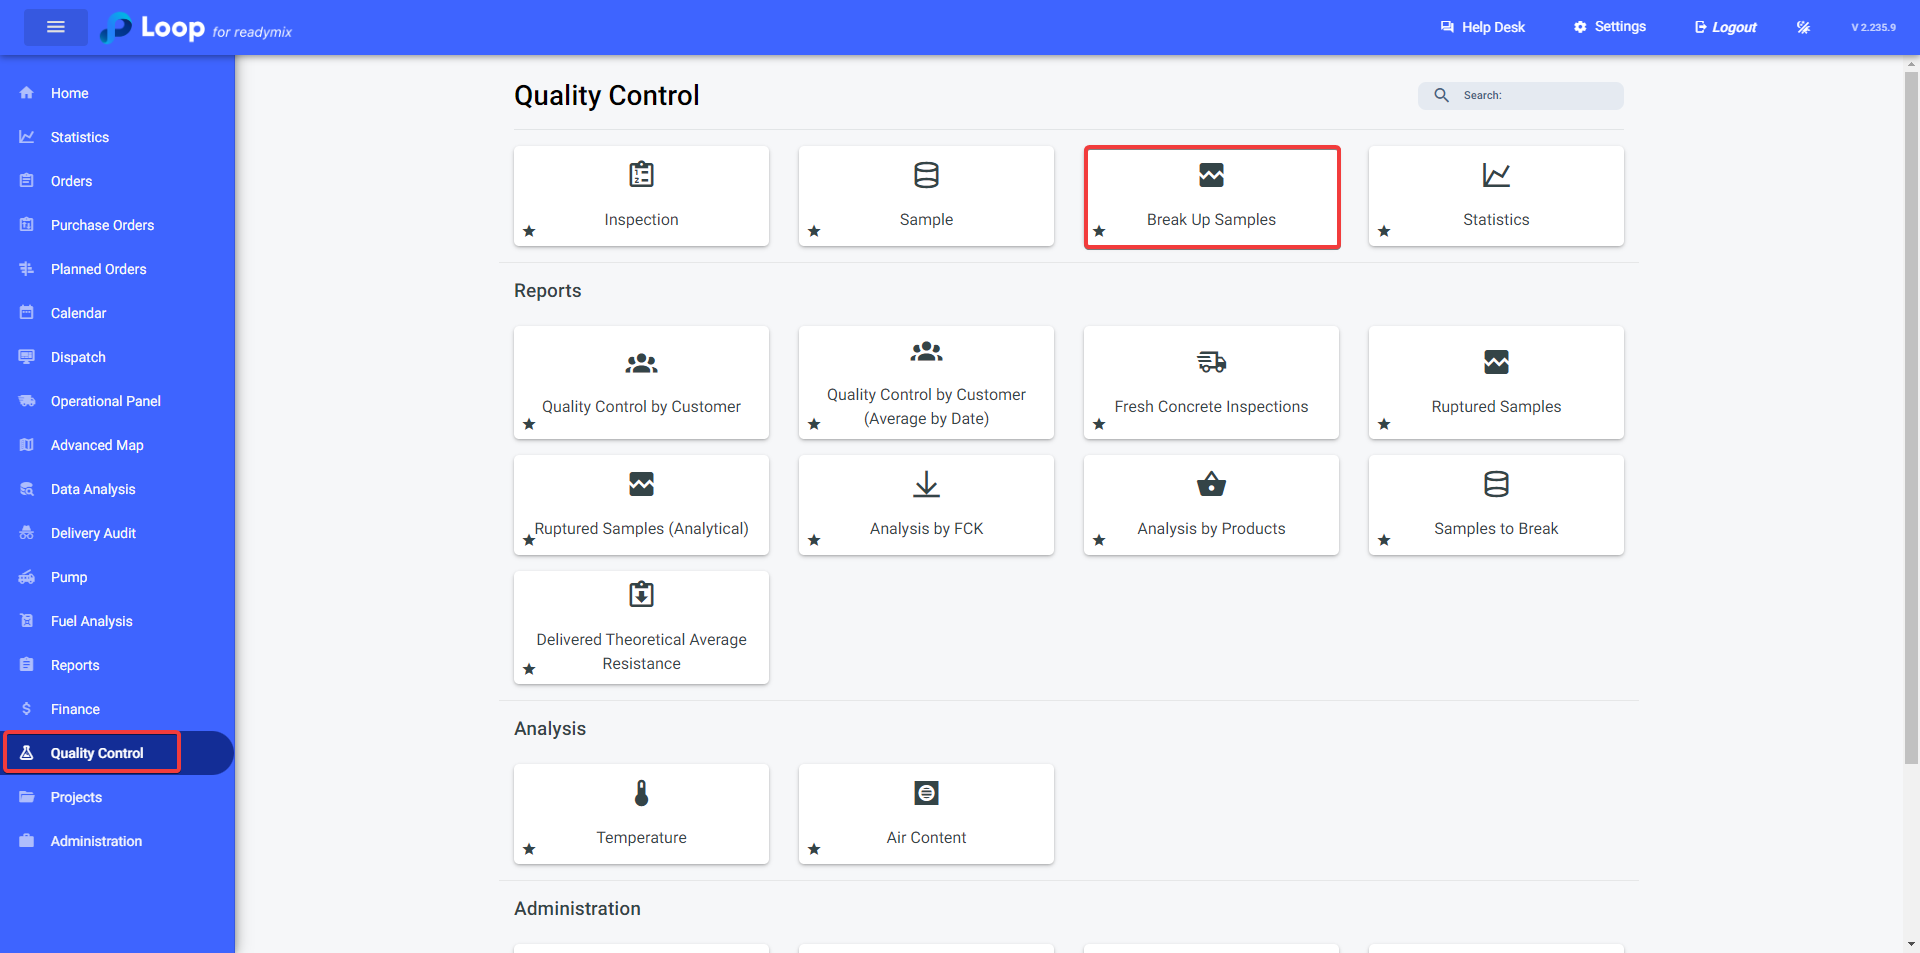
To do this, open the menu on the left side of the screen and select "Quality Control">"Break Samples".
On the "Break Samples" screen select the Test Date, Plant, Laboratory and Age (if necessary).

After locating the sample that will be broken, fill in the data:
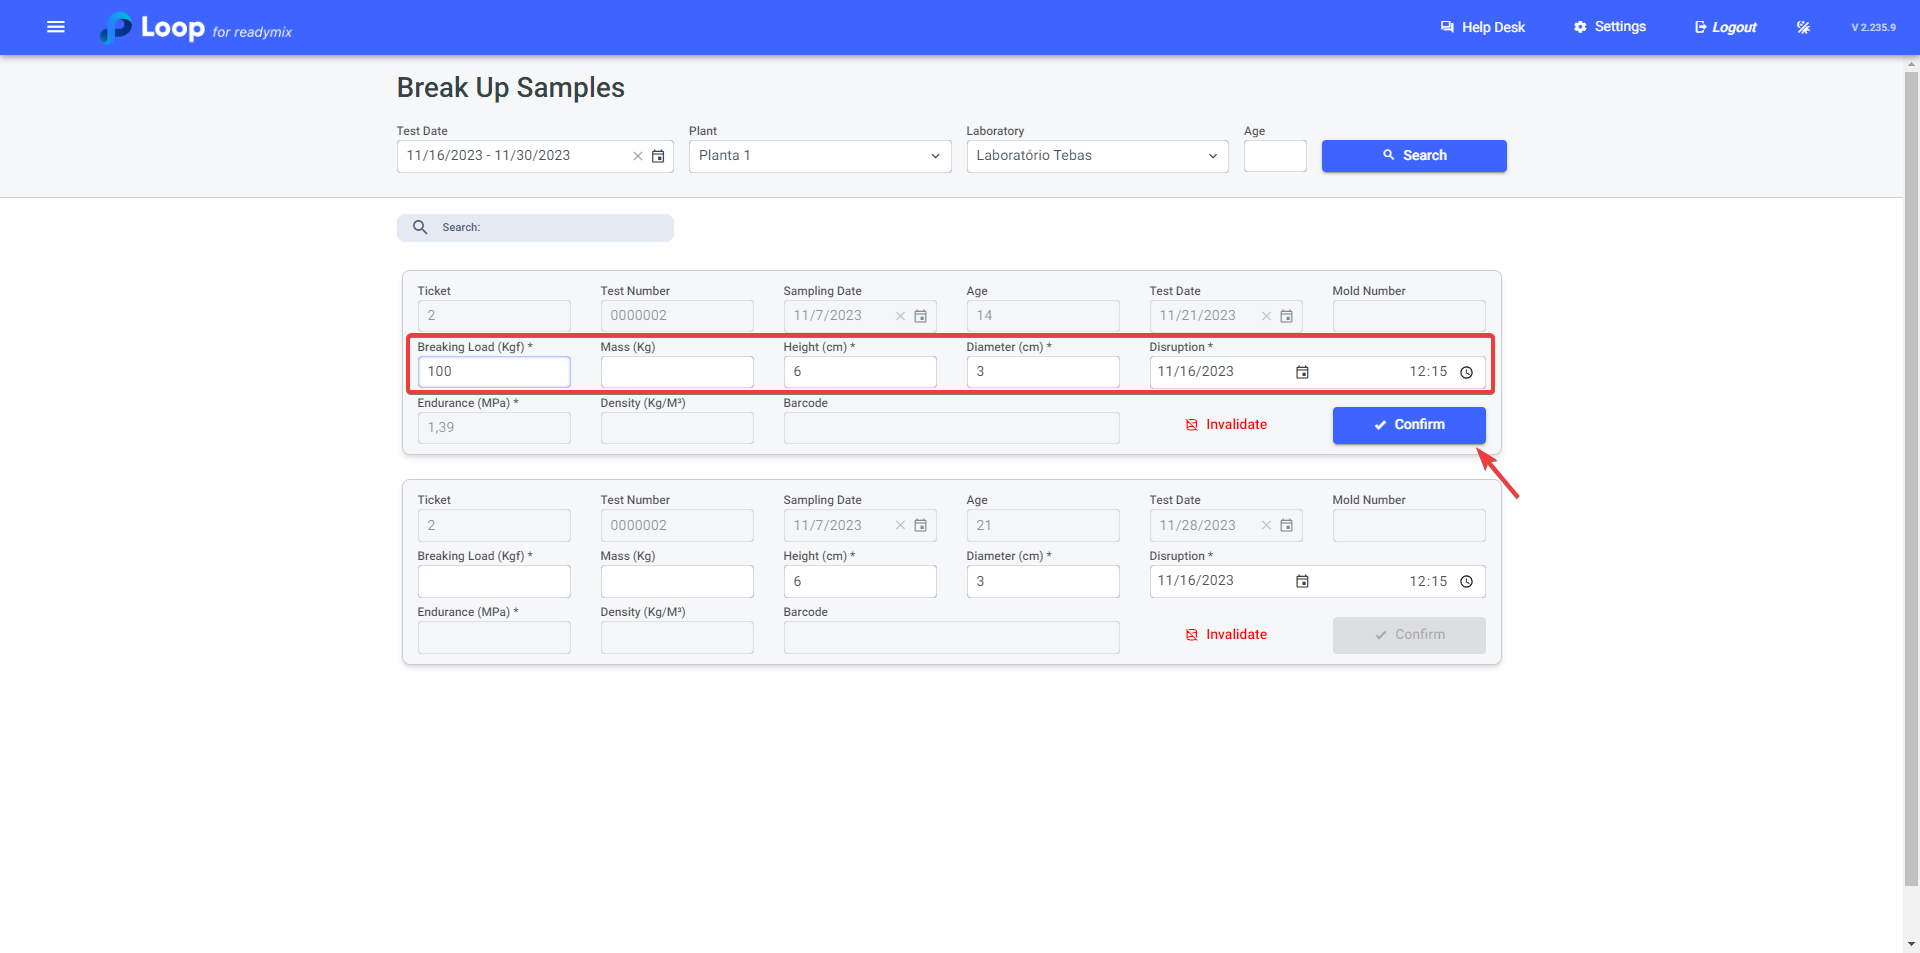
After confirming all the data, click confirm to Break the Sample.

