Inspection plays a crucial role in ensuring the quality and strength of Readymix. Through it, it is possible to determine if the Readymix meets the final customer's demand, ensuring quality and safety.
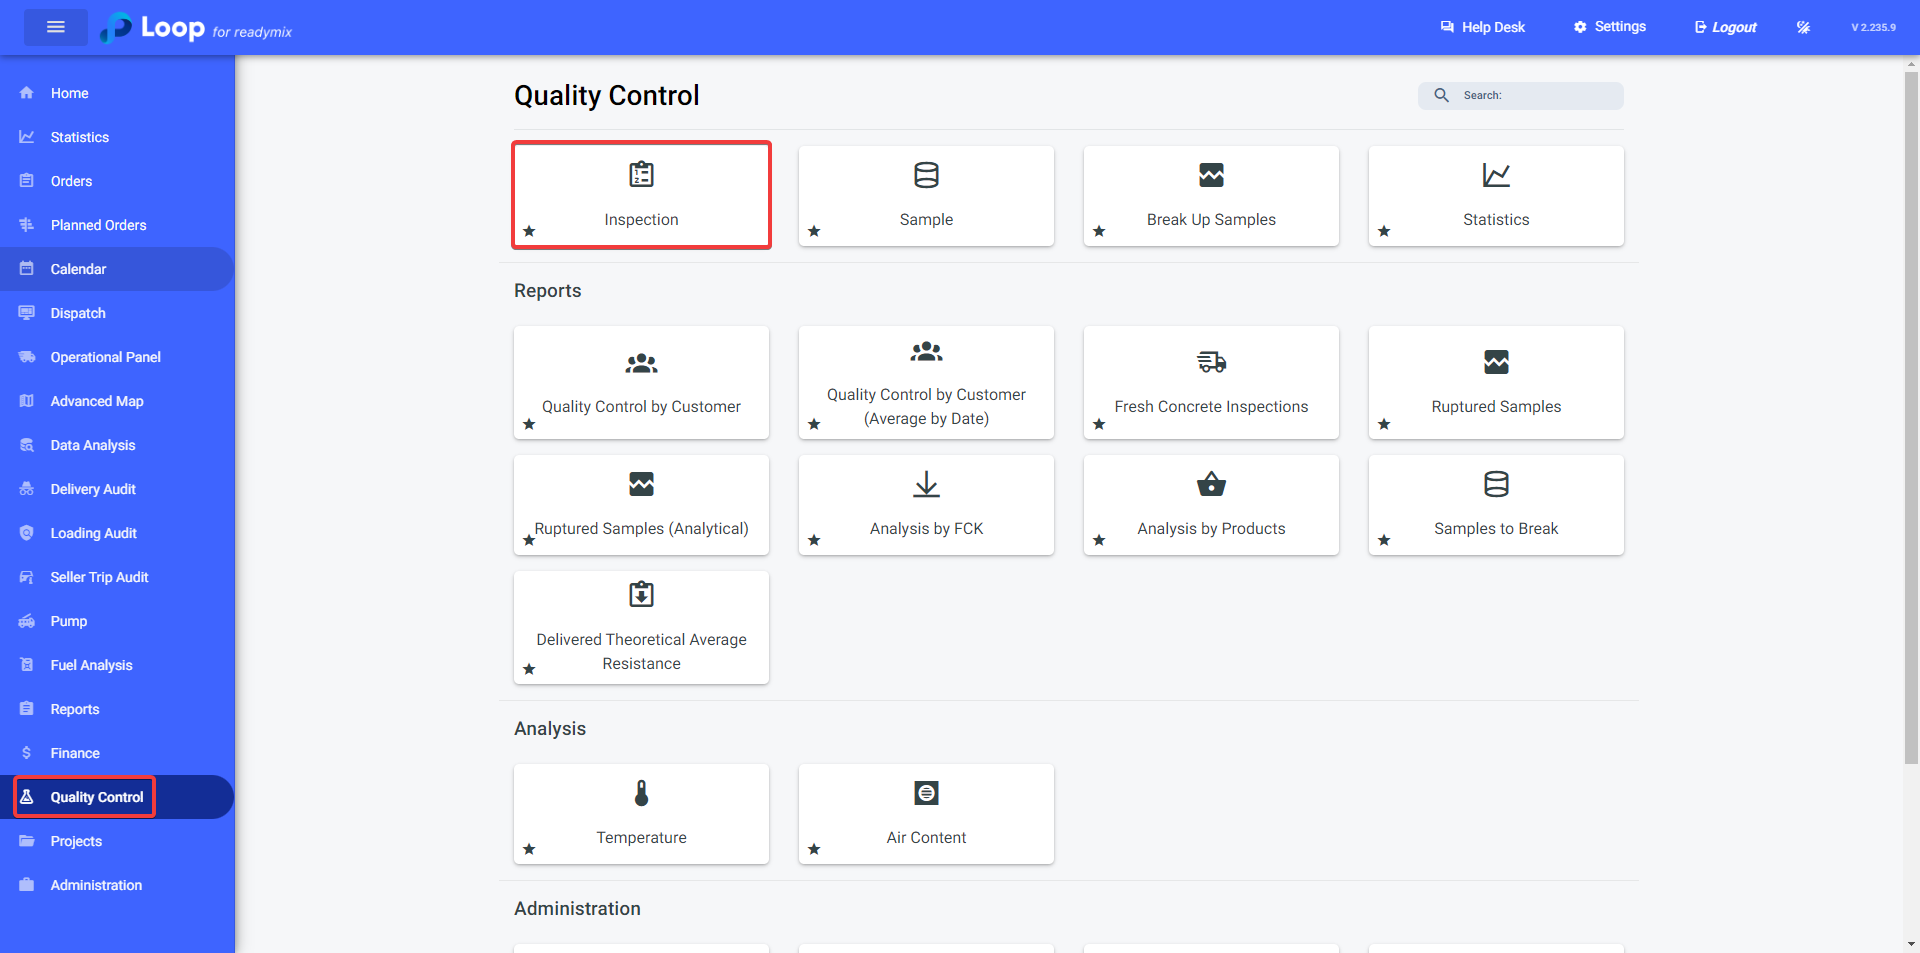
Open the menu on the left side of the screen and select "Quality Control" - "Inspection."
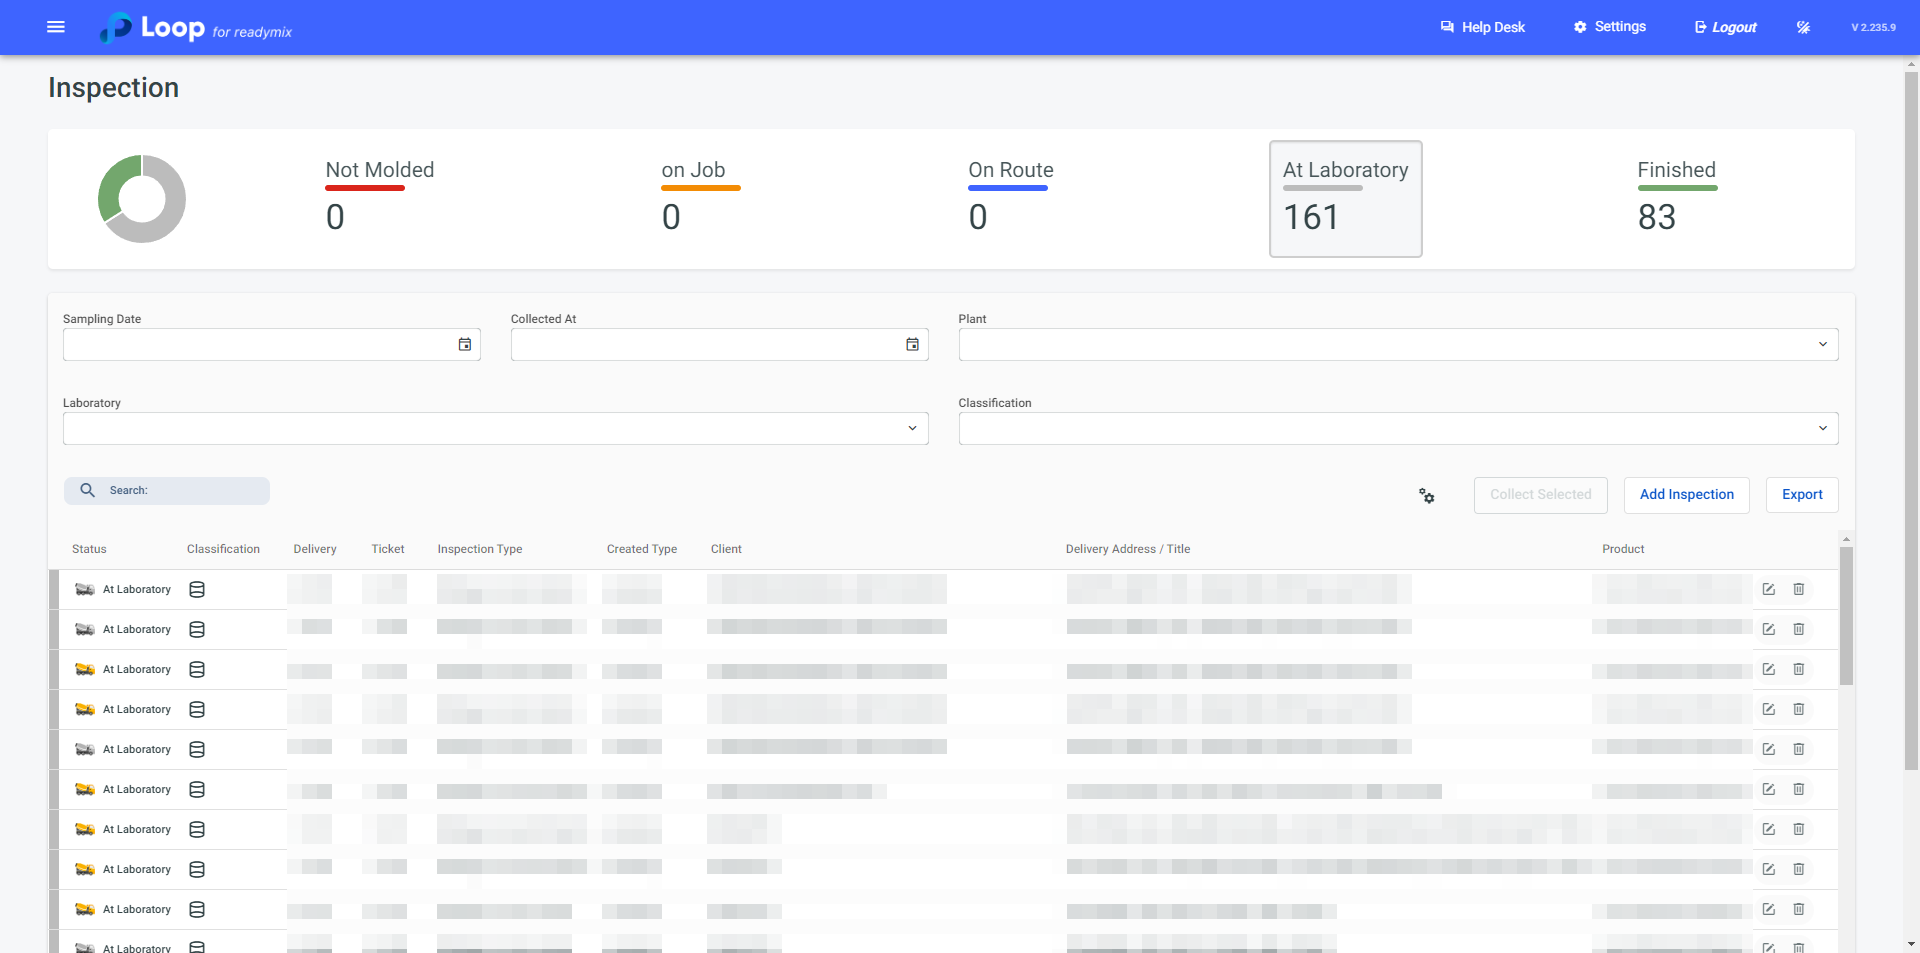
Through an intuitive interface, you can access the icon with its corresponding color and click on options such as Not molded, On Job, On route, At laboratory, and Finished to perform a quicker filter on inspections.
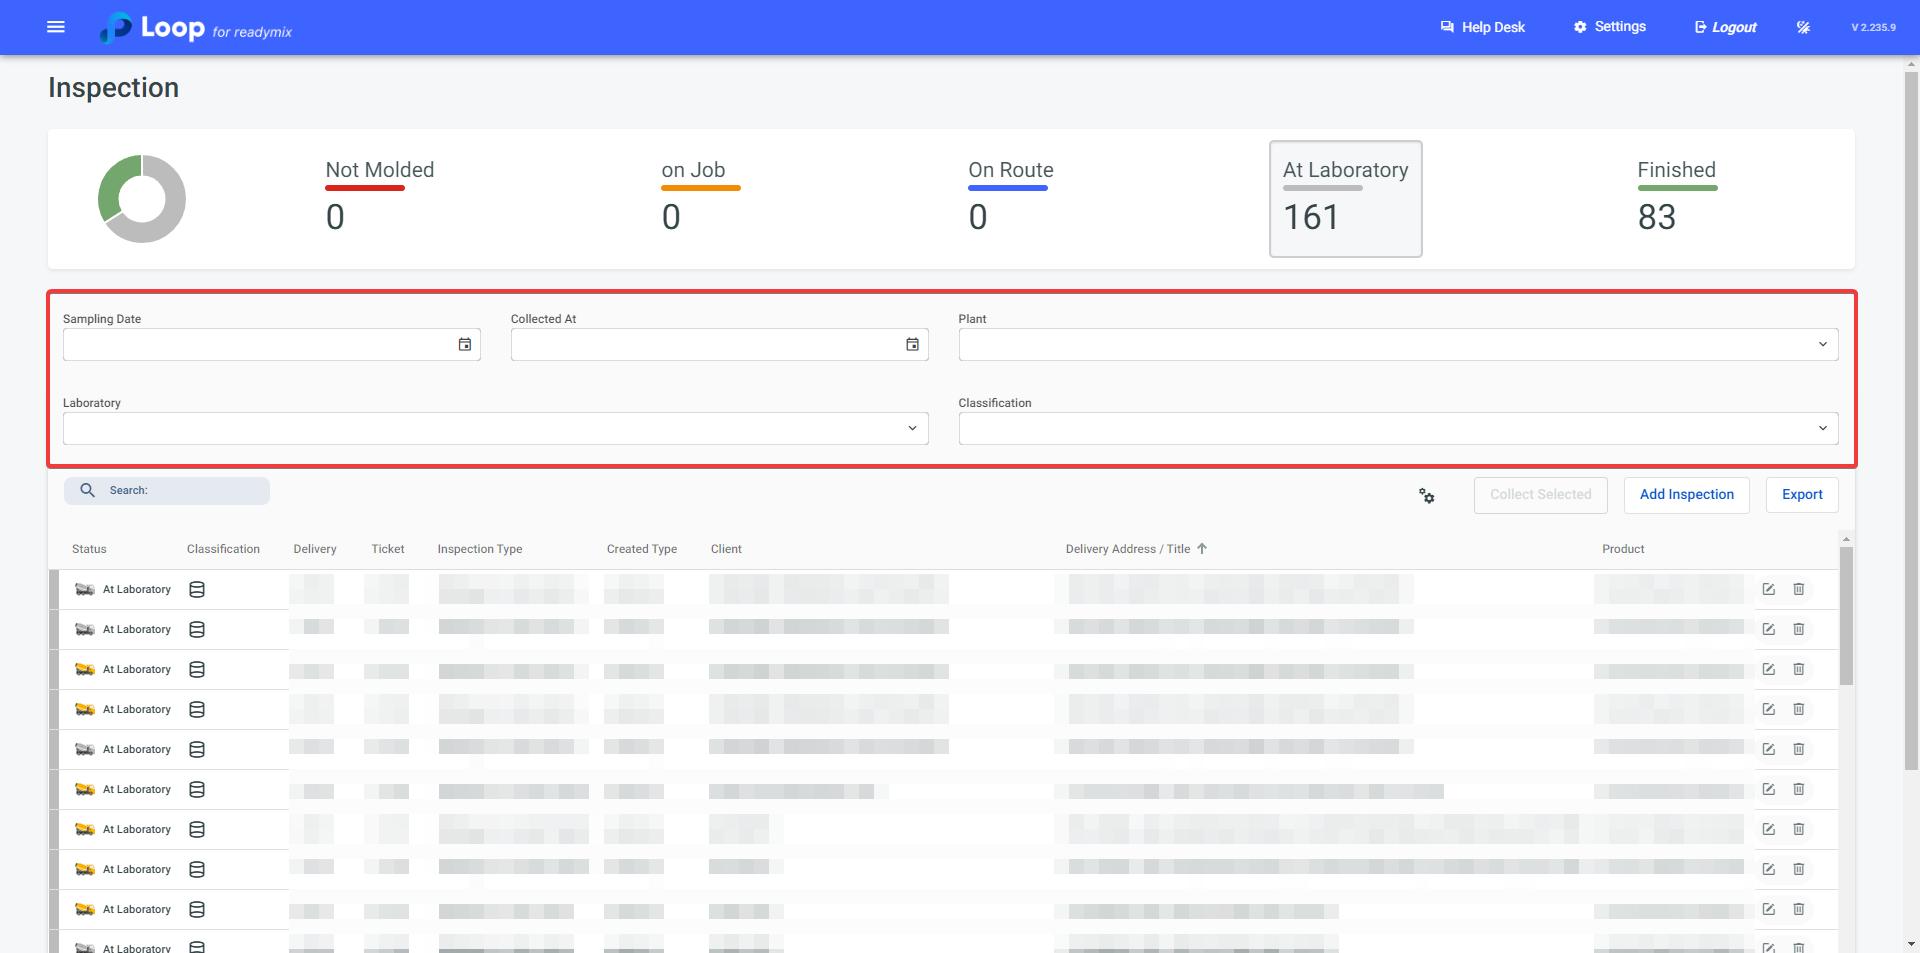
Additionally, you can filter existing inspections through fields like Sampling Date, Collected at, Plant, Laboratory, and Classification.
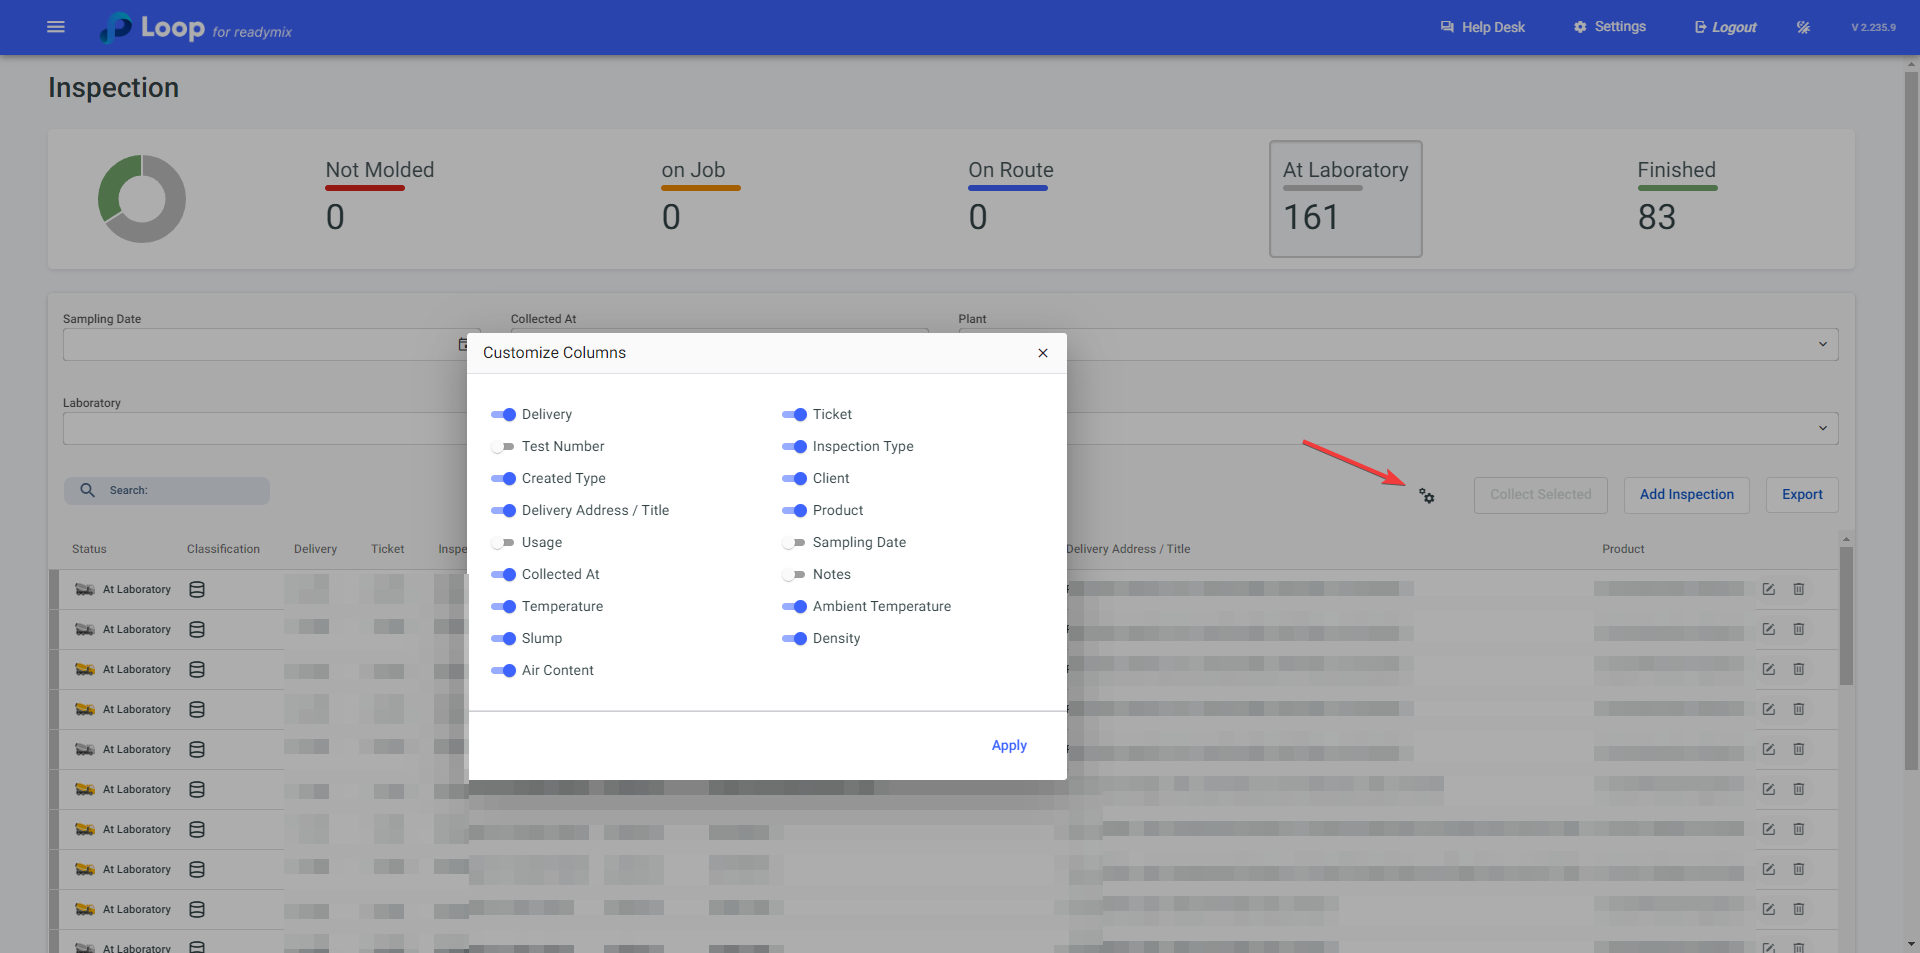
You can change the information displayed in columns through the gear icon, enabling or disabling customizations as desired.
Click on the "Add Inspection" option to start the addition process.
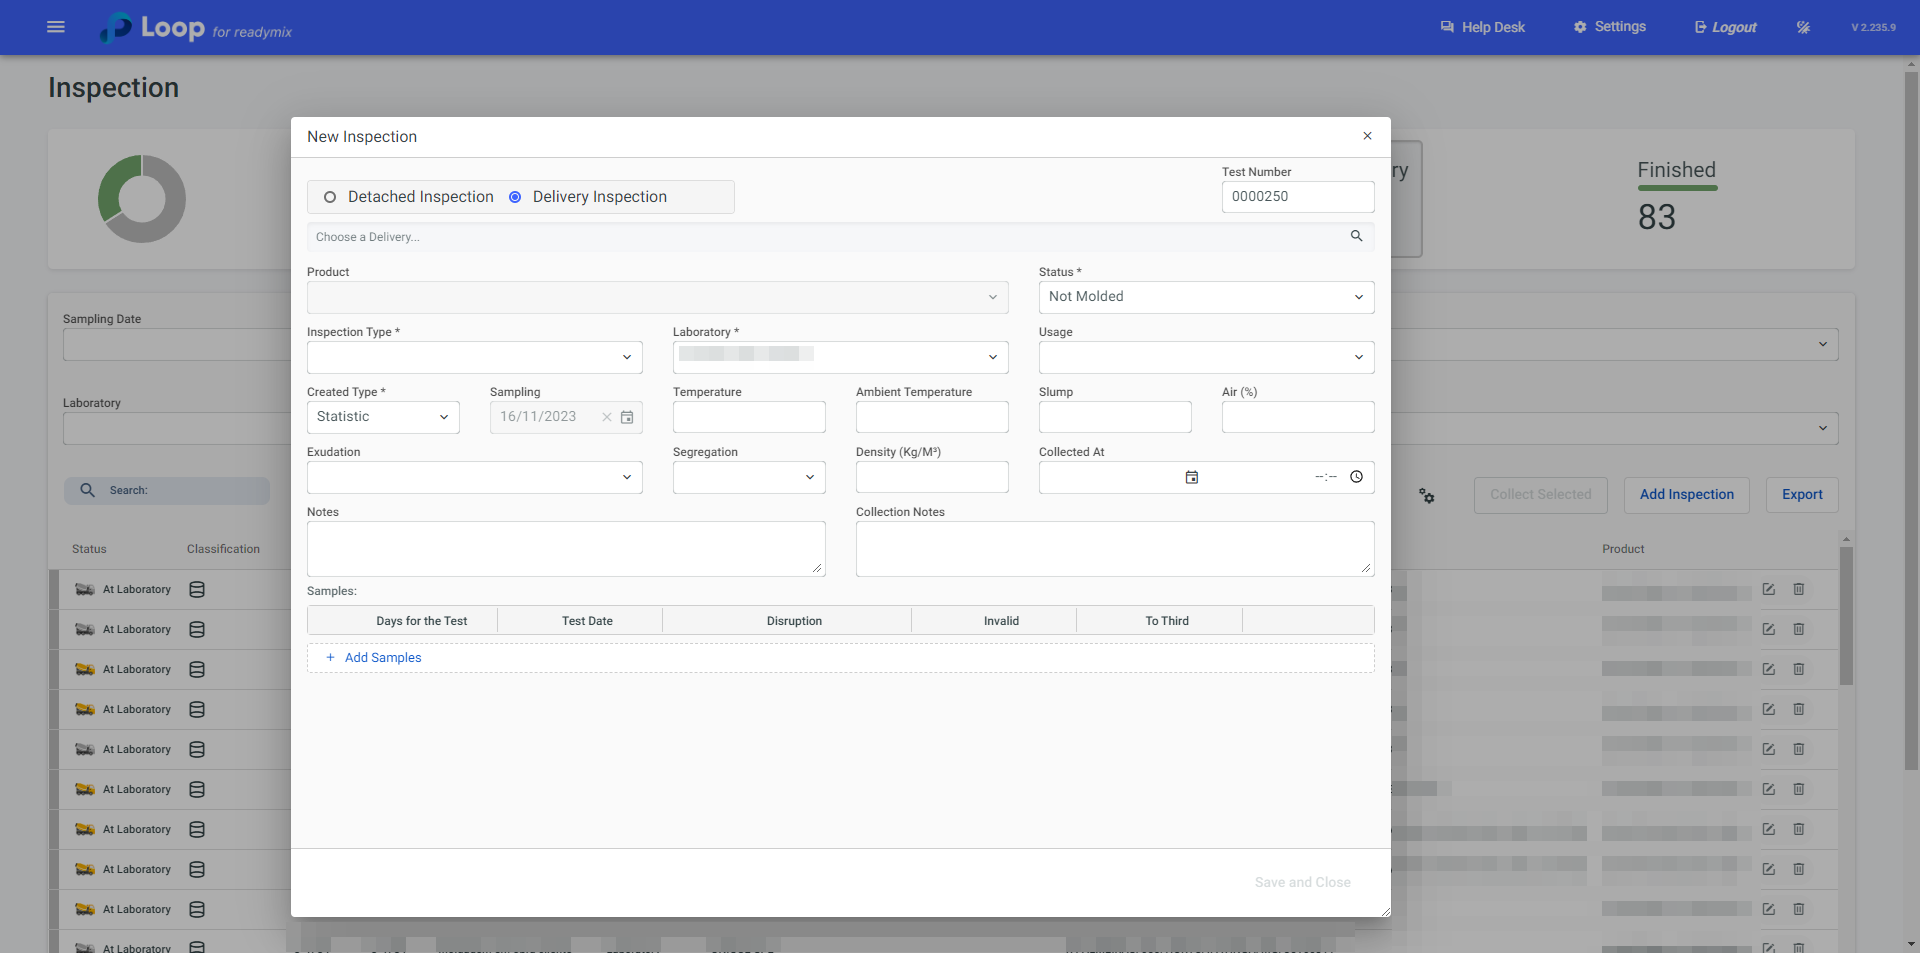
Choose a delivery:
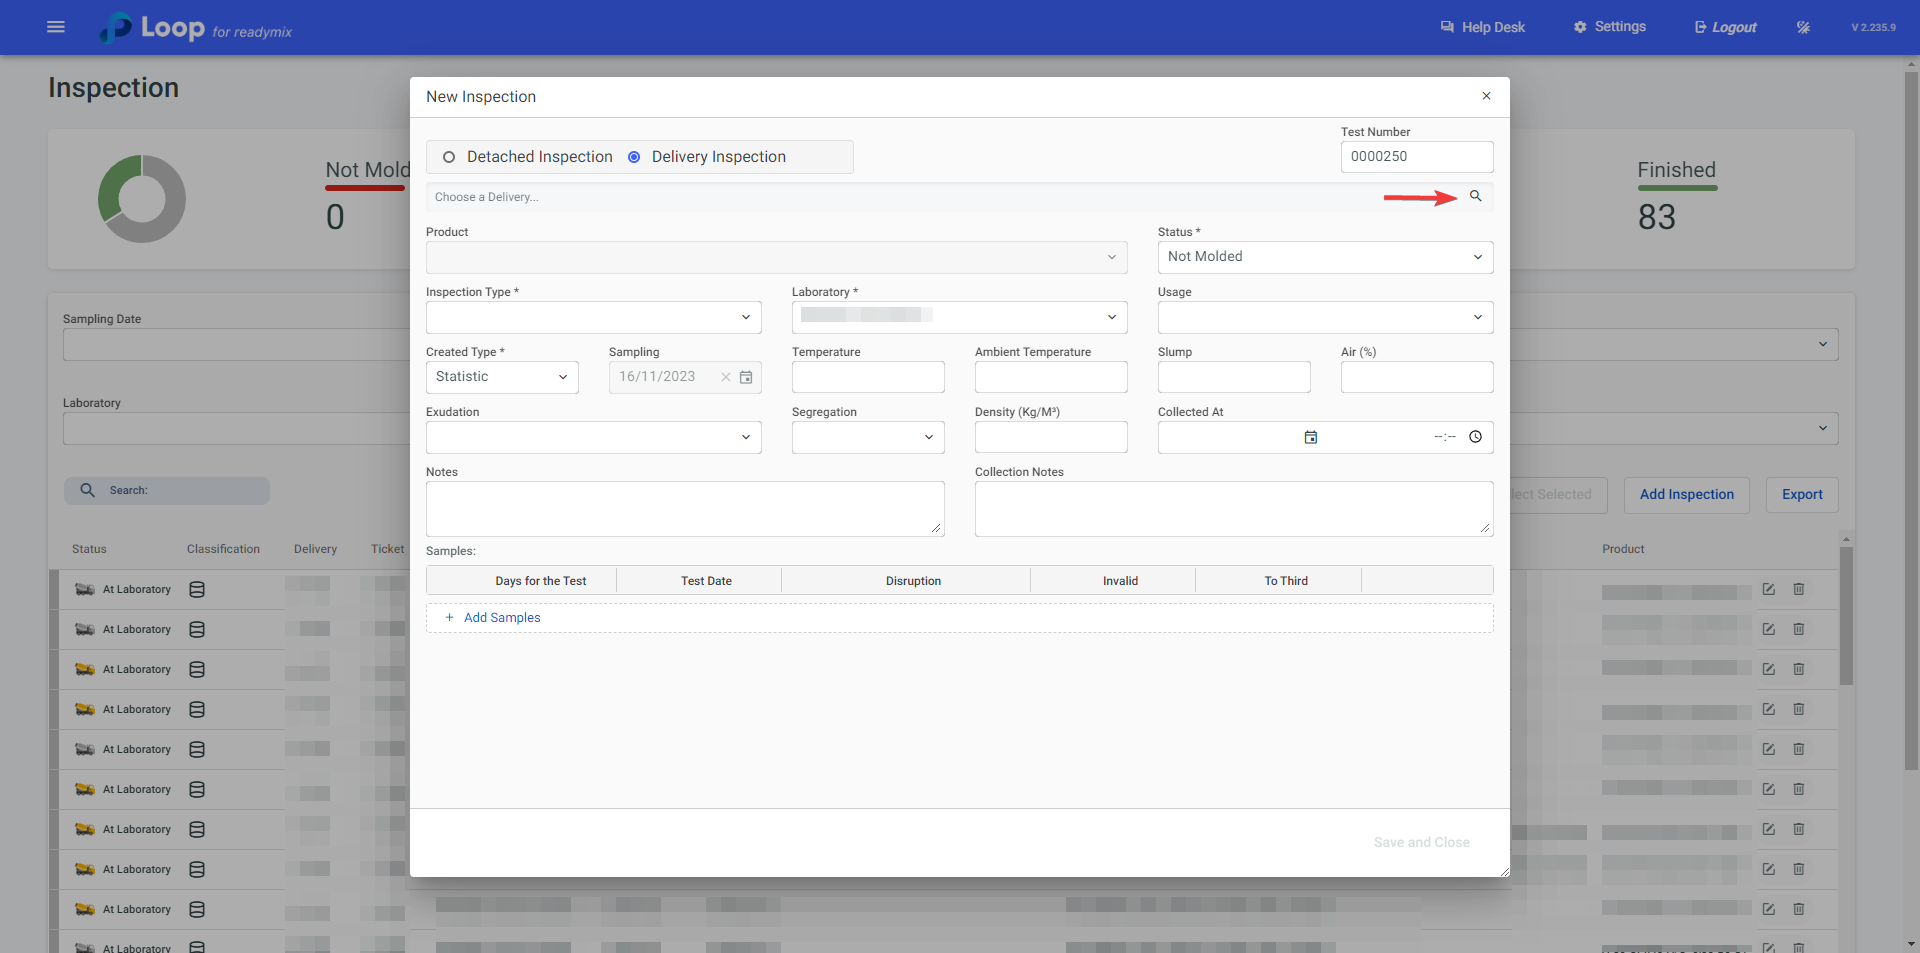
By clicking on the "Magnifying Glass" icon, you can select the delivery to which these samples belong:
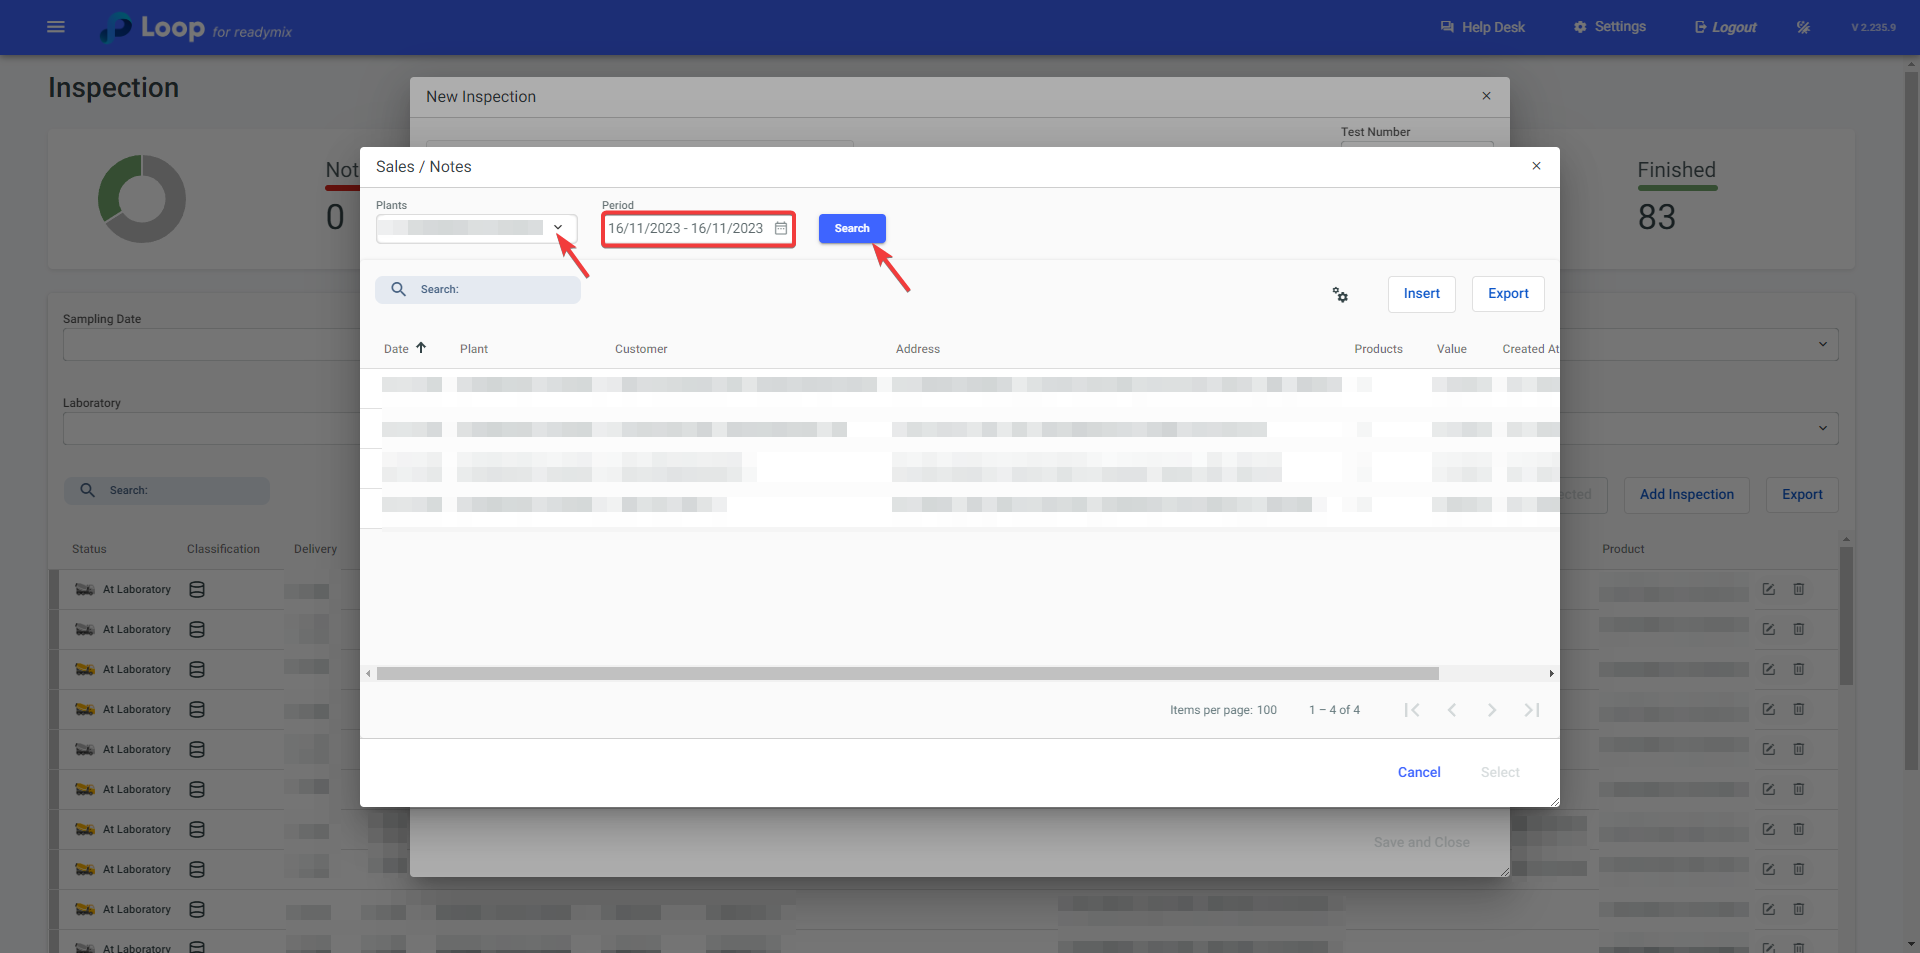
Once you locate the delivery, click on it to mark it, and then click "Select."
After that, fill in the mandatory fields.
Mandatory Fields:
Status: Refers to the current status of the inspection, indicating whether it is Unmolded, On-site, On route, In the laboratory, or Finished.
Inspection Type: In terms of Readymix quality and strength, the "Inspection Type" refers to the specific approach used to evaluate the material properties.

Laboratory: Refers to the laboratory where the inspection will take place.
Created Type: Refers to the type of sample created.
The Samples field will be automatically filled with the days and quantities of samples scheduled in the Type of Inspection. However, you can manually modify the days if needed.
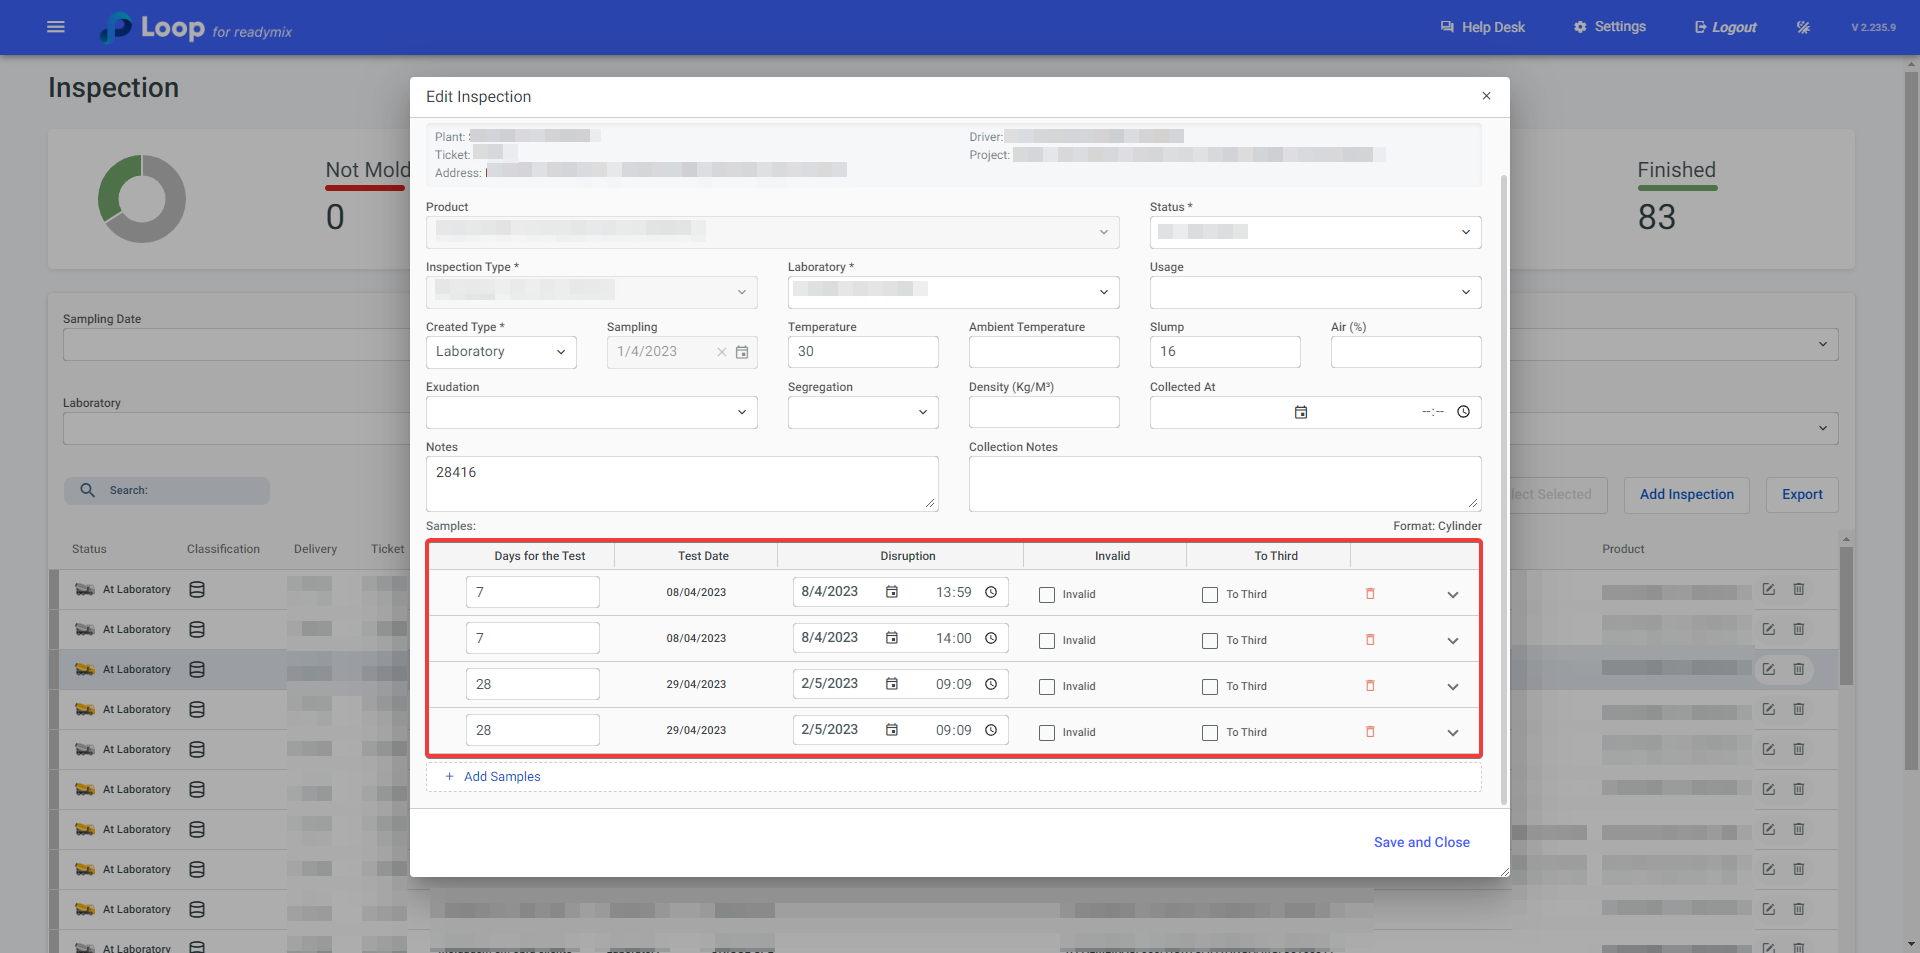
Disruption: Enter the date and time in this field when the test specimen was broken.
Invalid: Check the checkbox if it is necessary to invalidate the sample.
To Third: Check the checkbox if the sample is intended for third-party analysis.
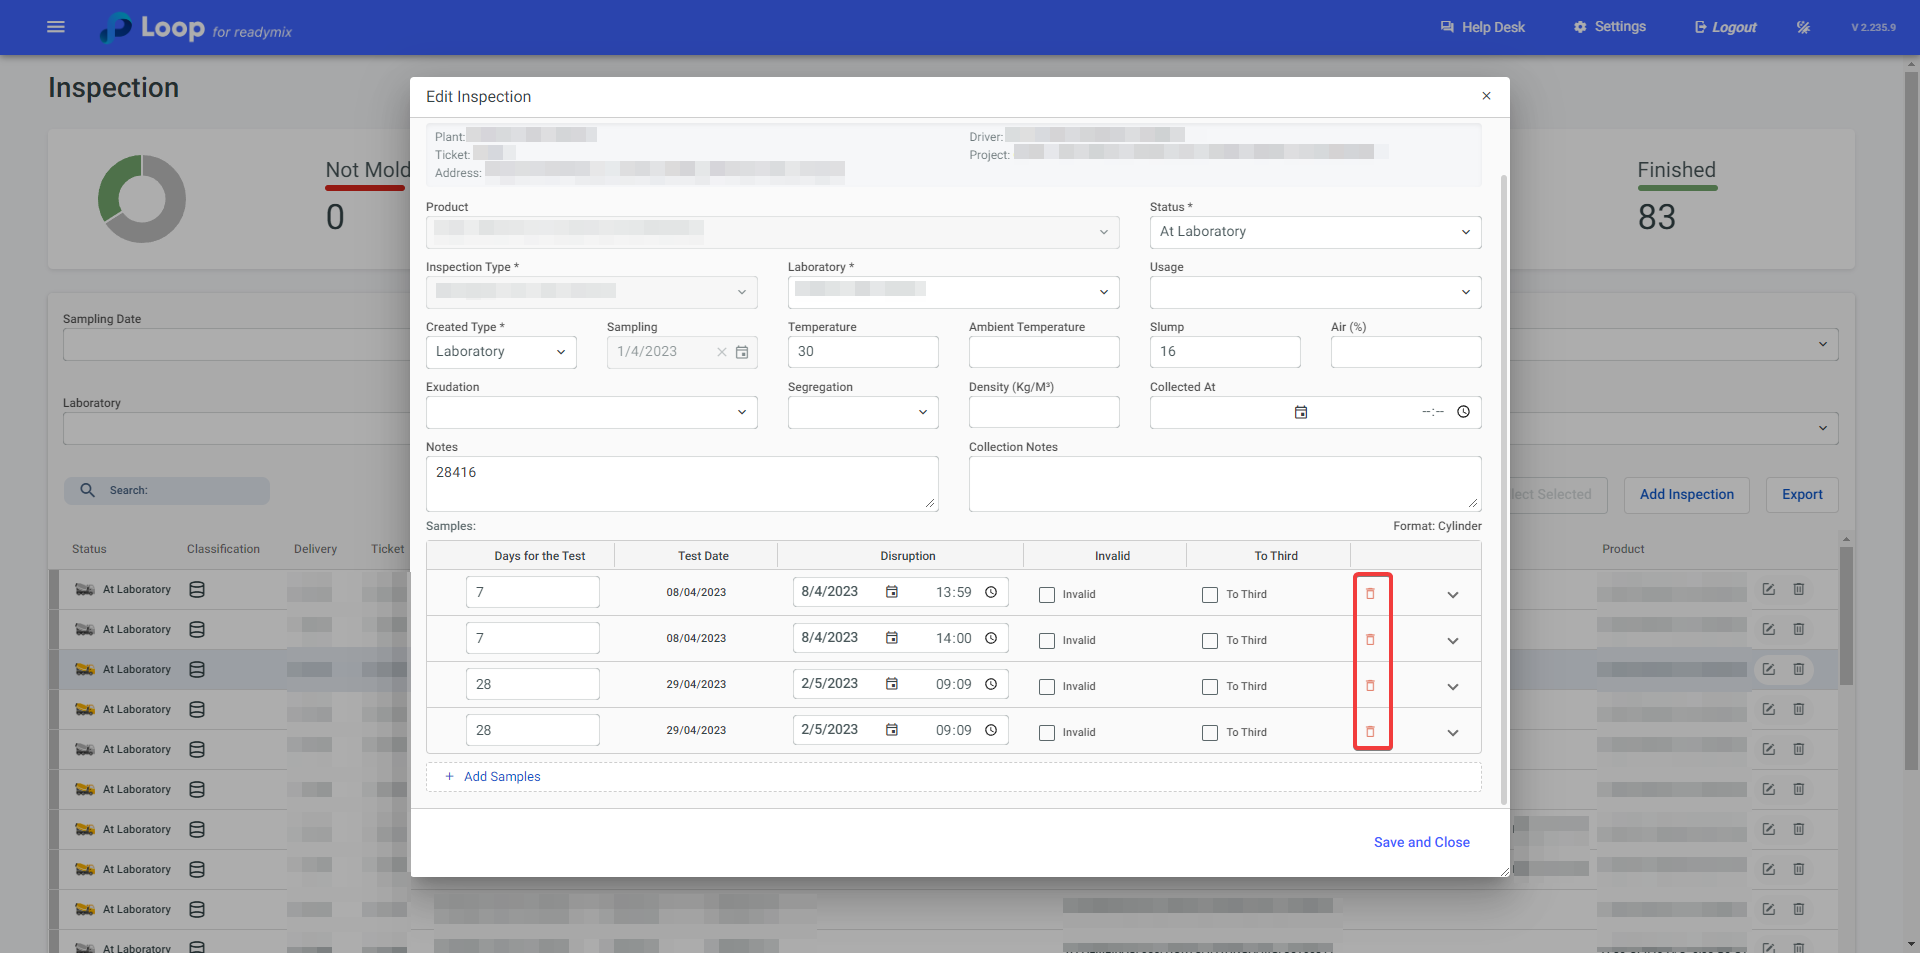
Remove: You can remove a sample by clicking on the trash icon.
Add Samples: If necessary, you can add more samples to your inspection by clicking on the "Add Samples" option.
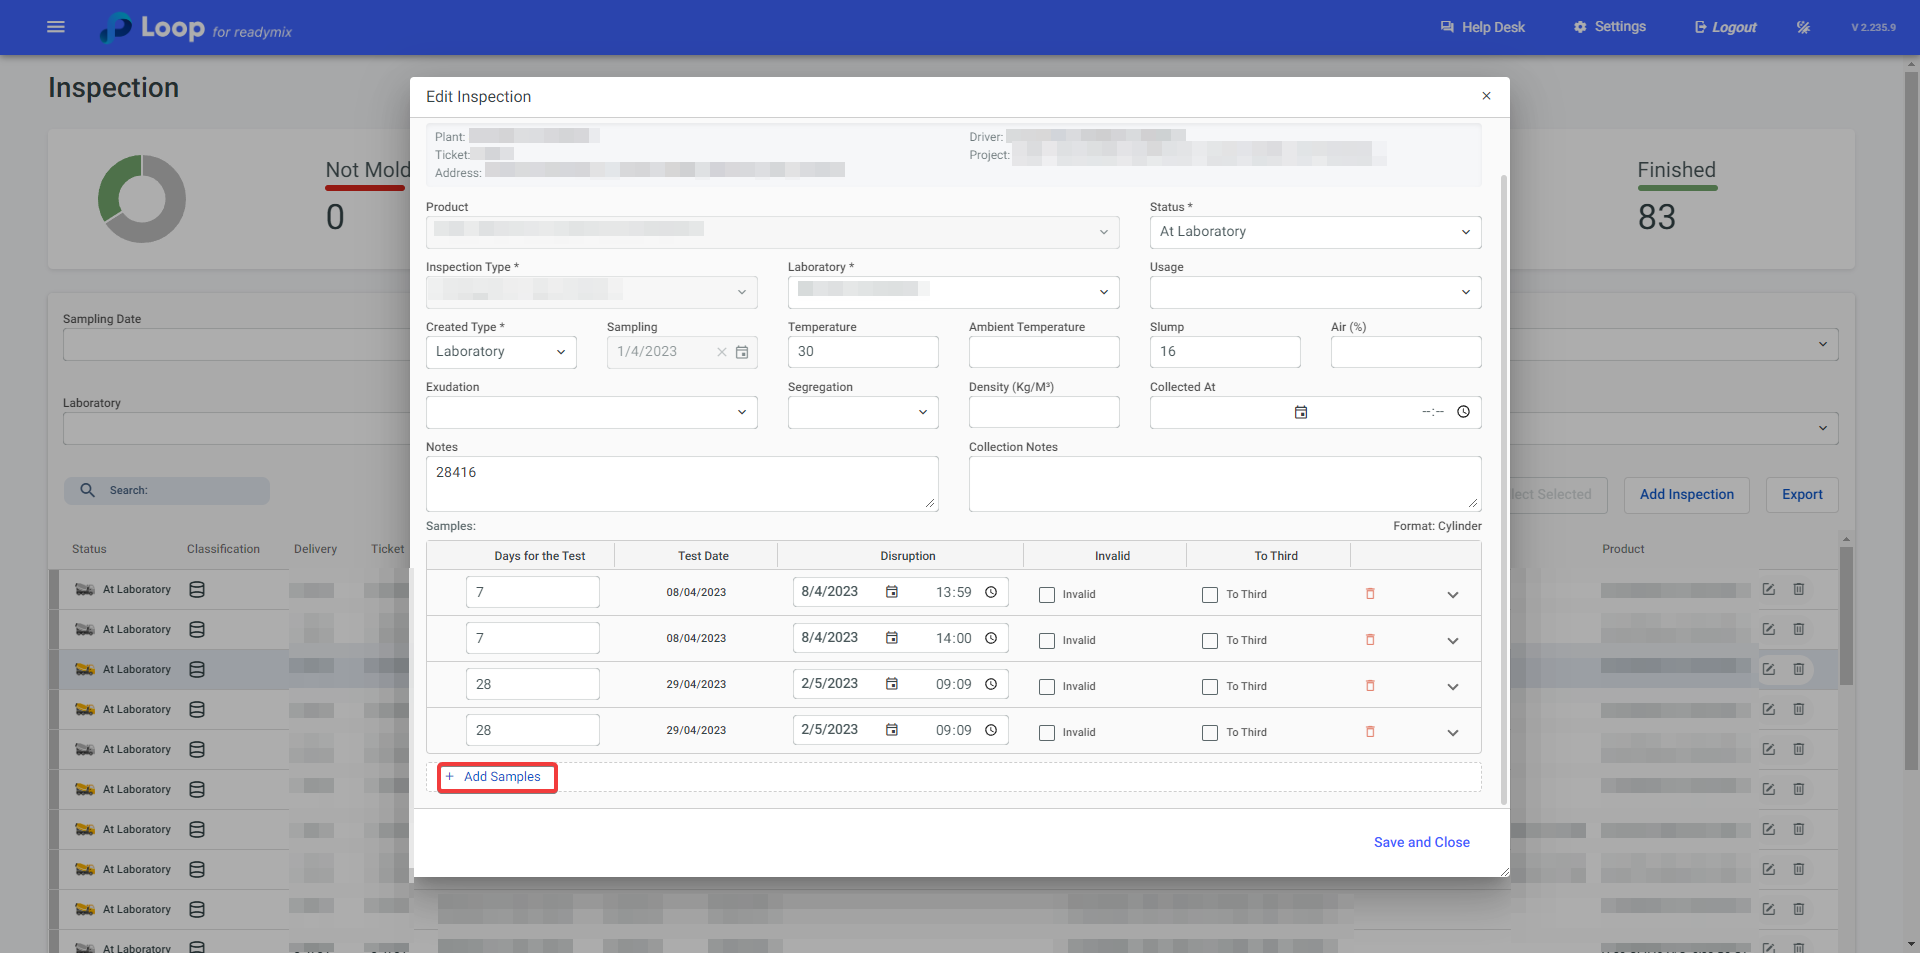
After filling in all the necessary fields, simply click "Save and Close."
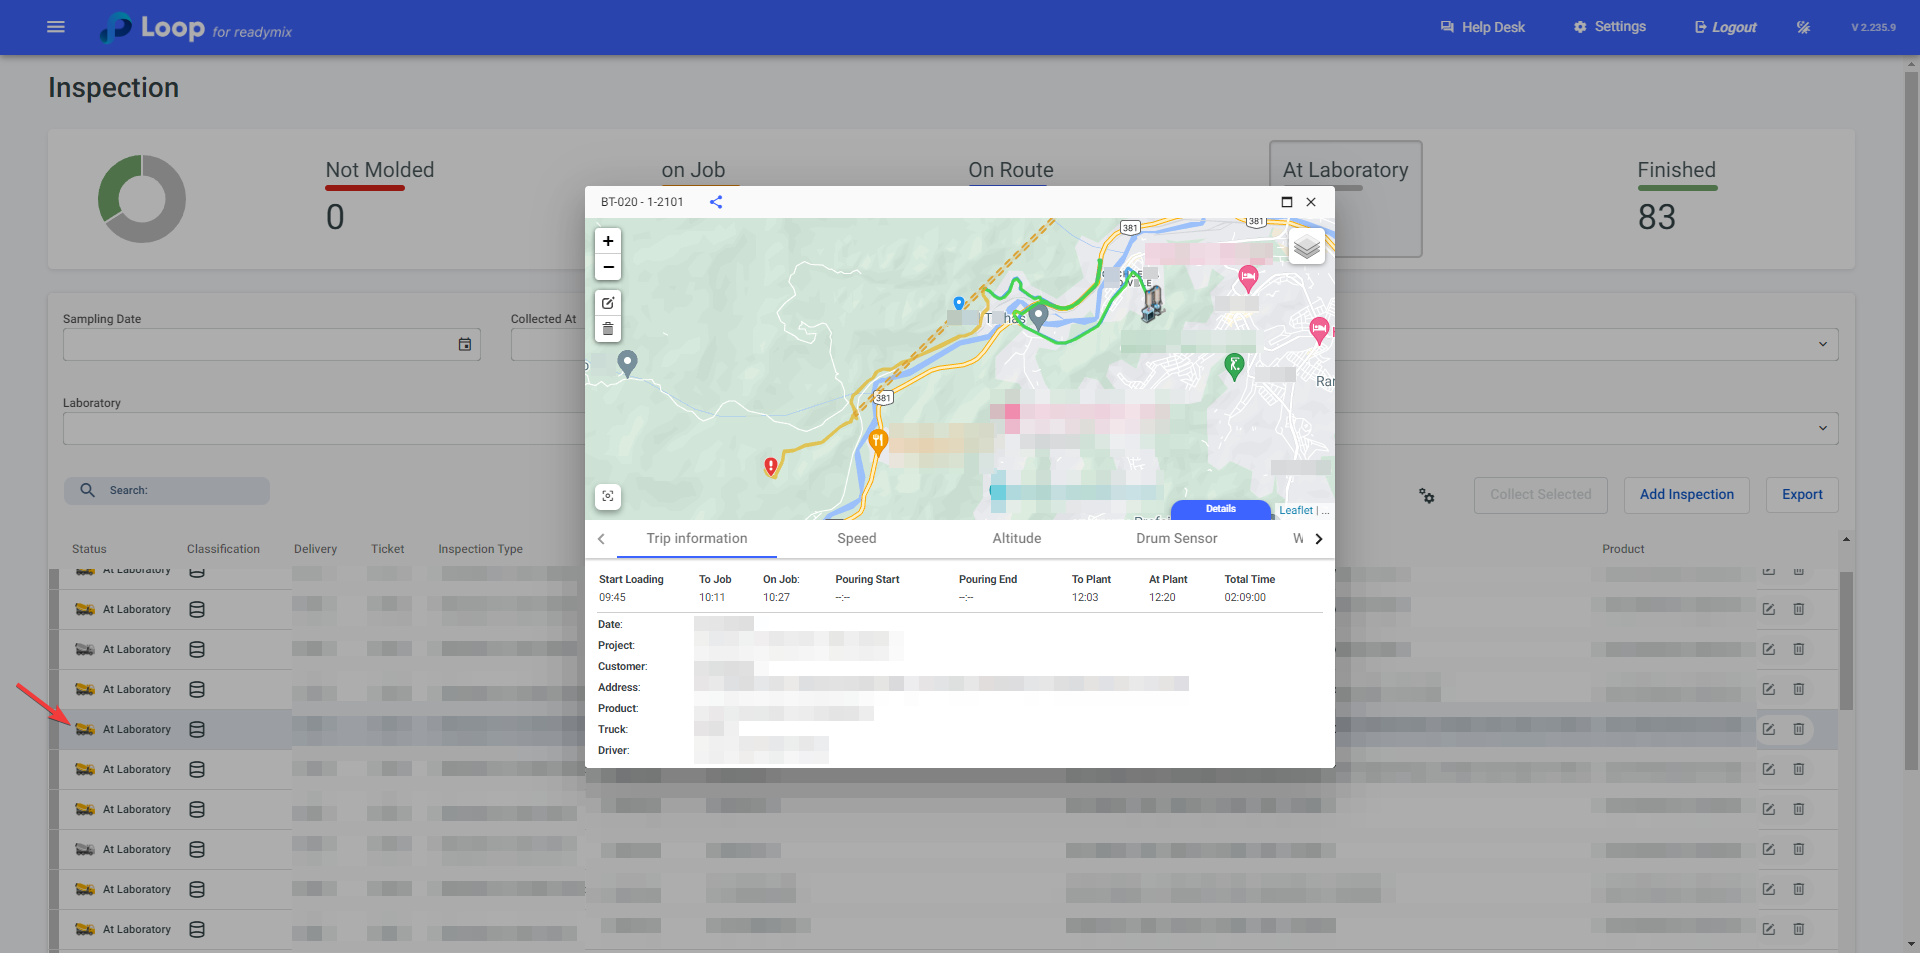
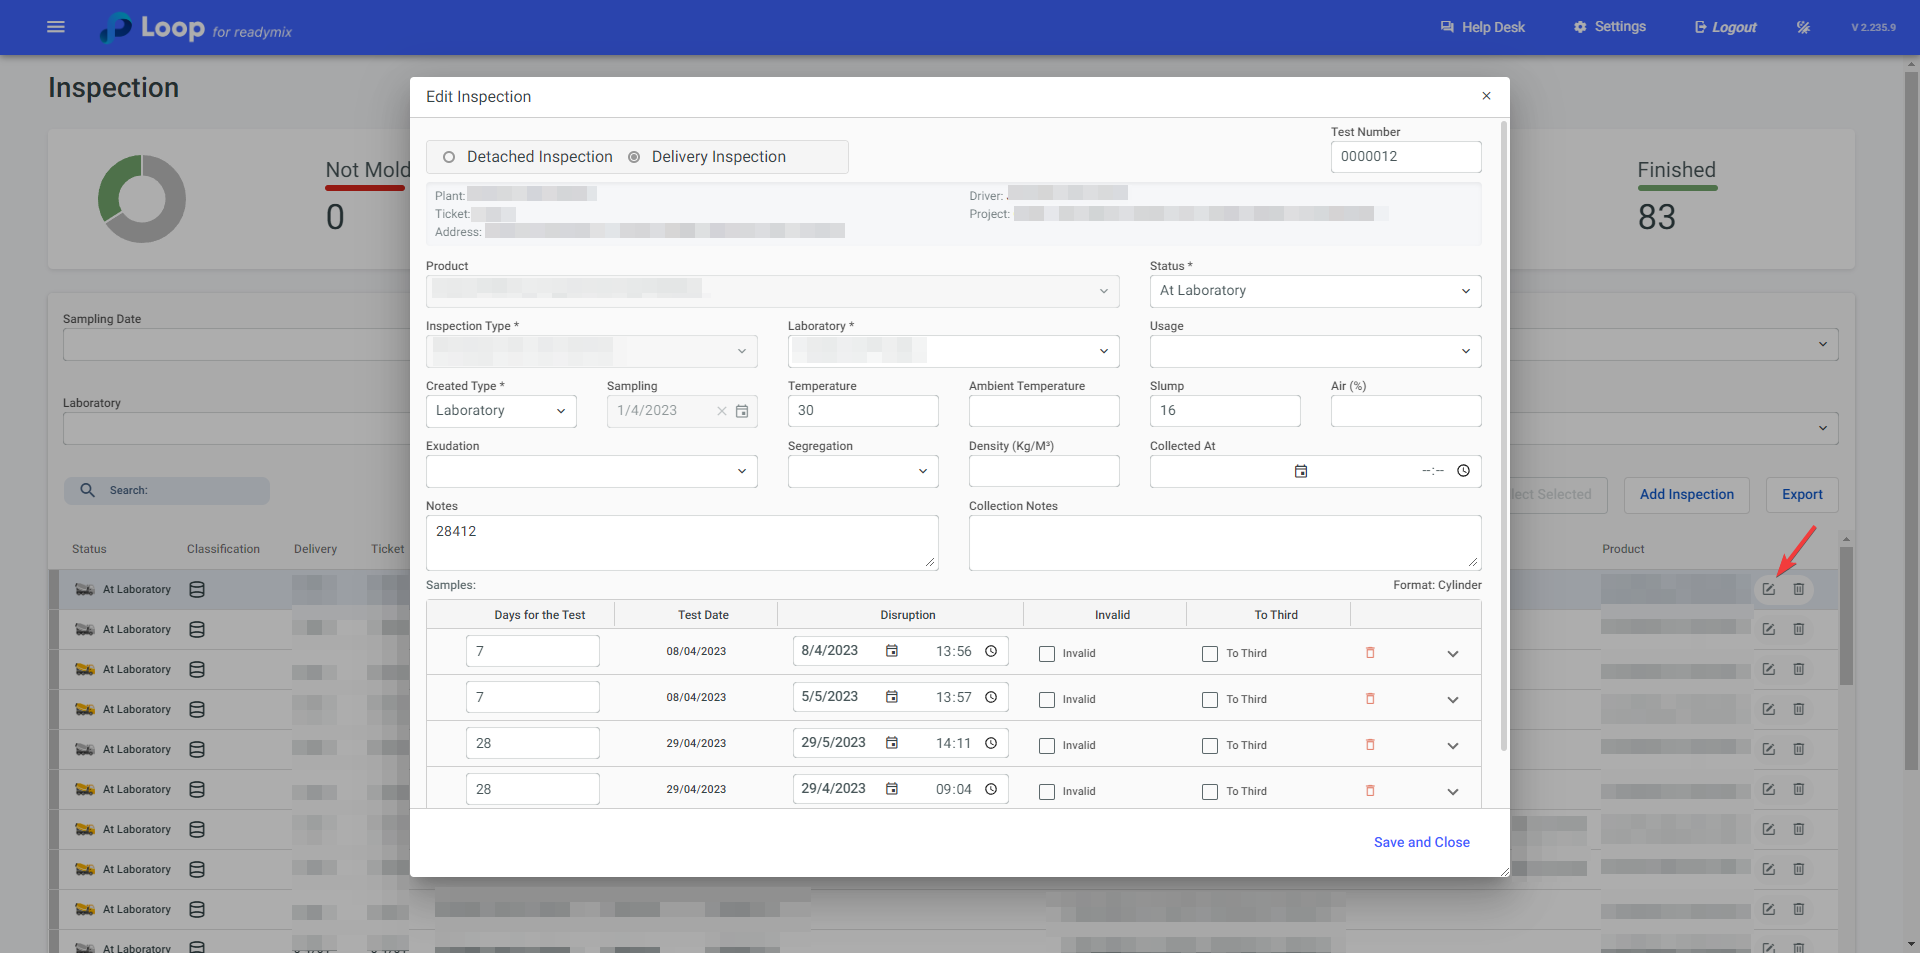
By clicking on the details icon of an Inspection, you can verify all its data.
Additional Information:
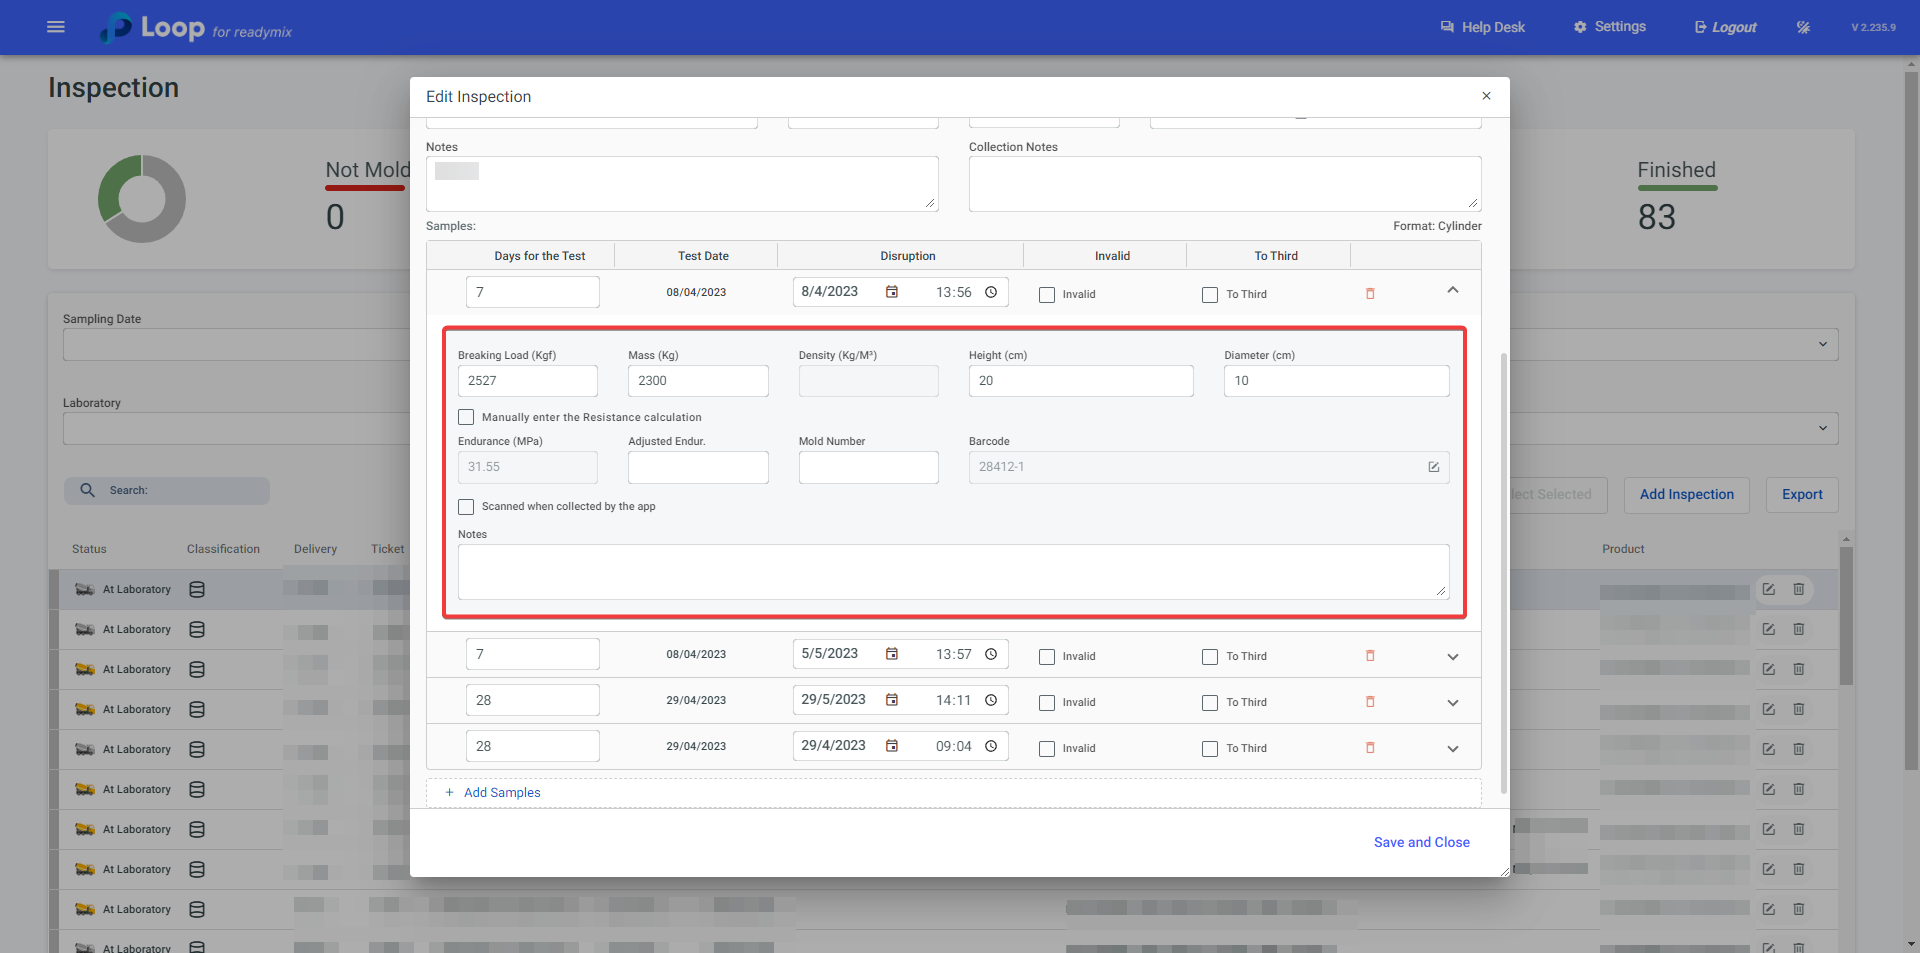
Furthermore, by clicking on the "V" icon on a sample, you can check the characteristics of its test, such as Breakage Load (KN), Mass (Kg), Density (Kg/M³), Strength (Kgf/cm²), among others. You can also add notes relevant to the test.

Information related to the delivery can be checked by clicking on the yellow "Truck" icon: