The Fuel Management module is essential for optimizing and controlling vehicle refueling. With it, you can record and monitor all refuelings, ensuring precise and efficient control of fuel consumption.
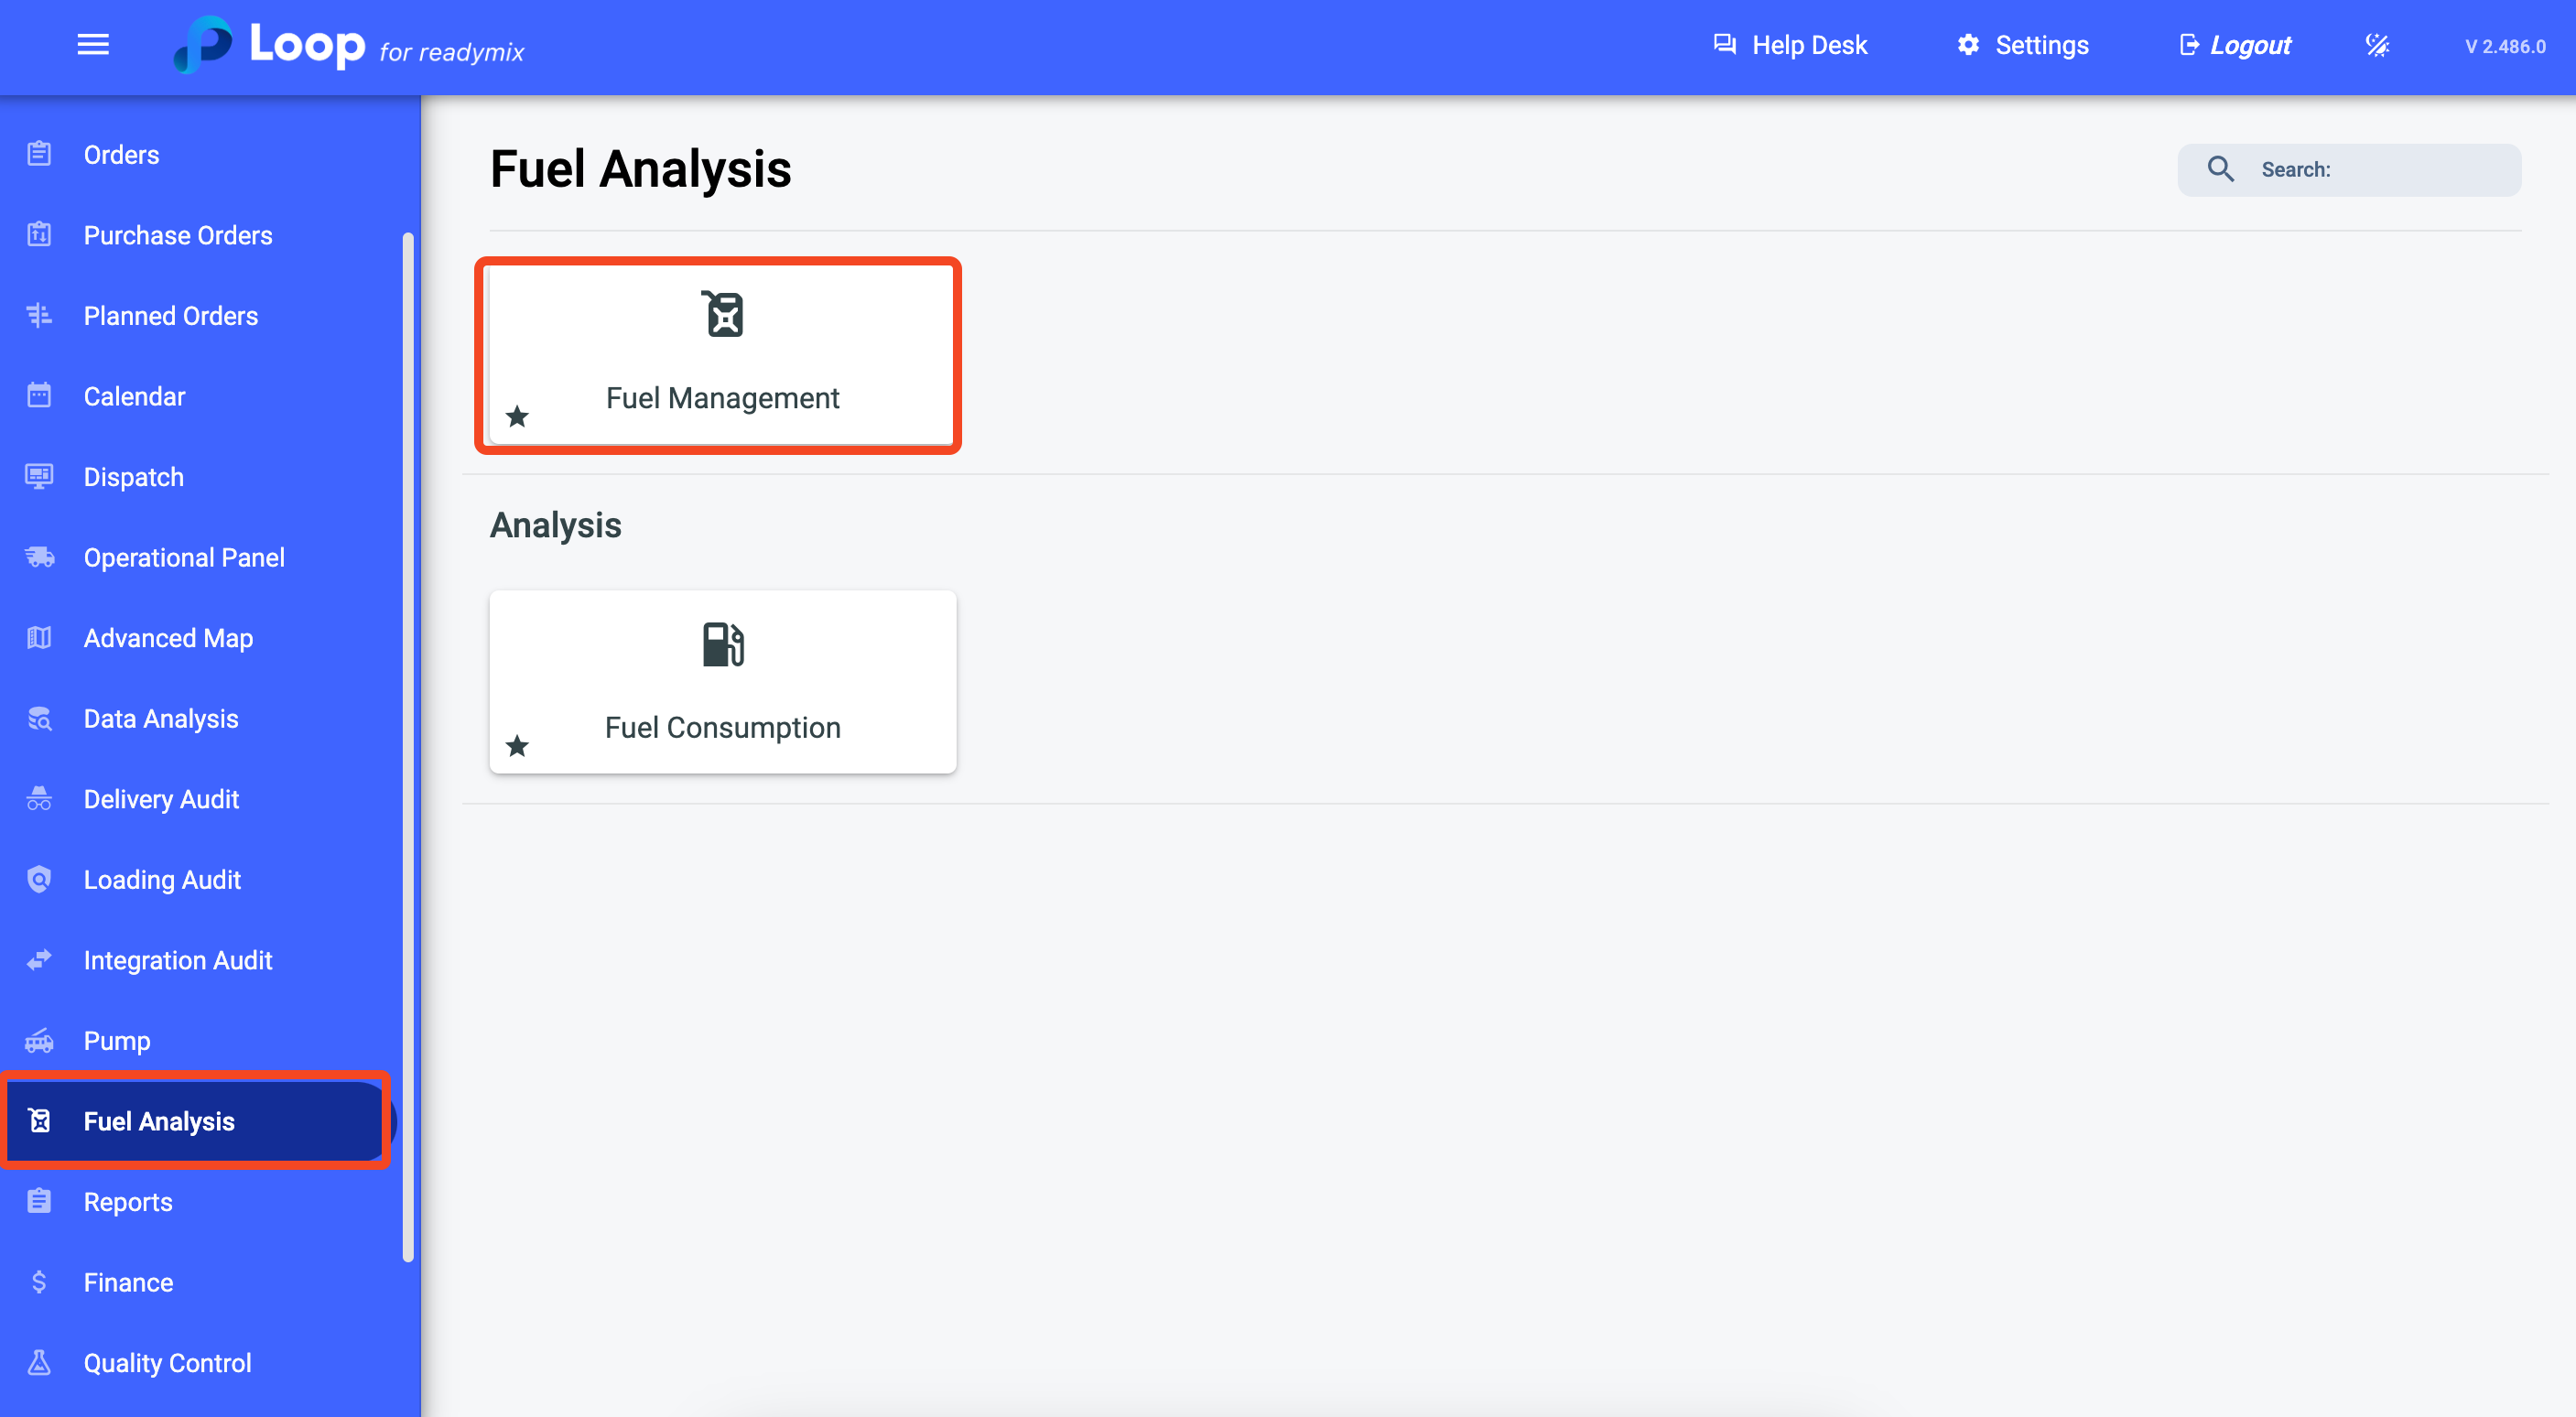
Open the menu on the left side of the screen and select "Fuel Analysis" - "Fuel Management."
Using the filters, you can filter fuel events through the following fields: Refueling Date, Vehicle Type, Vehicle, and Driver.

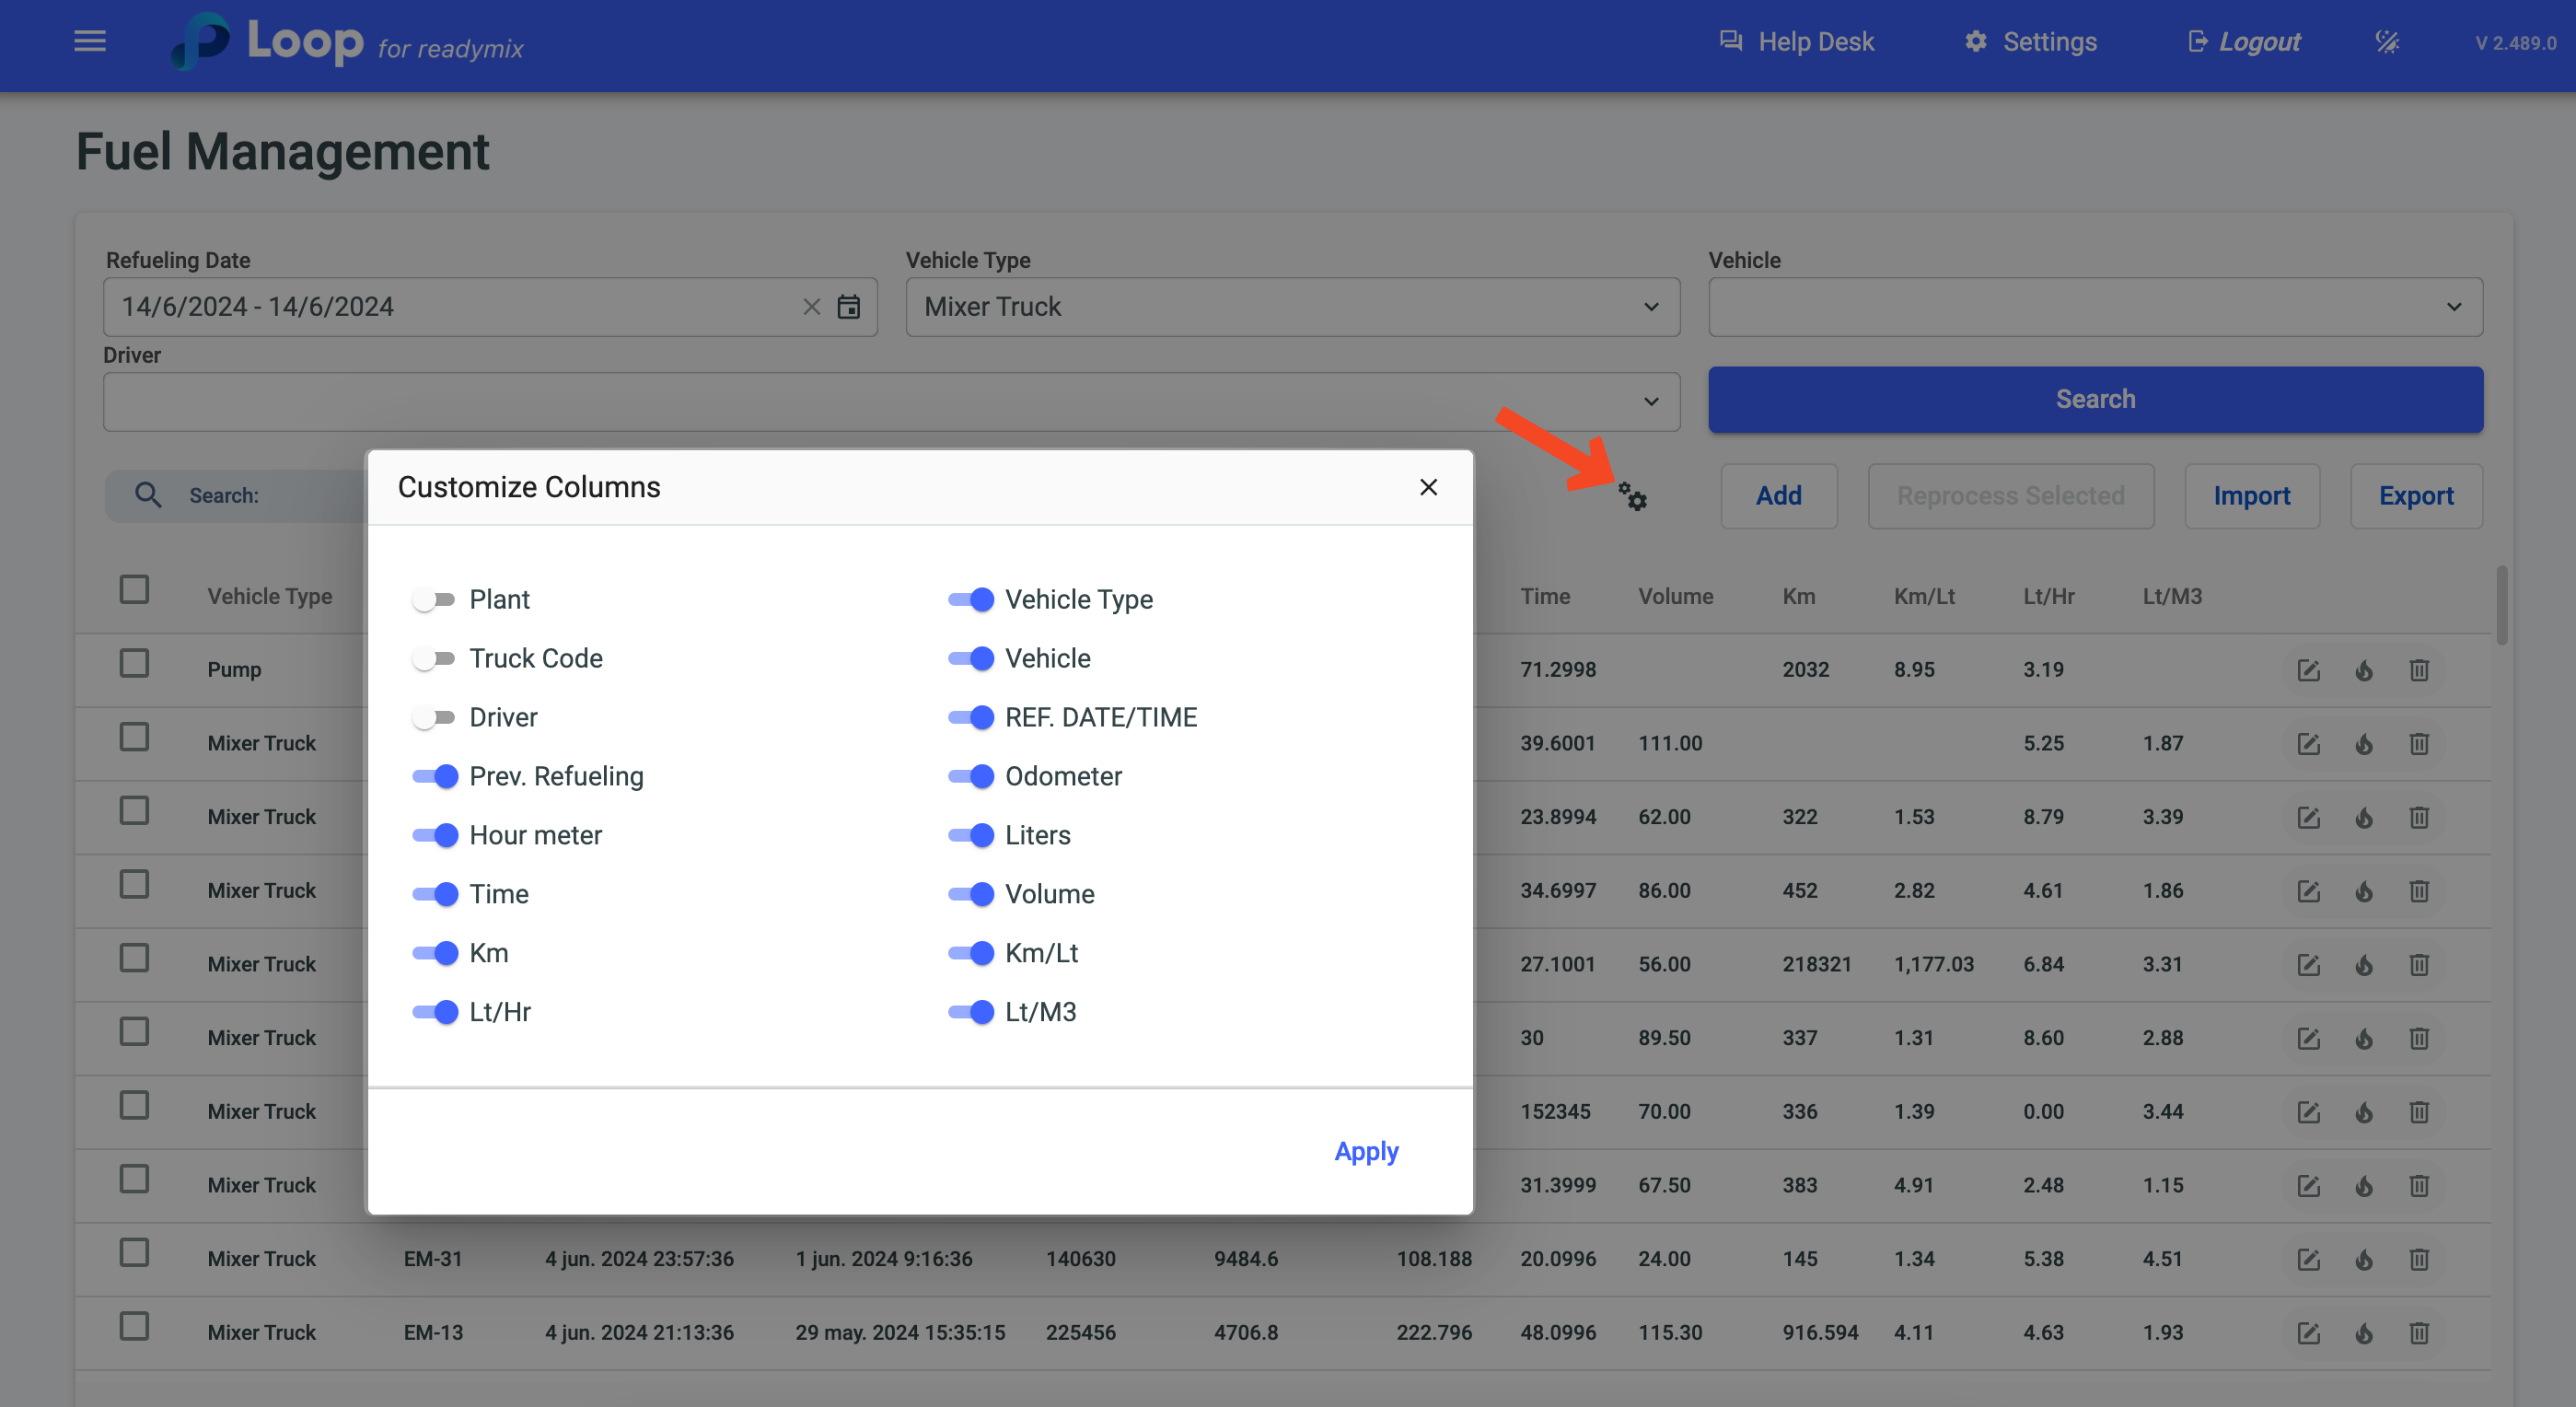
You can change the information displayed in the columns using the gear icon, enabling or disabling the customizations you want.
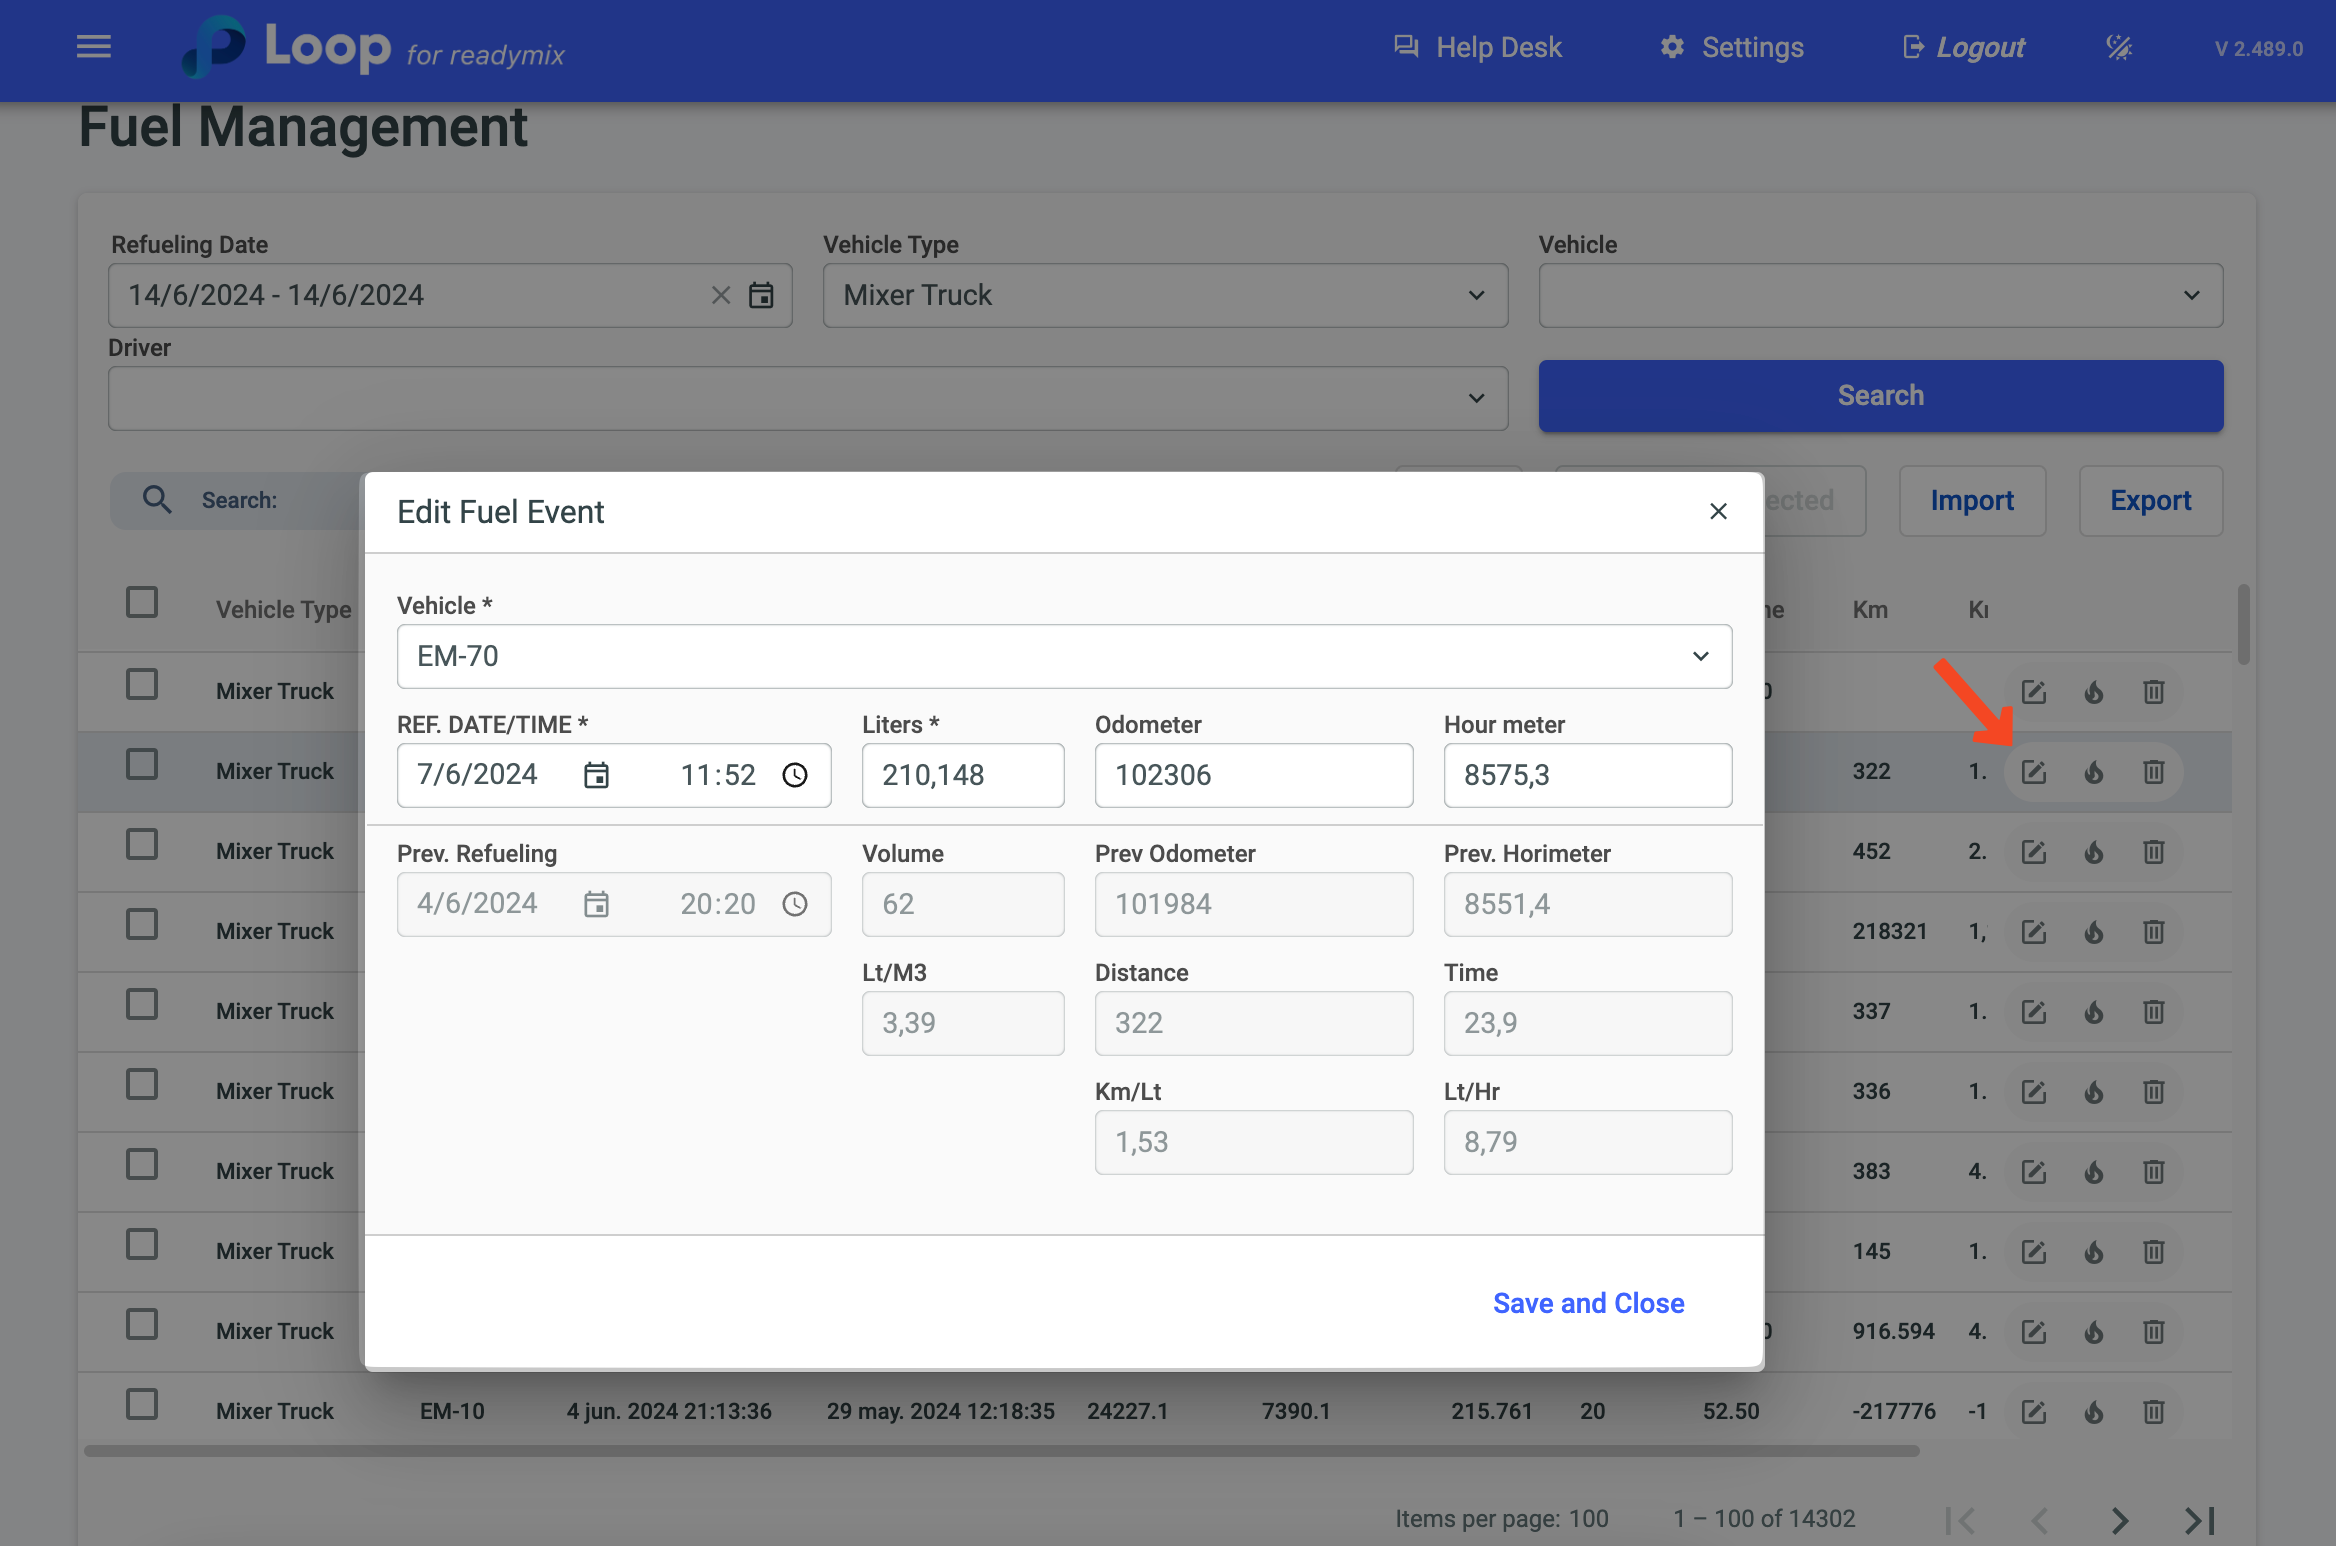
Click on "Add" and fill in the required fields.
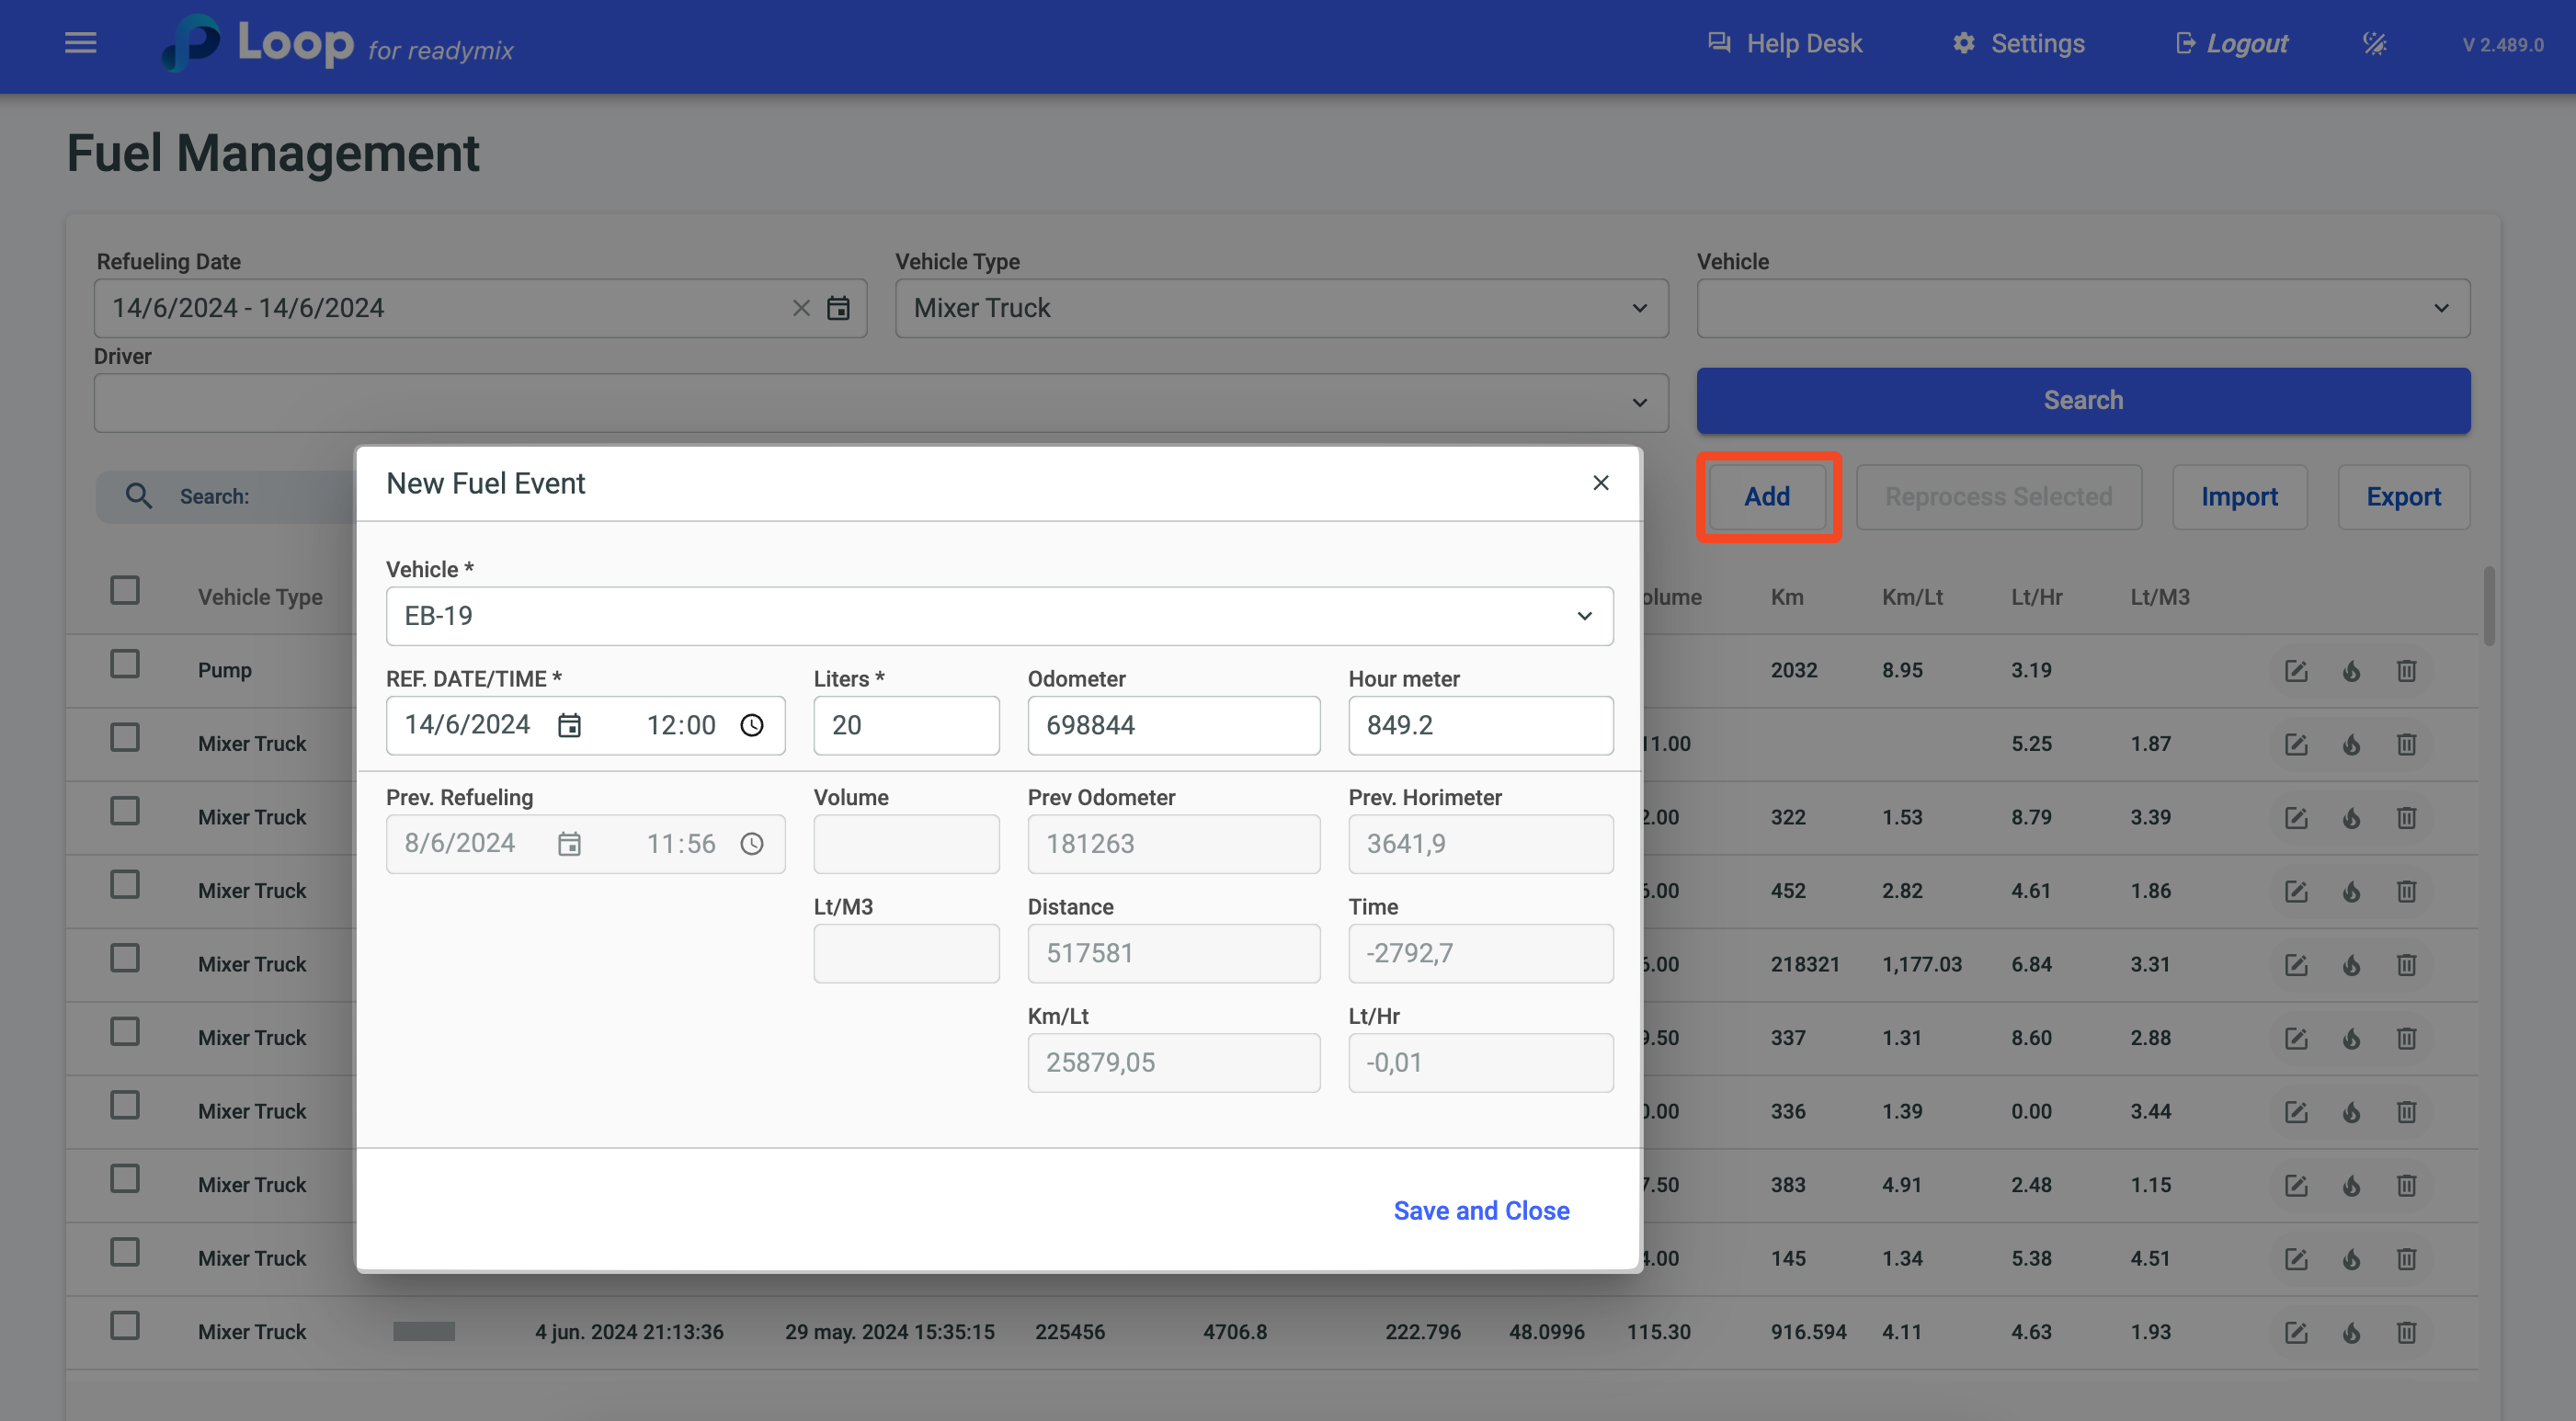
When selecting the vehicle, the system will automatically fill in the Previous Refueling, Previous Odometer, and Previous Hourmeter fields based on the previously recorded event (If there is). Once all necessary fields are filled in, the system will automatically calculate the distance traveled, time, Km/liter, and liters/hour, using the data from the last recorded event for the vehicle.
Complete the event registration by clicking Save and Close.
Quickly and easily import an Excel spreadsheet with fuel event data for multiple vehicles at once. To do this, click the Import button.
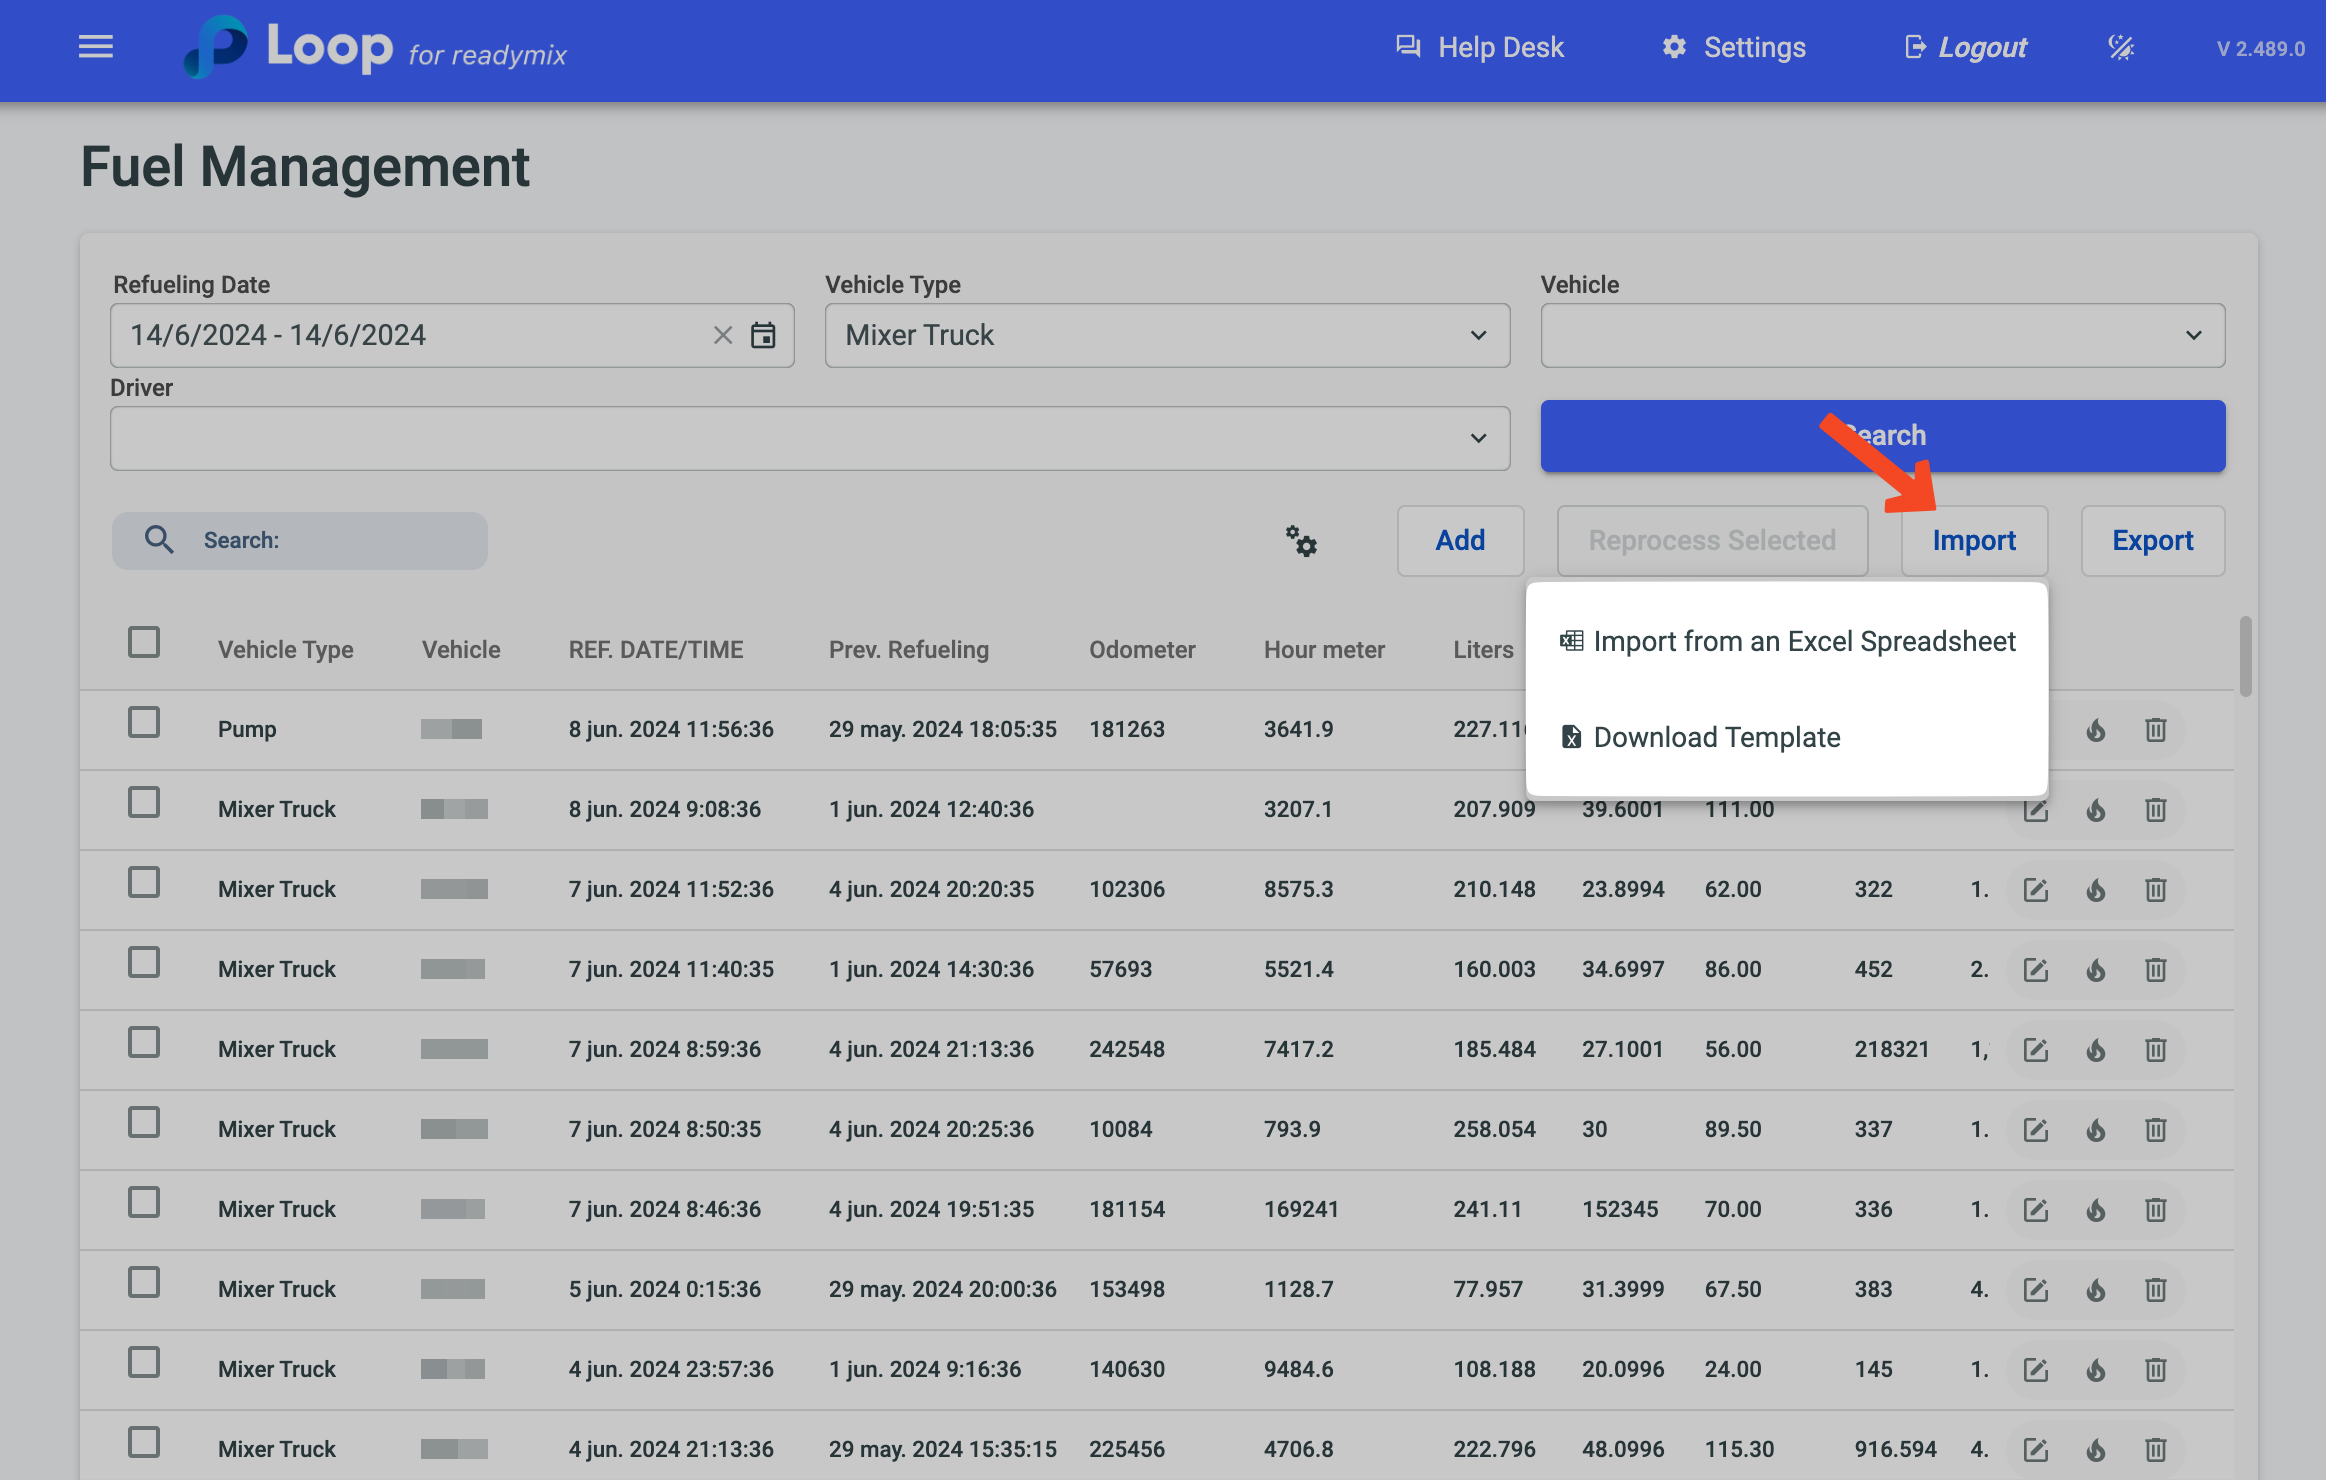
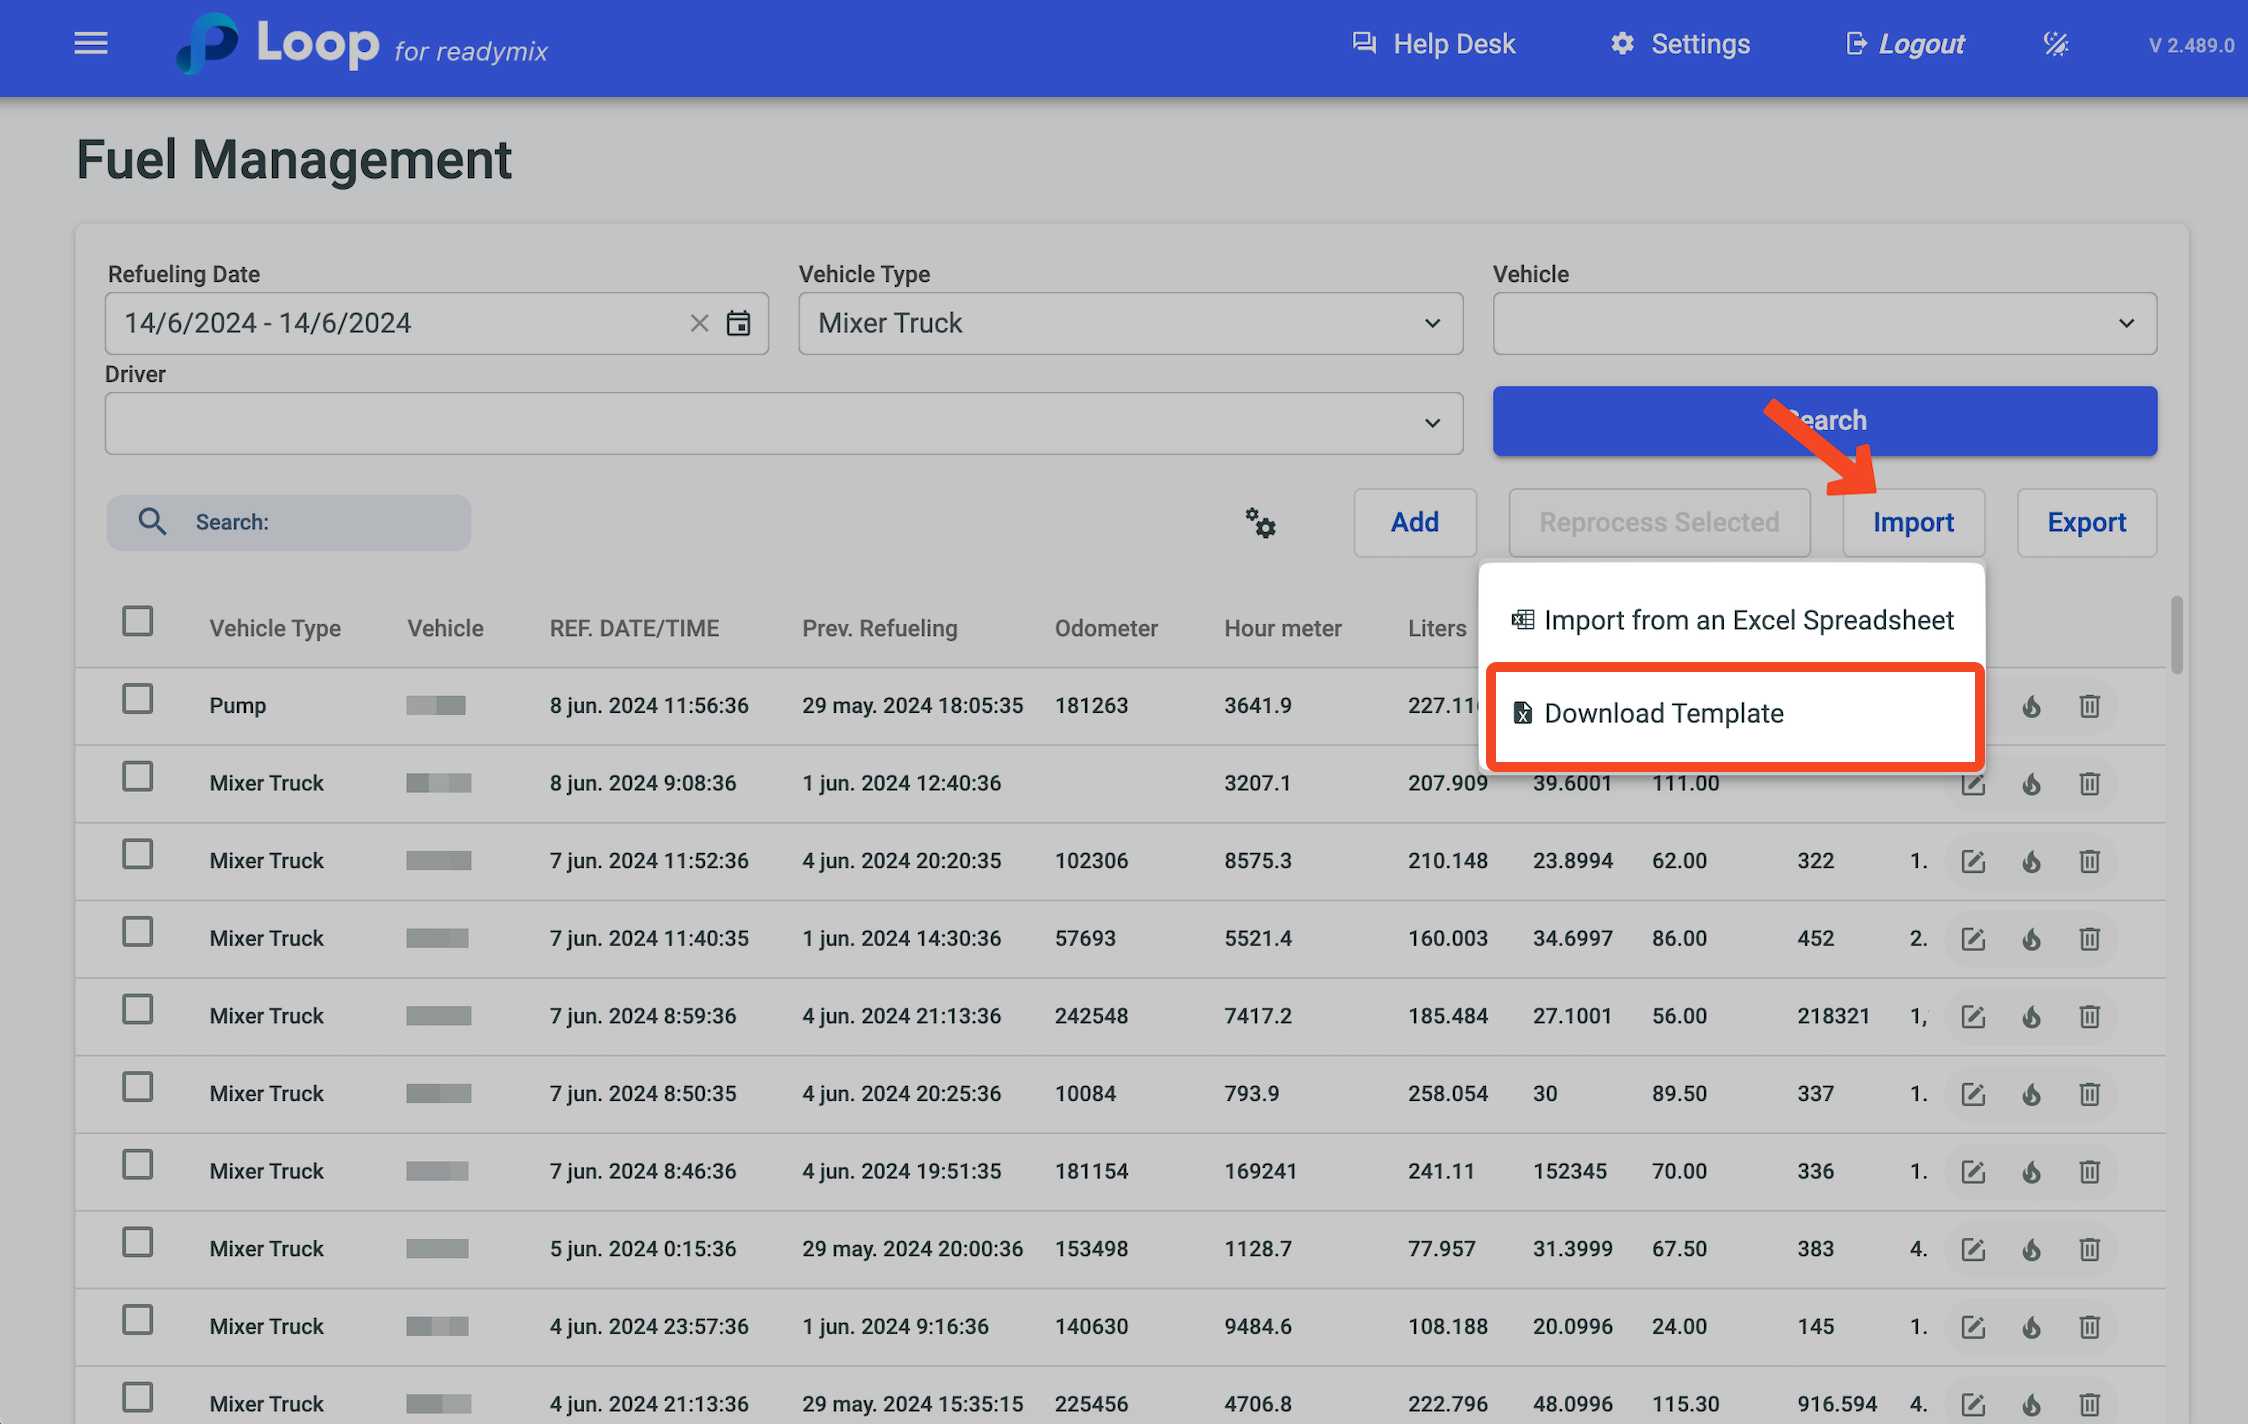
To start, click Download Template to download an Excel spreadsheet with the fields to be filled out:
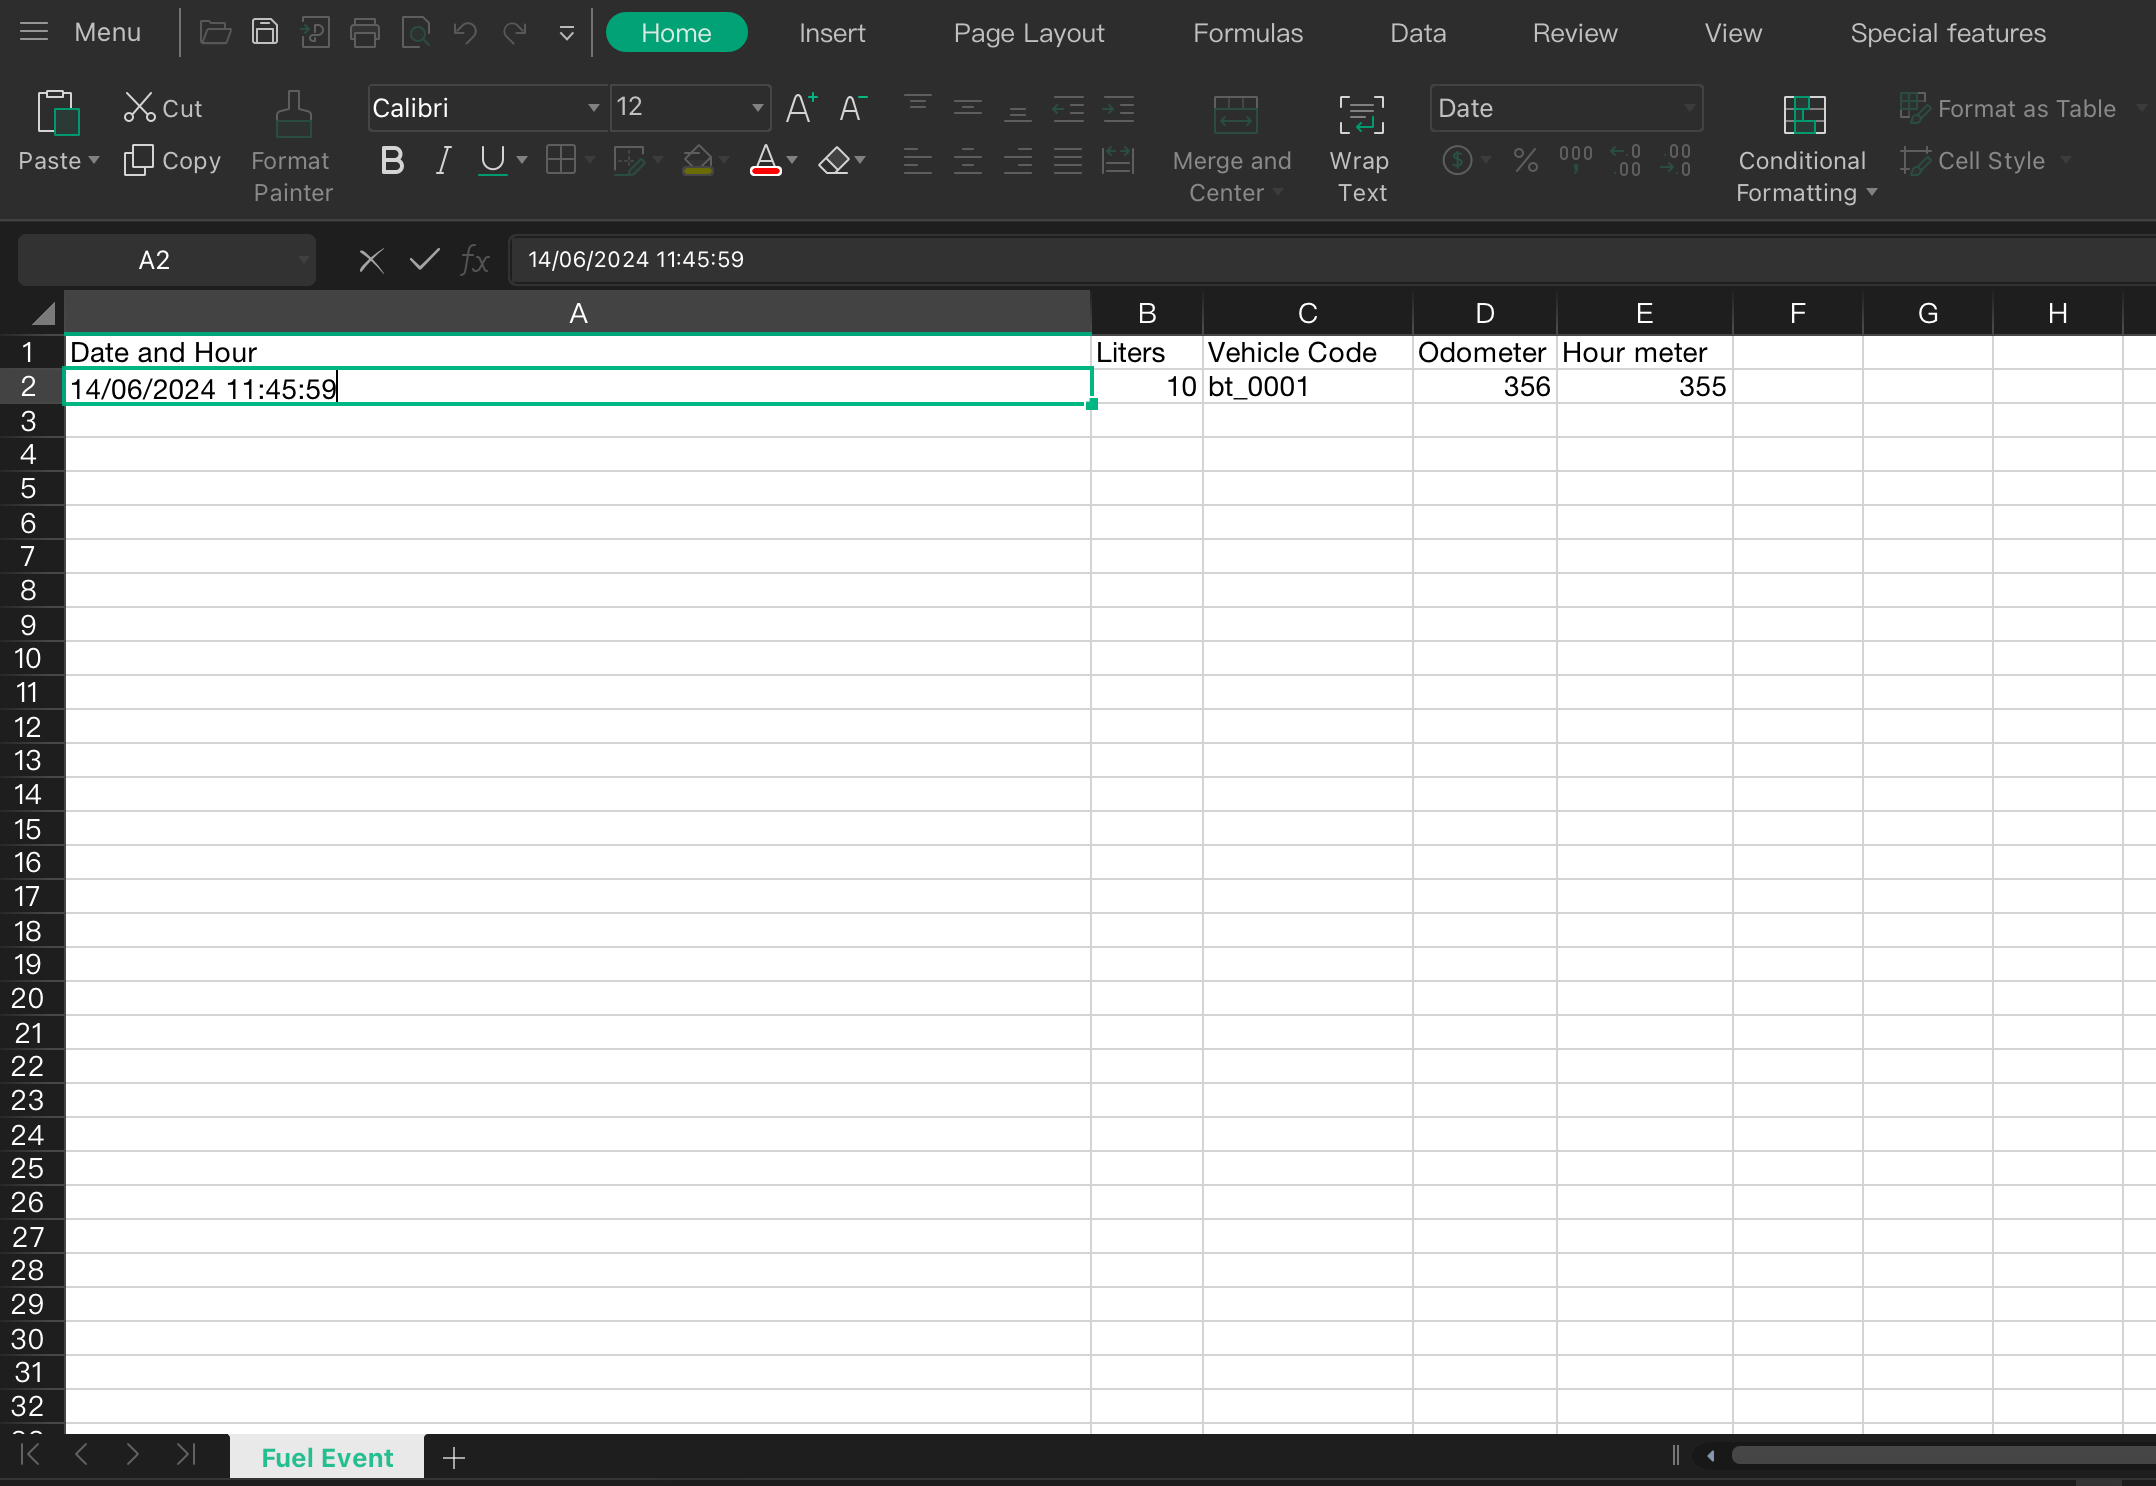
Date and Time: Fill in with the date in day/month/year format and the time in 00:00:00 format.
Liters: Fill in with the amount of fuel refilled.
Vehicle Code: Fill in with the internal code of the vehicle registered in Loop.

Odometer: Fill in with the current number shown on the vehicle's odometer.
Hourmeter: Fill in with the current number shown on the vehicle's hourmeter.
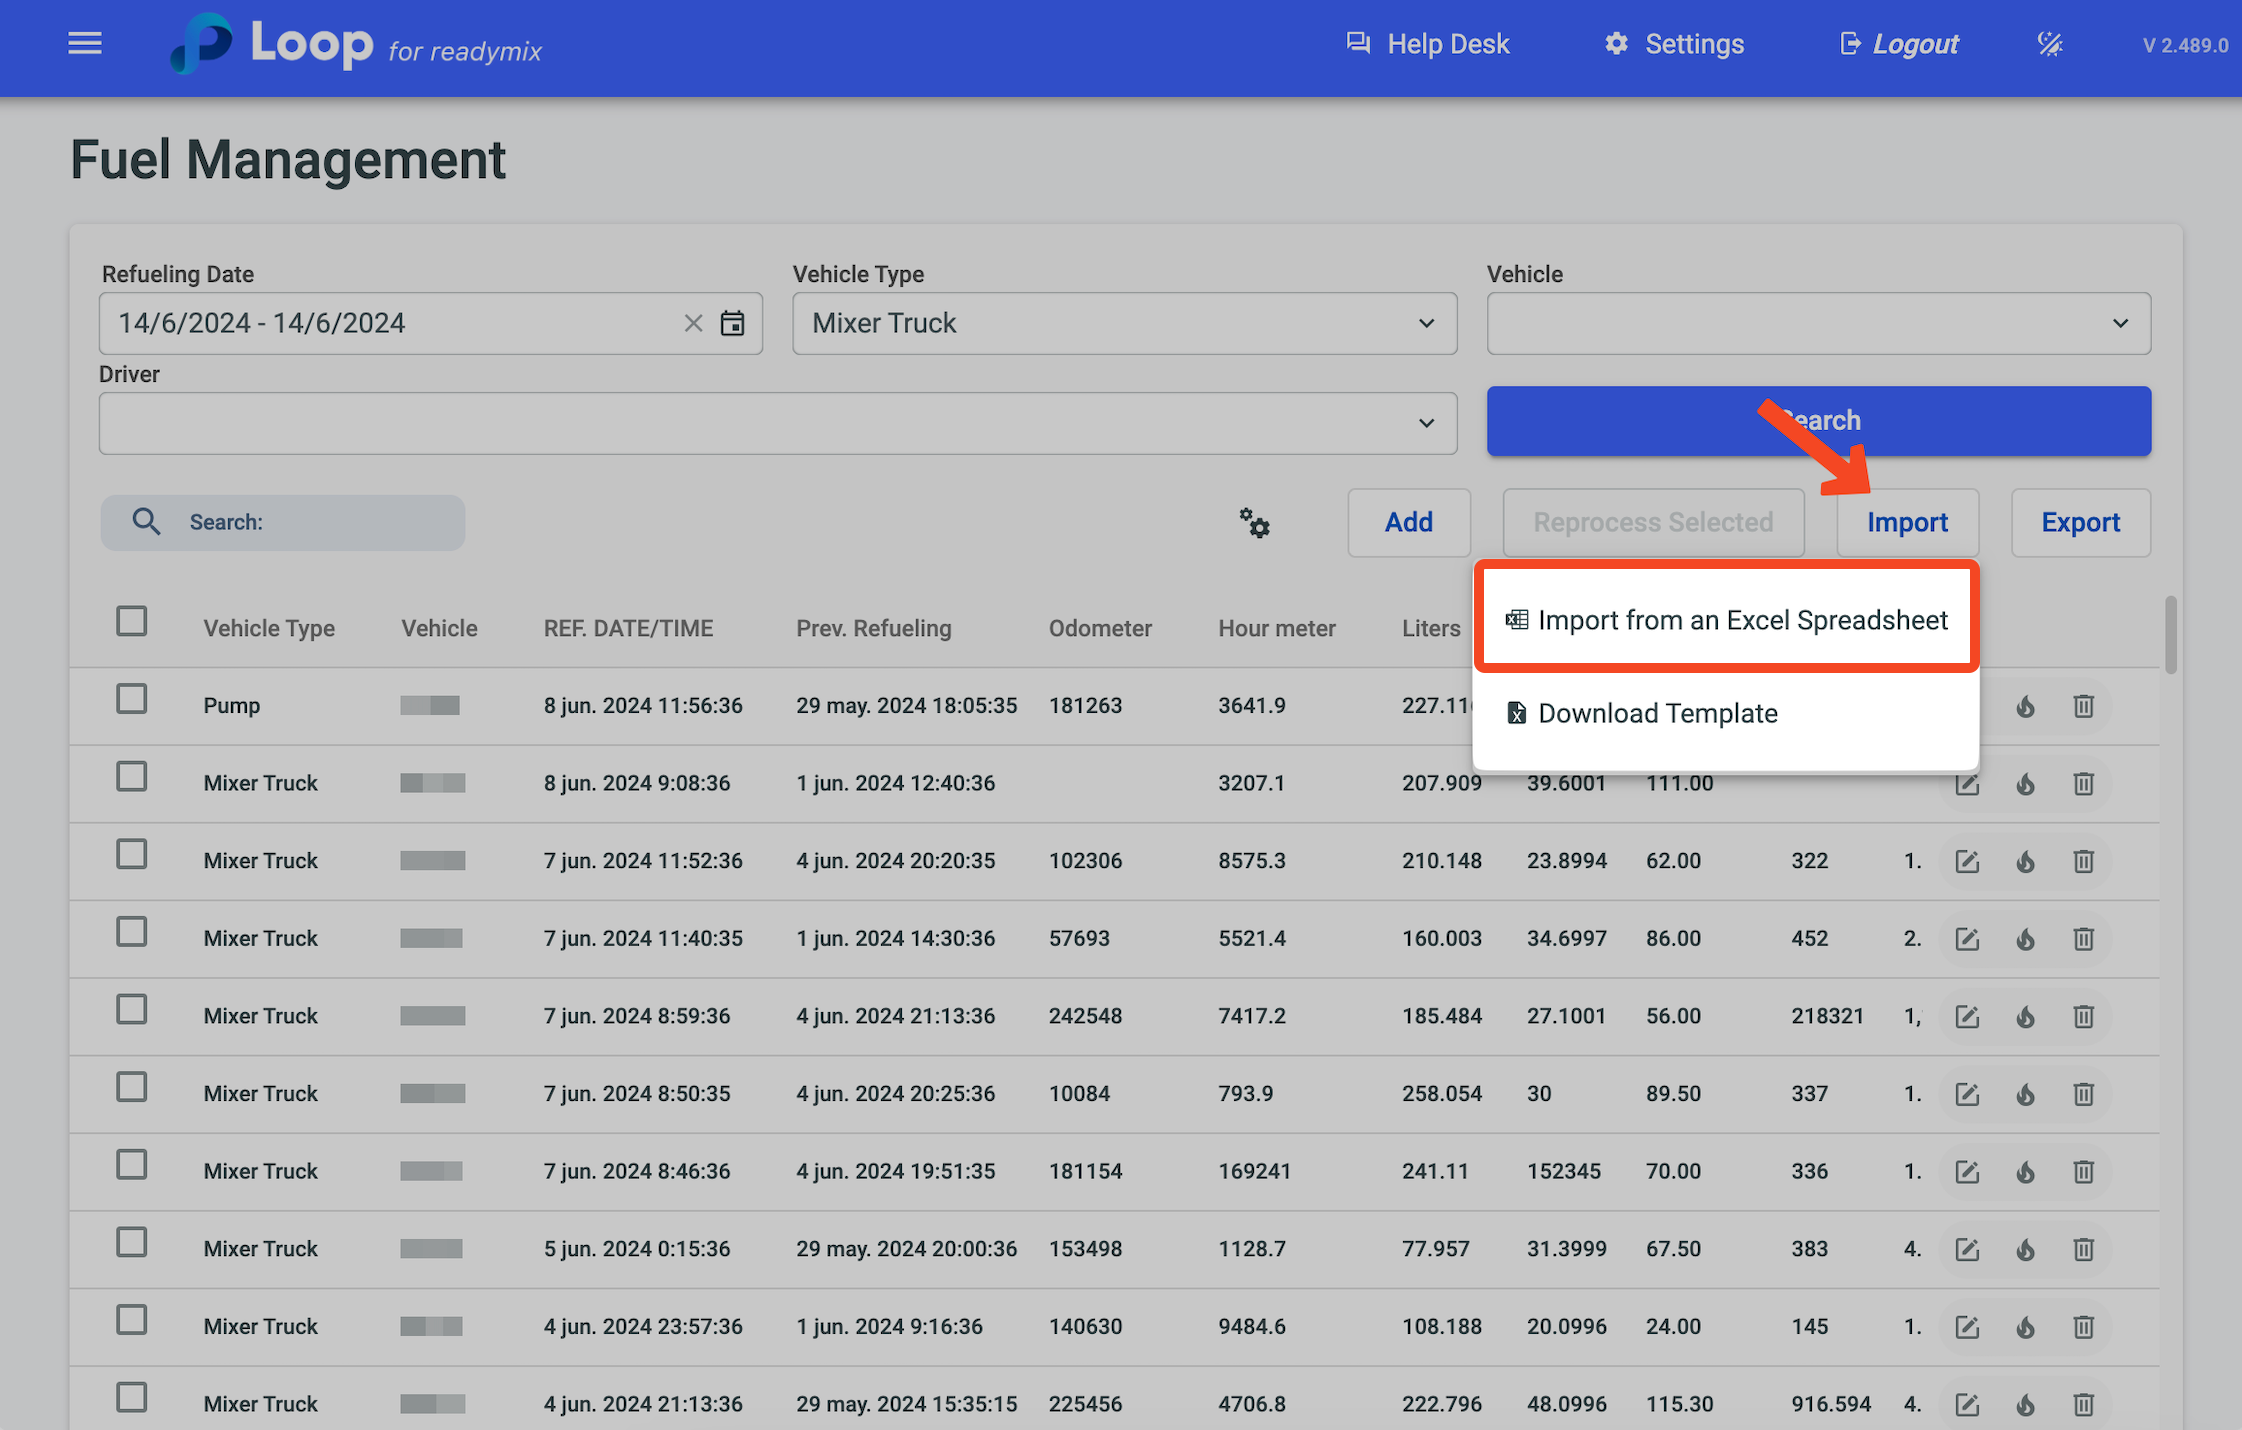
After filling out the spreadsheet with the desired vehicle data and saving it on your computer, return to the Fuel Management screen and click "import" - "Import from an Excel spreadsheet". Then, select the previously filled spreadsheet.
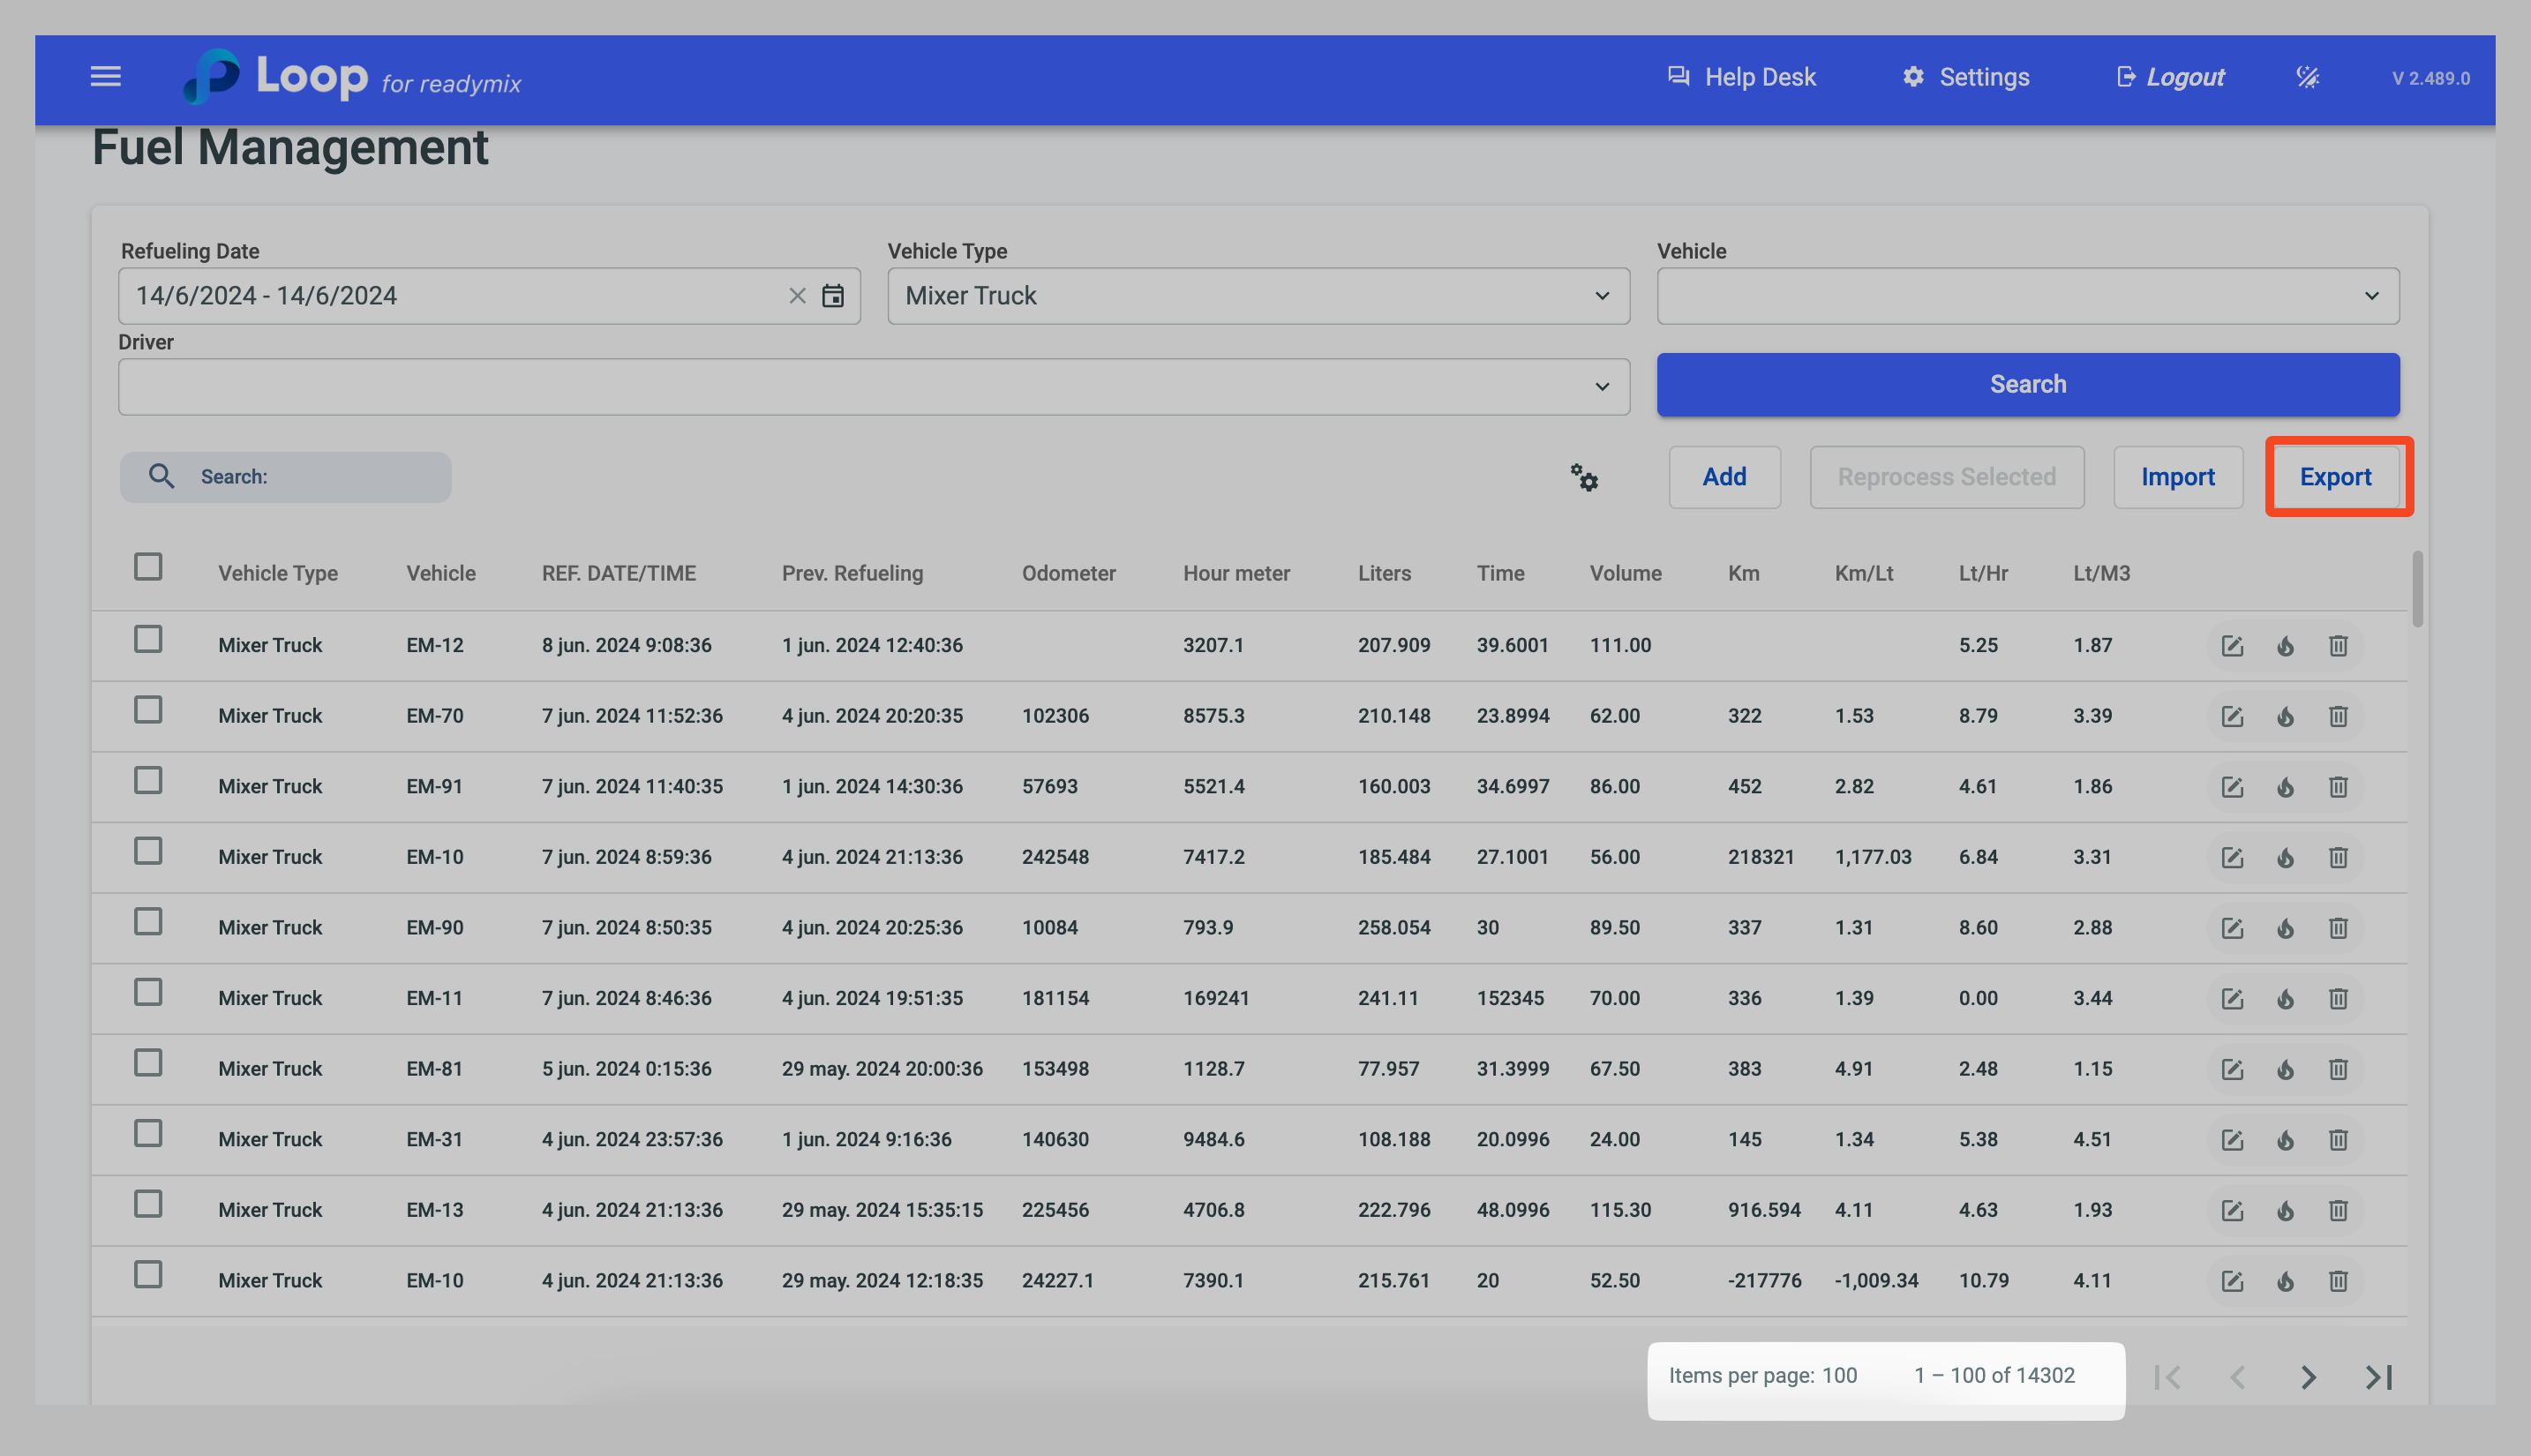
In the Fuel Management module, you can also export an Excel spreadsheet with the recorded Fuel Events. To do this, click Export.

Details: By clicking the details icon of a Fuel Event, you can view/edit its data.
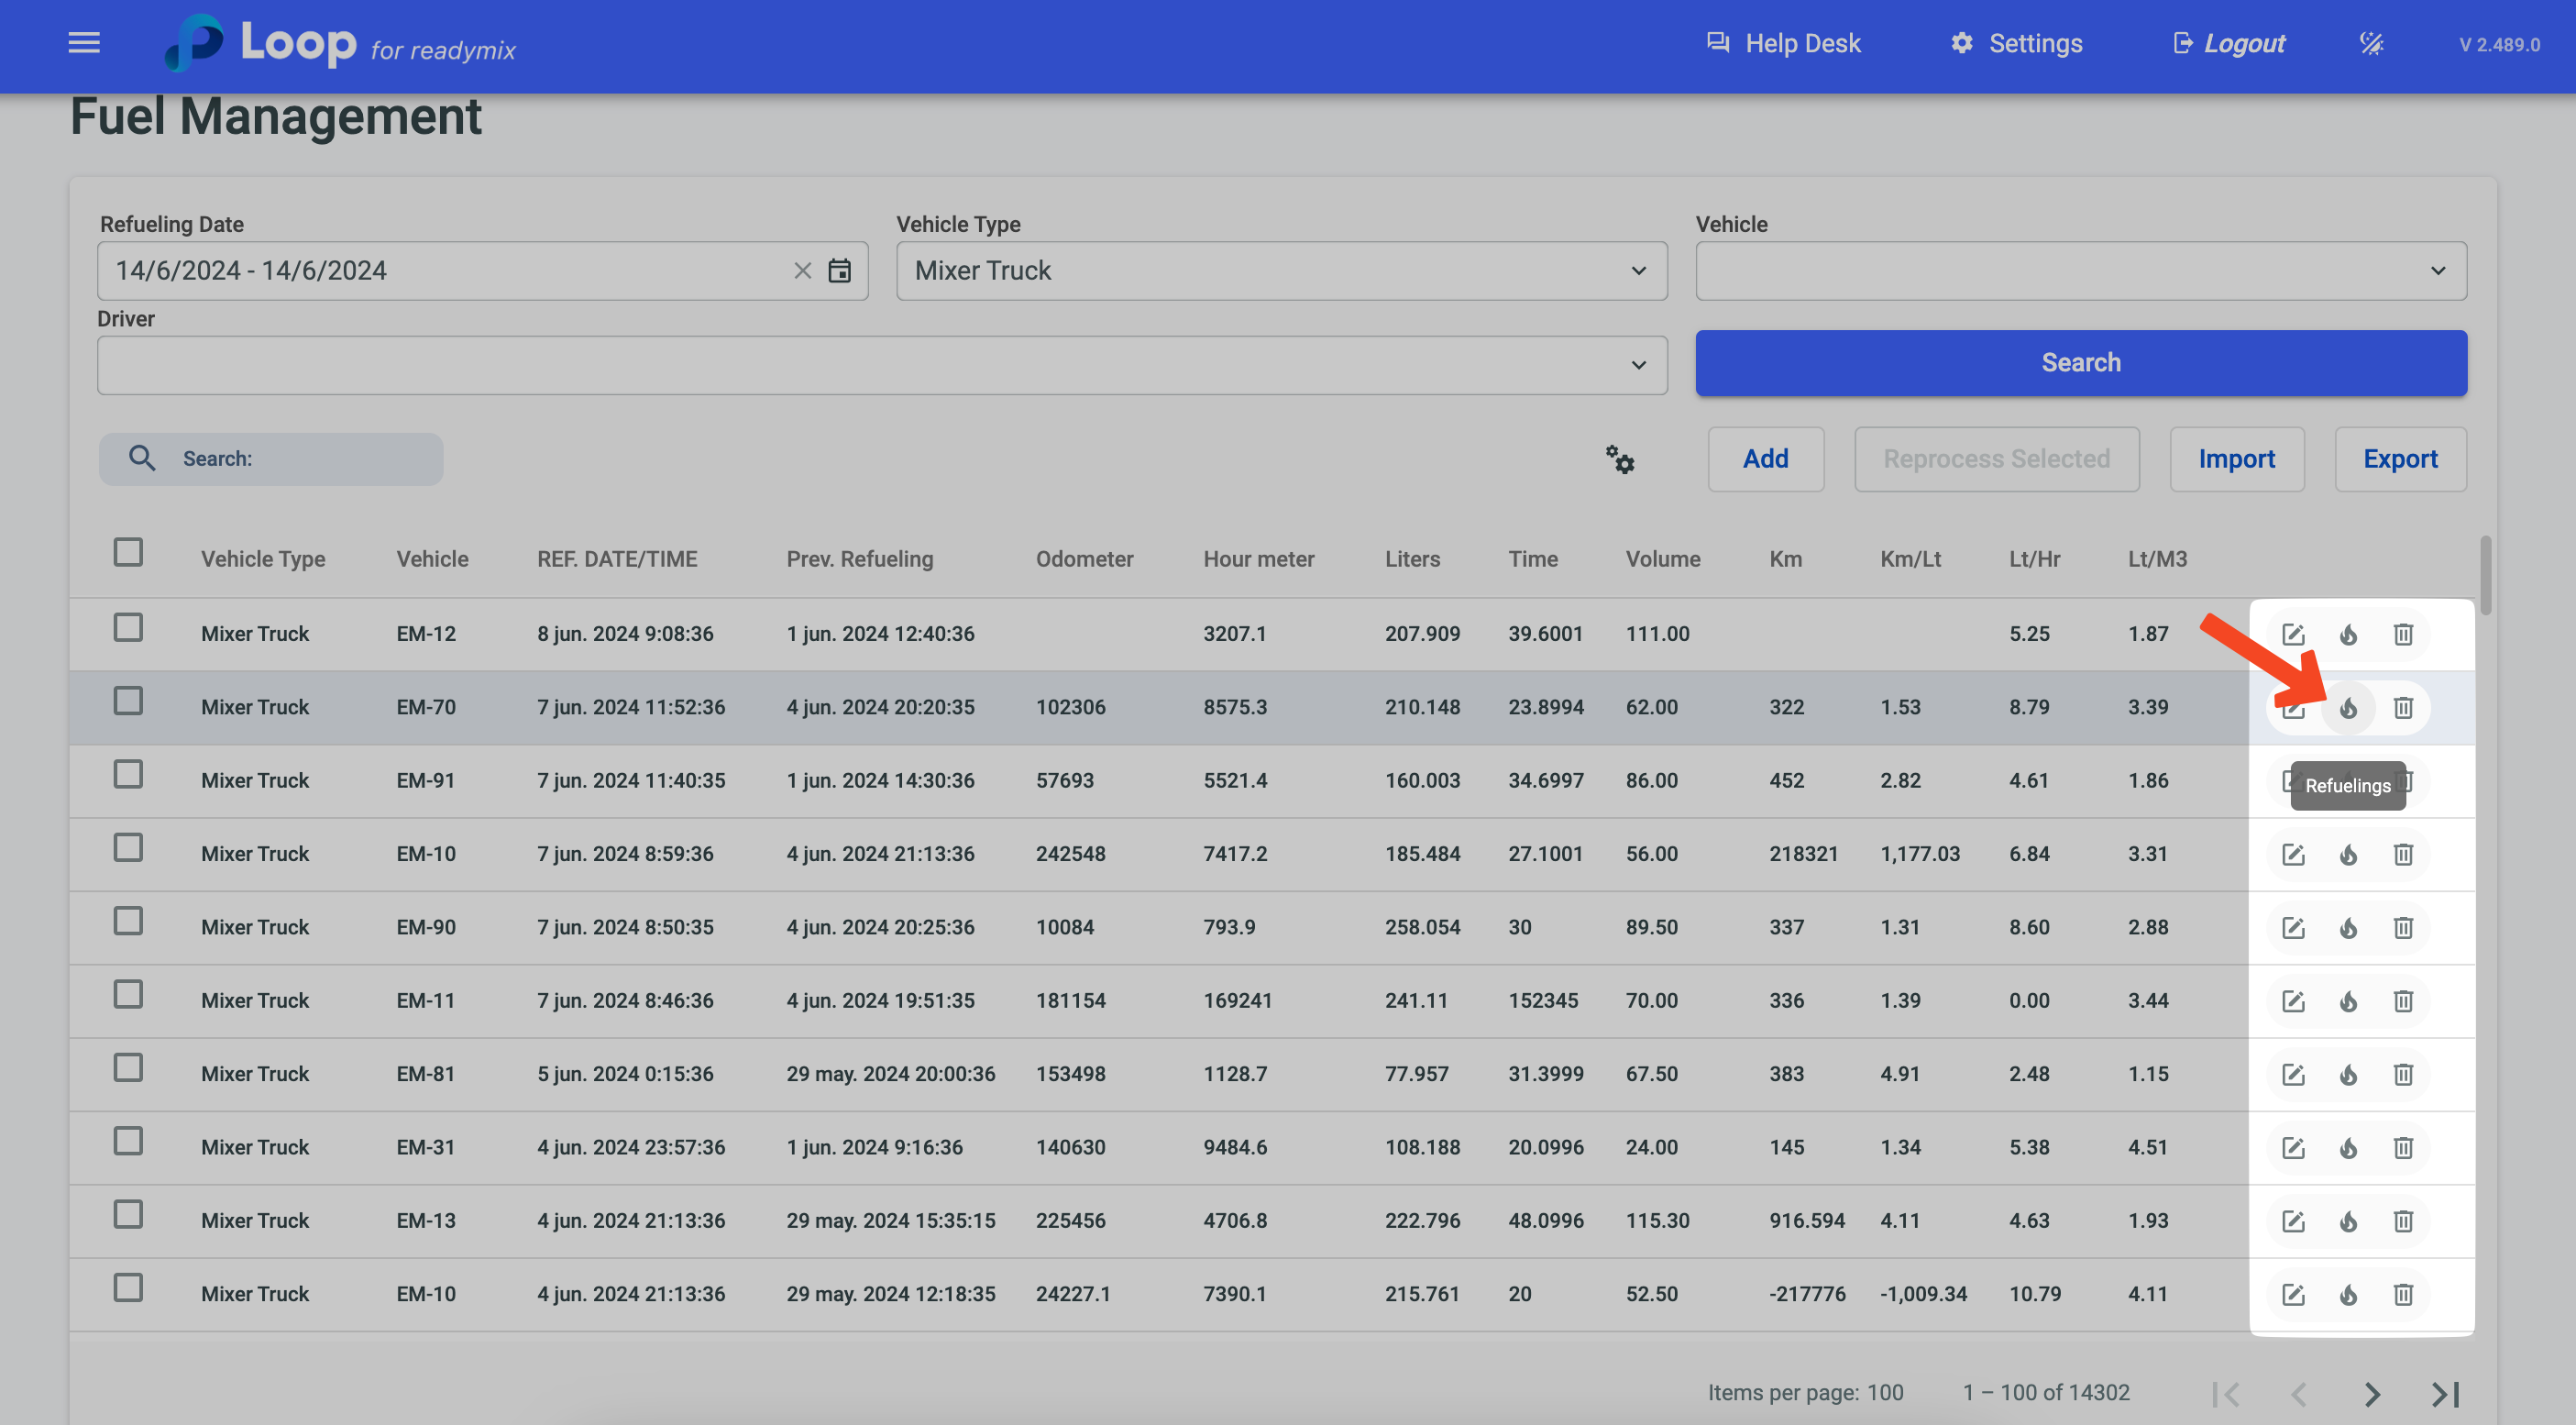
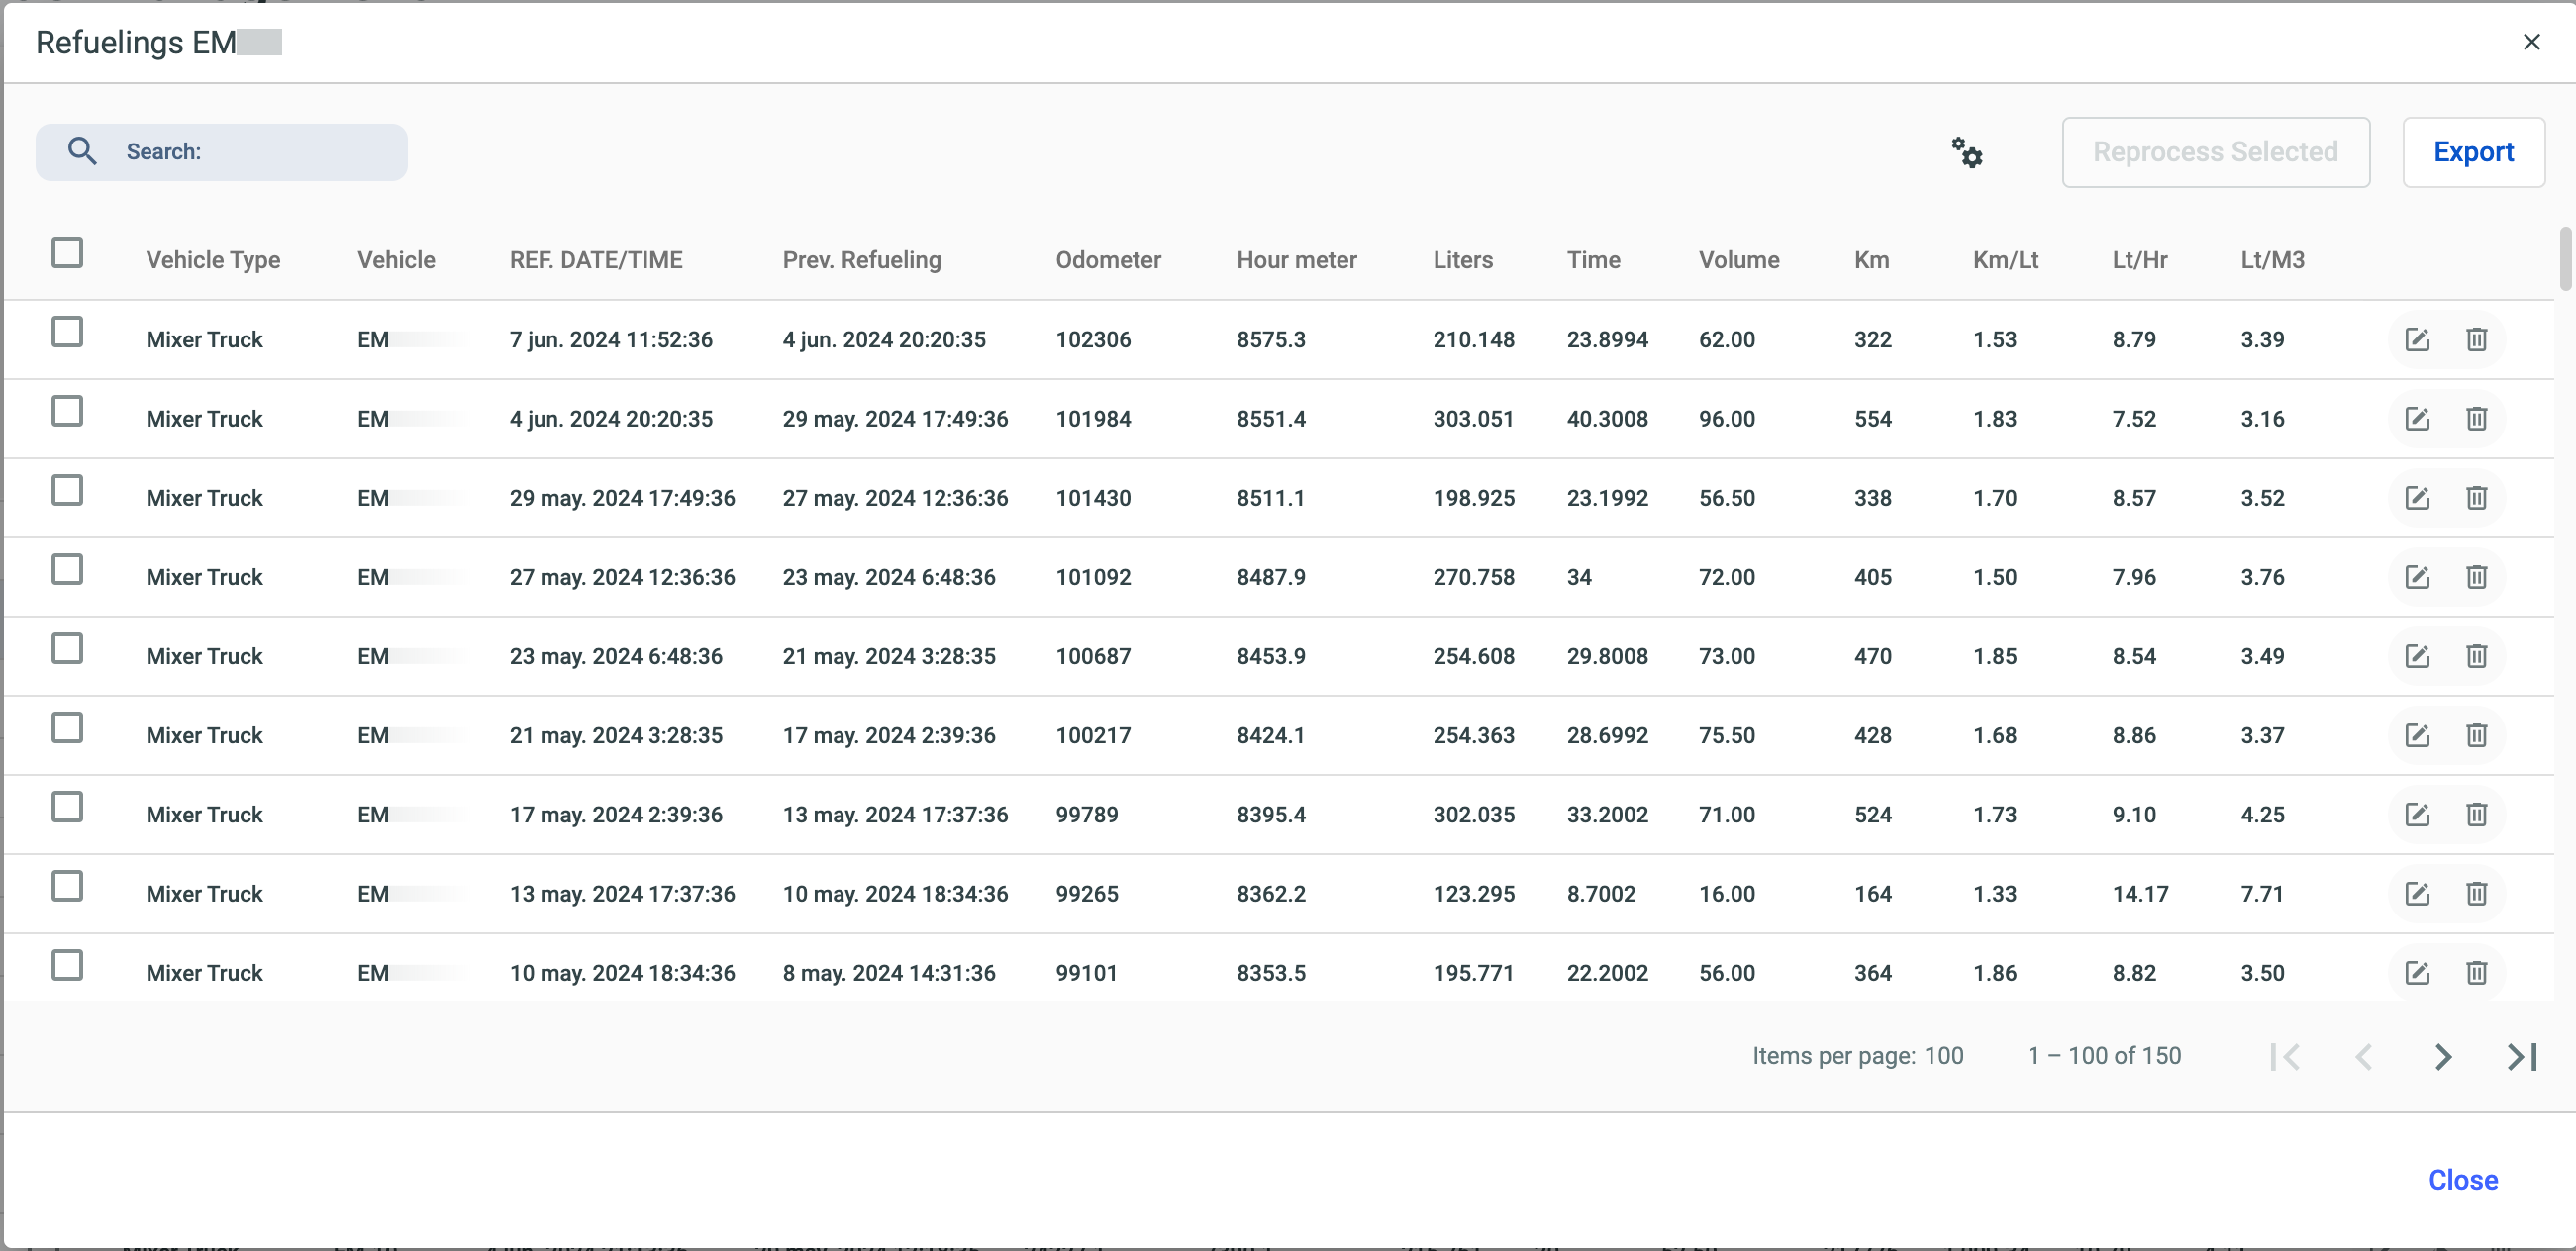
Refuelings: Through this icon, you can check the fuel events of the selected vehicle.
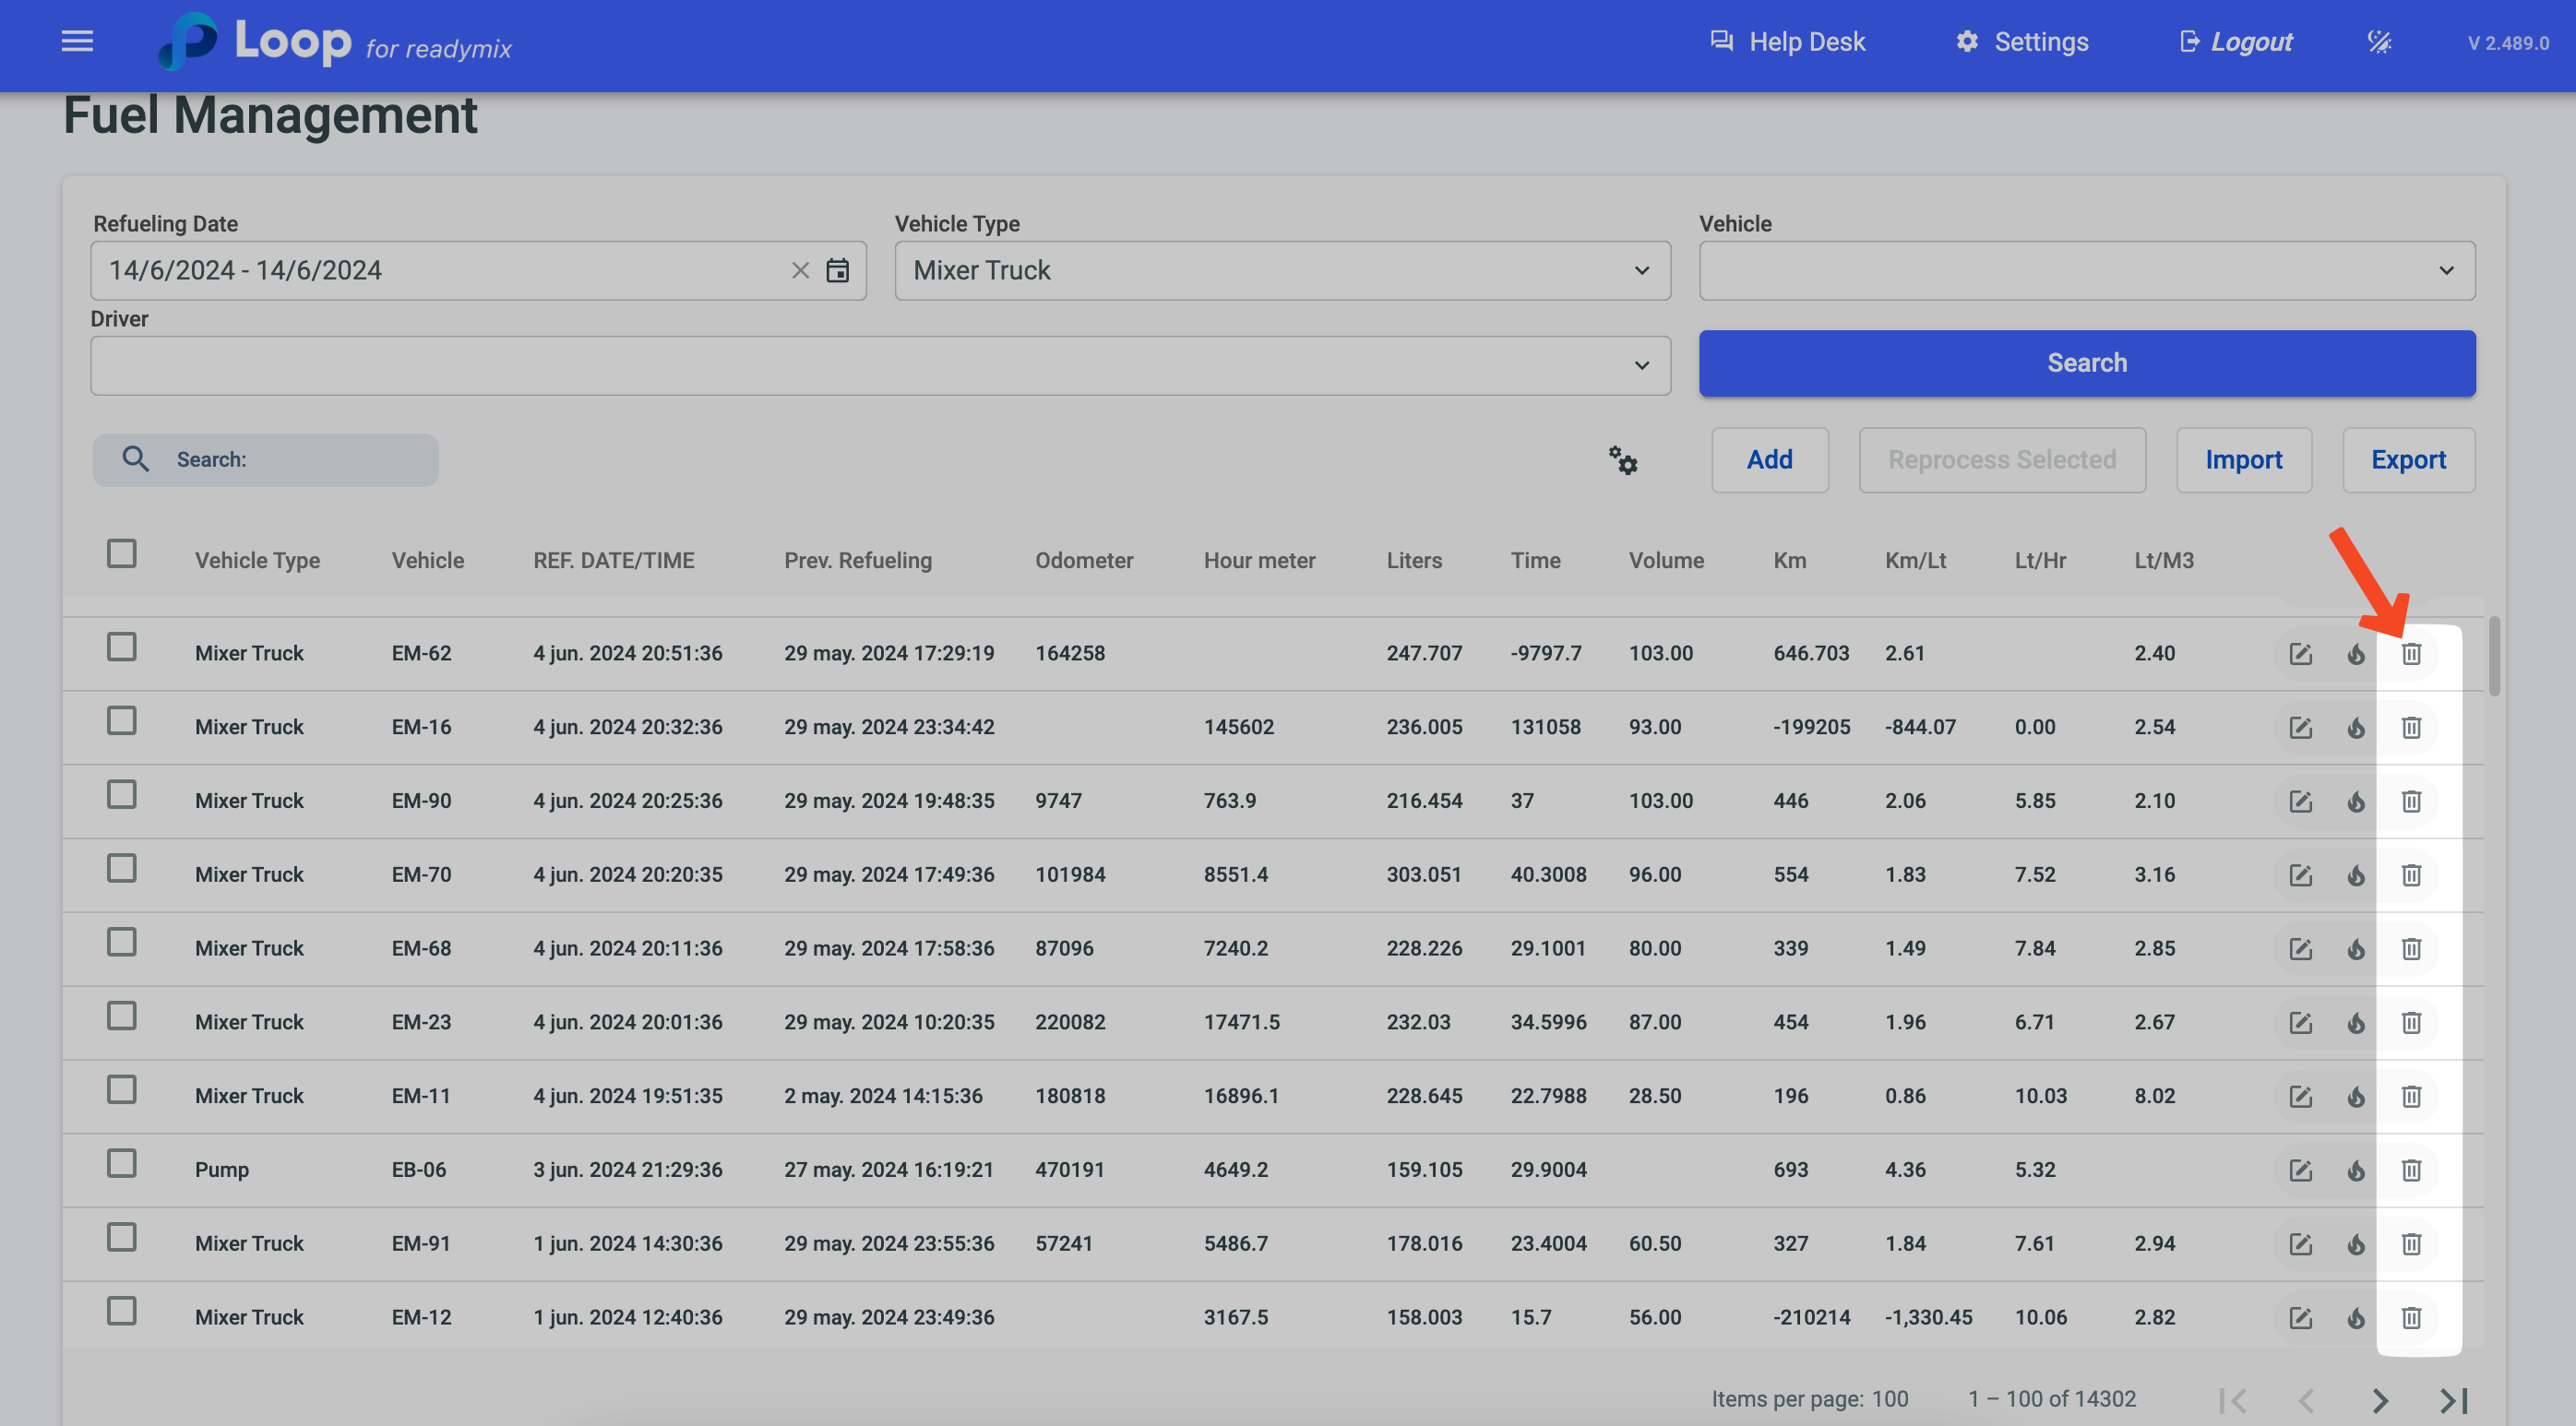
Remove Refueling: By clicking this icon, you can delete the selected fuel event.
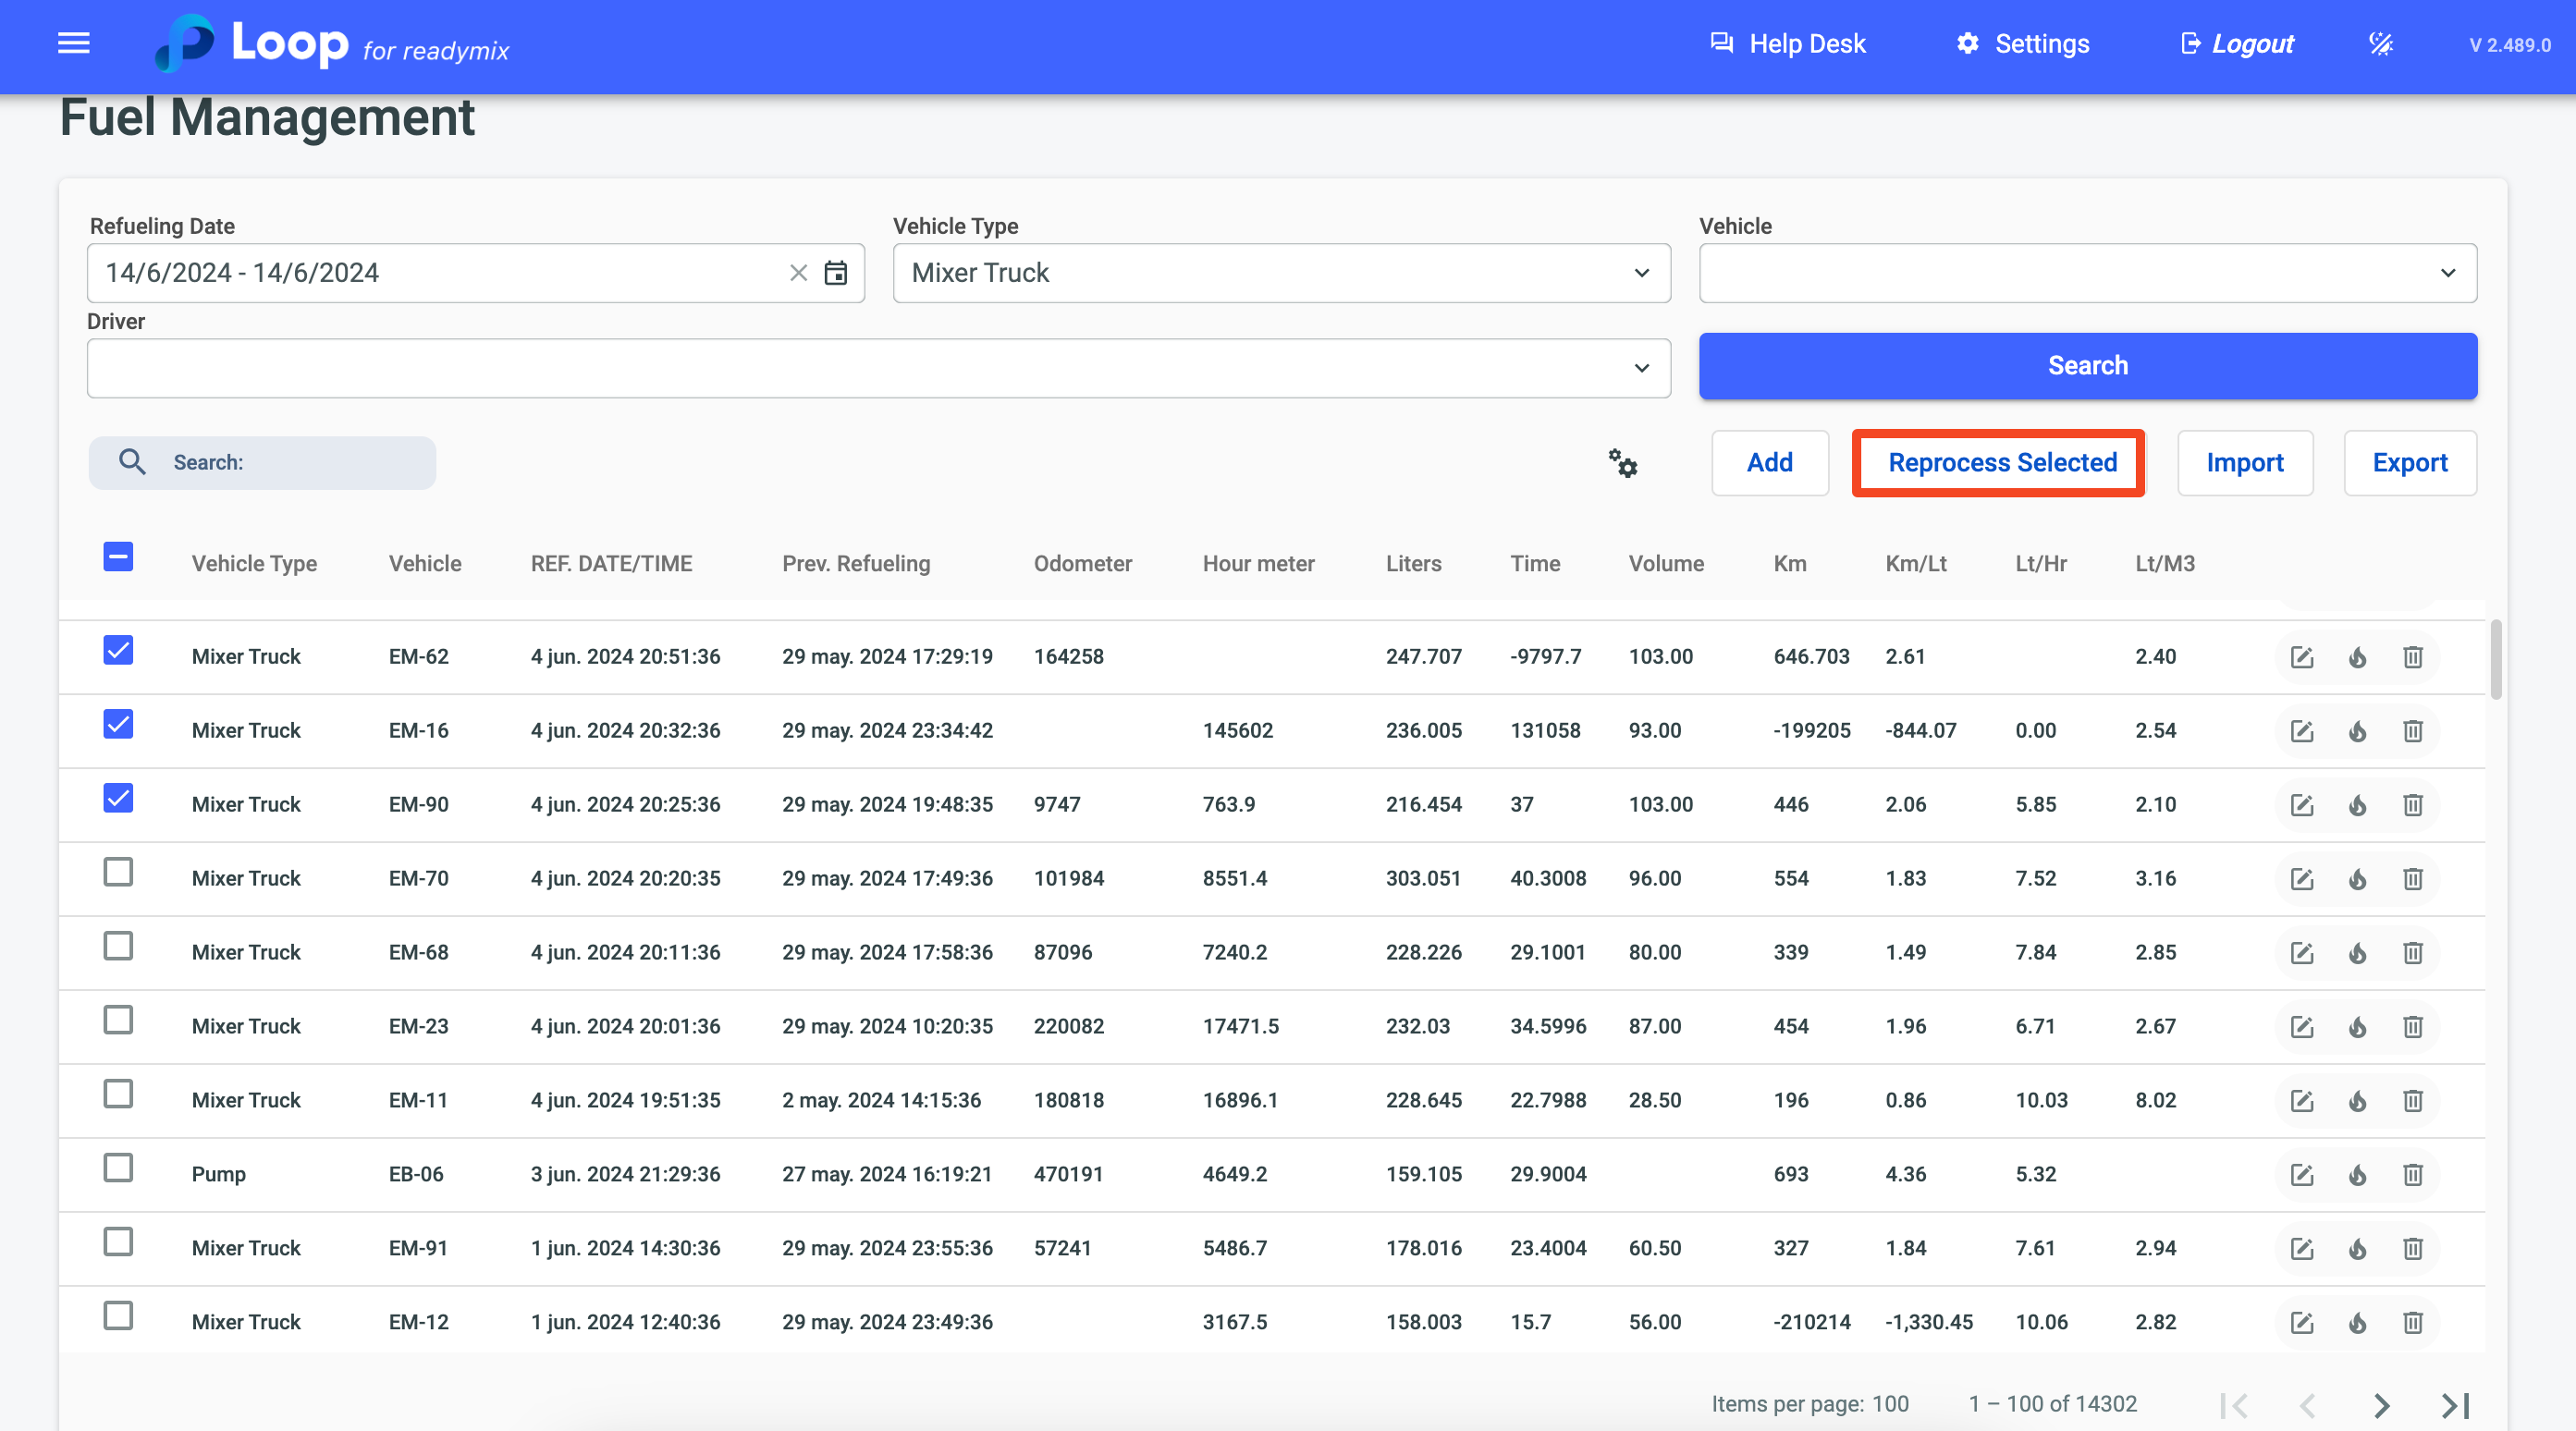
The "Reprocess Selected" button allows you to reprocess the data of the selected refuelings. By clicking this button, the system recalculates and updates the information on distance traveled, time, Km/liter, and liters/hour for the selected vehicles using the most updated data available. This ensures that all information is current and accurate, correcting any inconsistencies or incorrect data that may have been previously recorded.