The Orders functionality plays an essential role in the registration and monitoring of customer requests. Through it, it is possible to record, in an organized way, all orders placed. In addition, it offers a clear and accessible view of the entire order history, making it easy to monitor status and manage the workflow effectively.
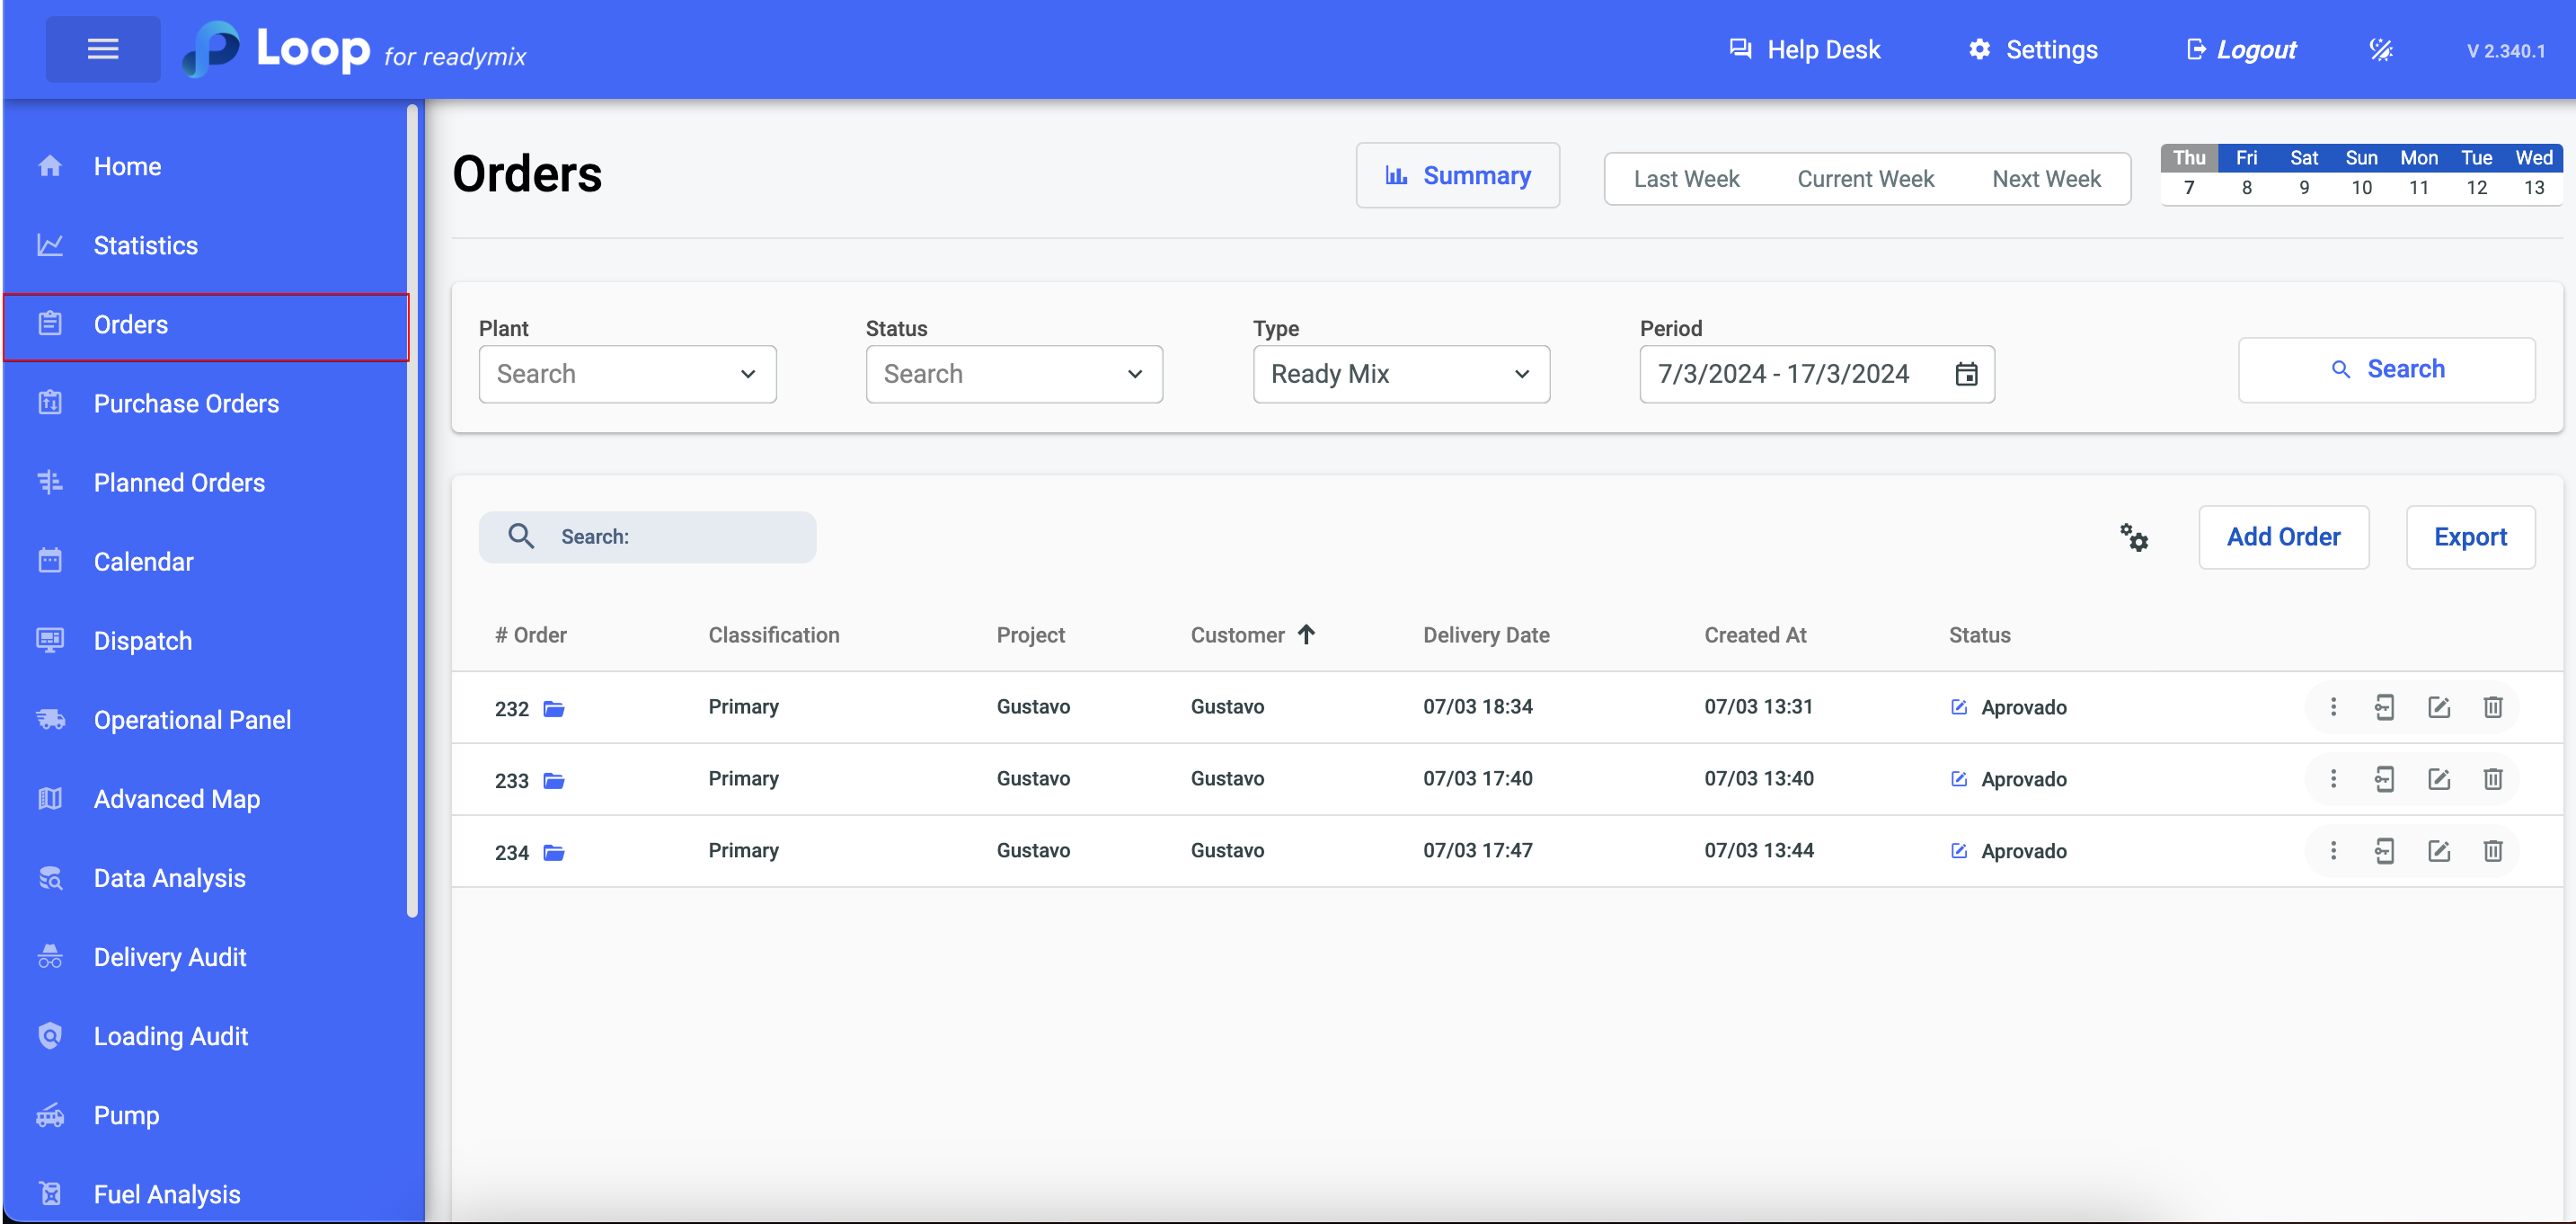
Open the menu on the left side of the screen and select "Orders."
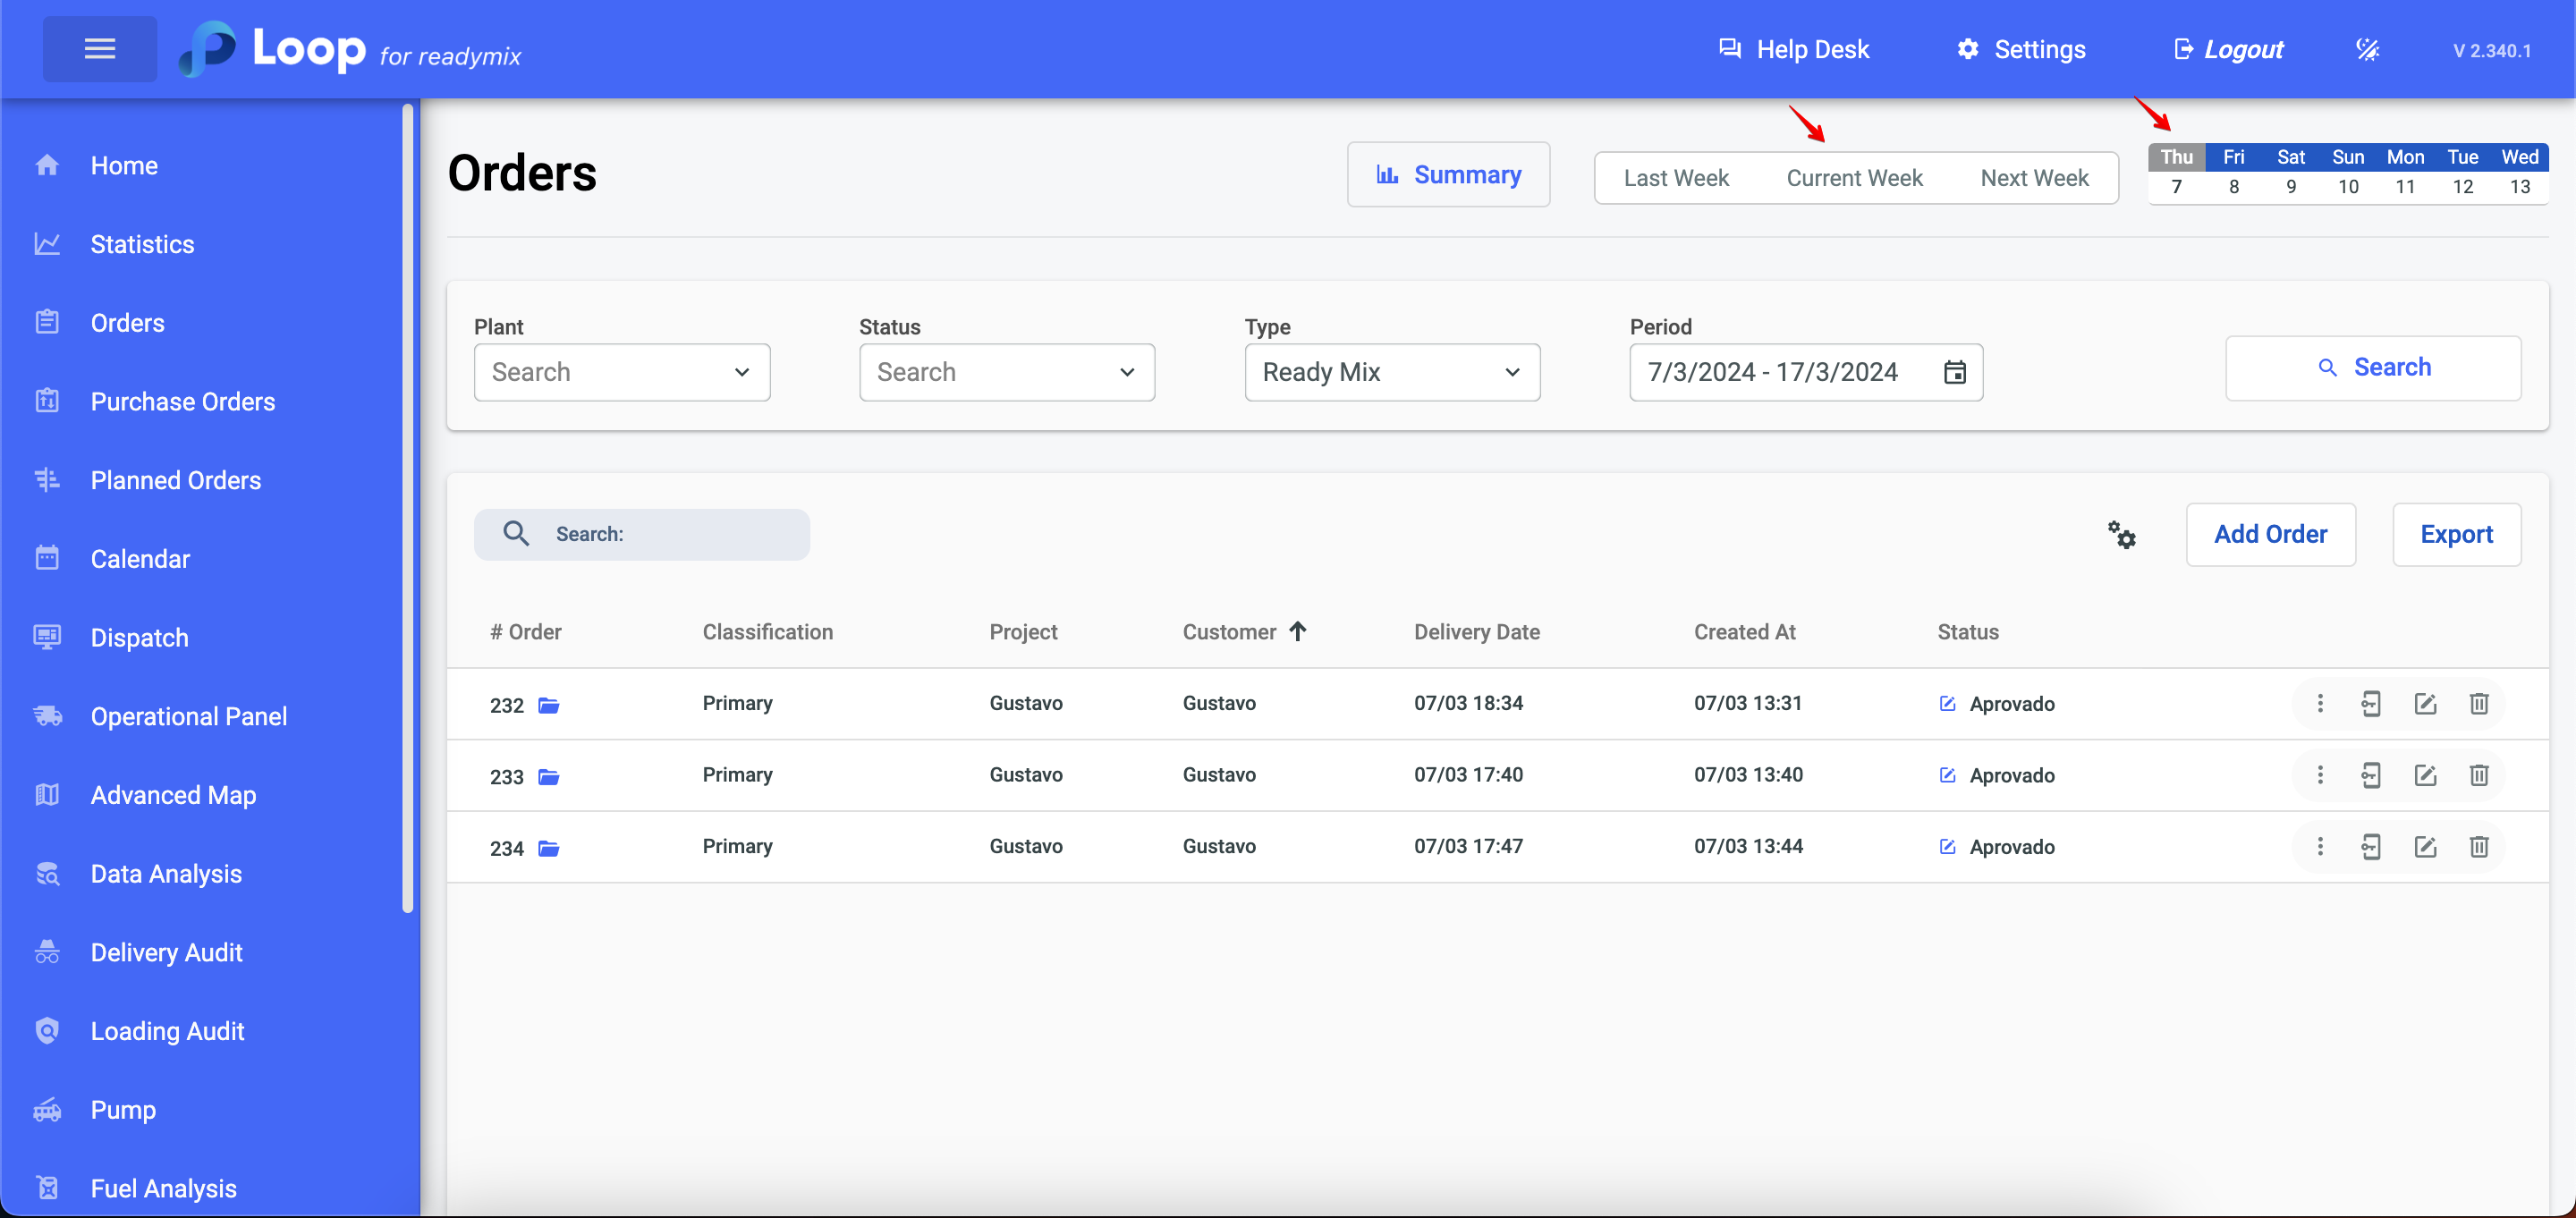
In the orders section, you can filter orders by weekly options and also by days of the week to facilitate your search.
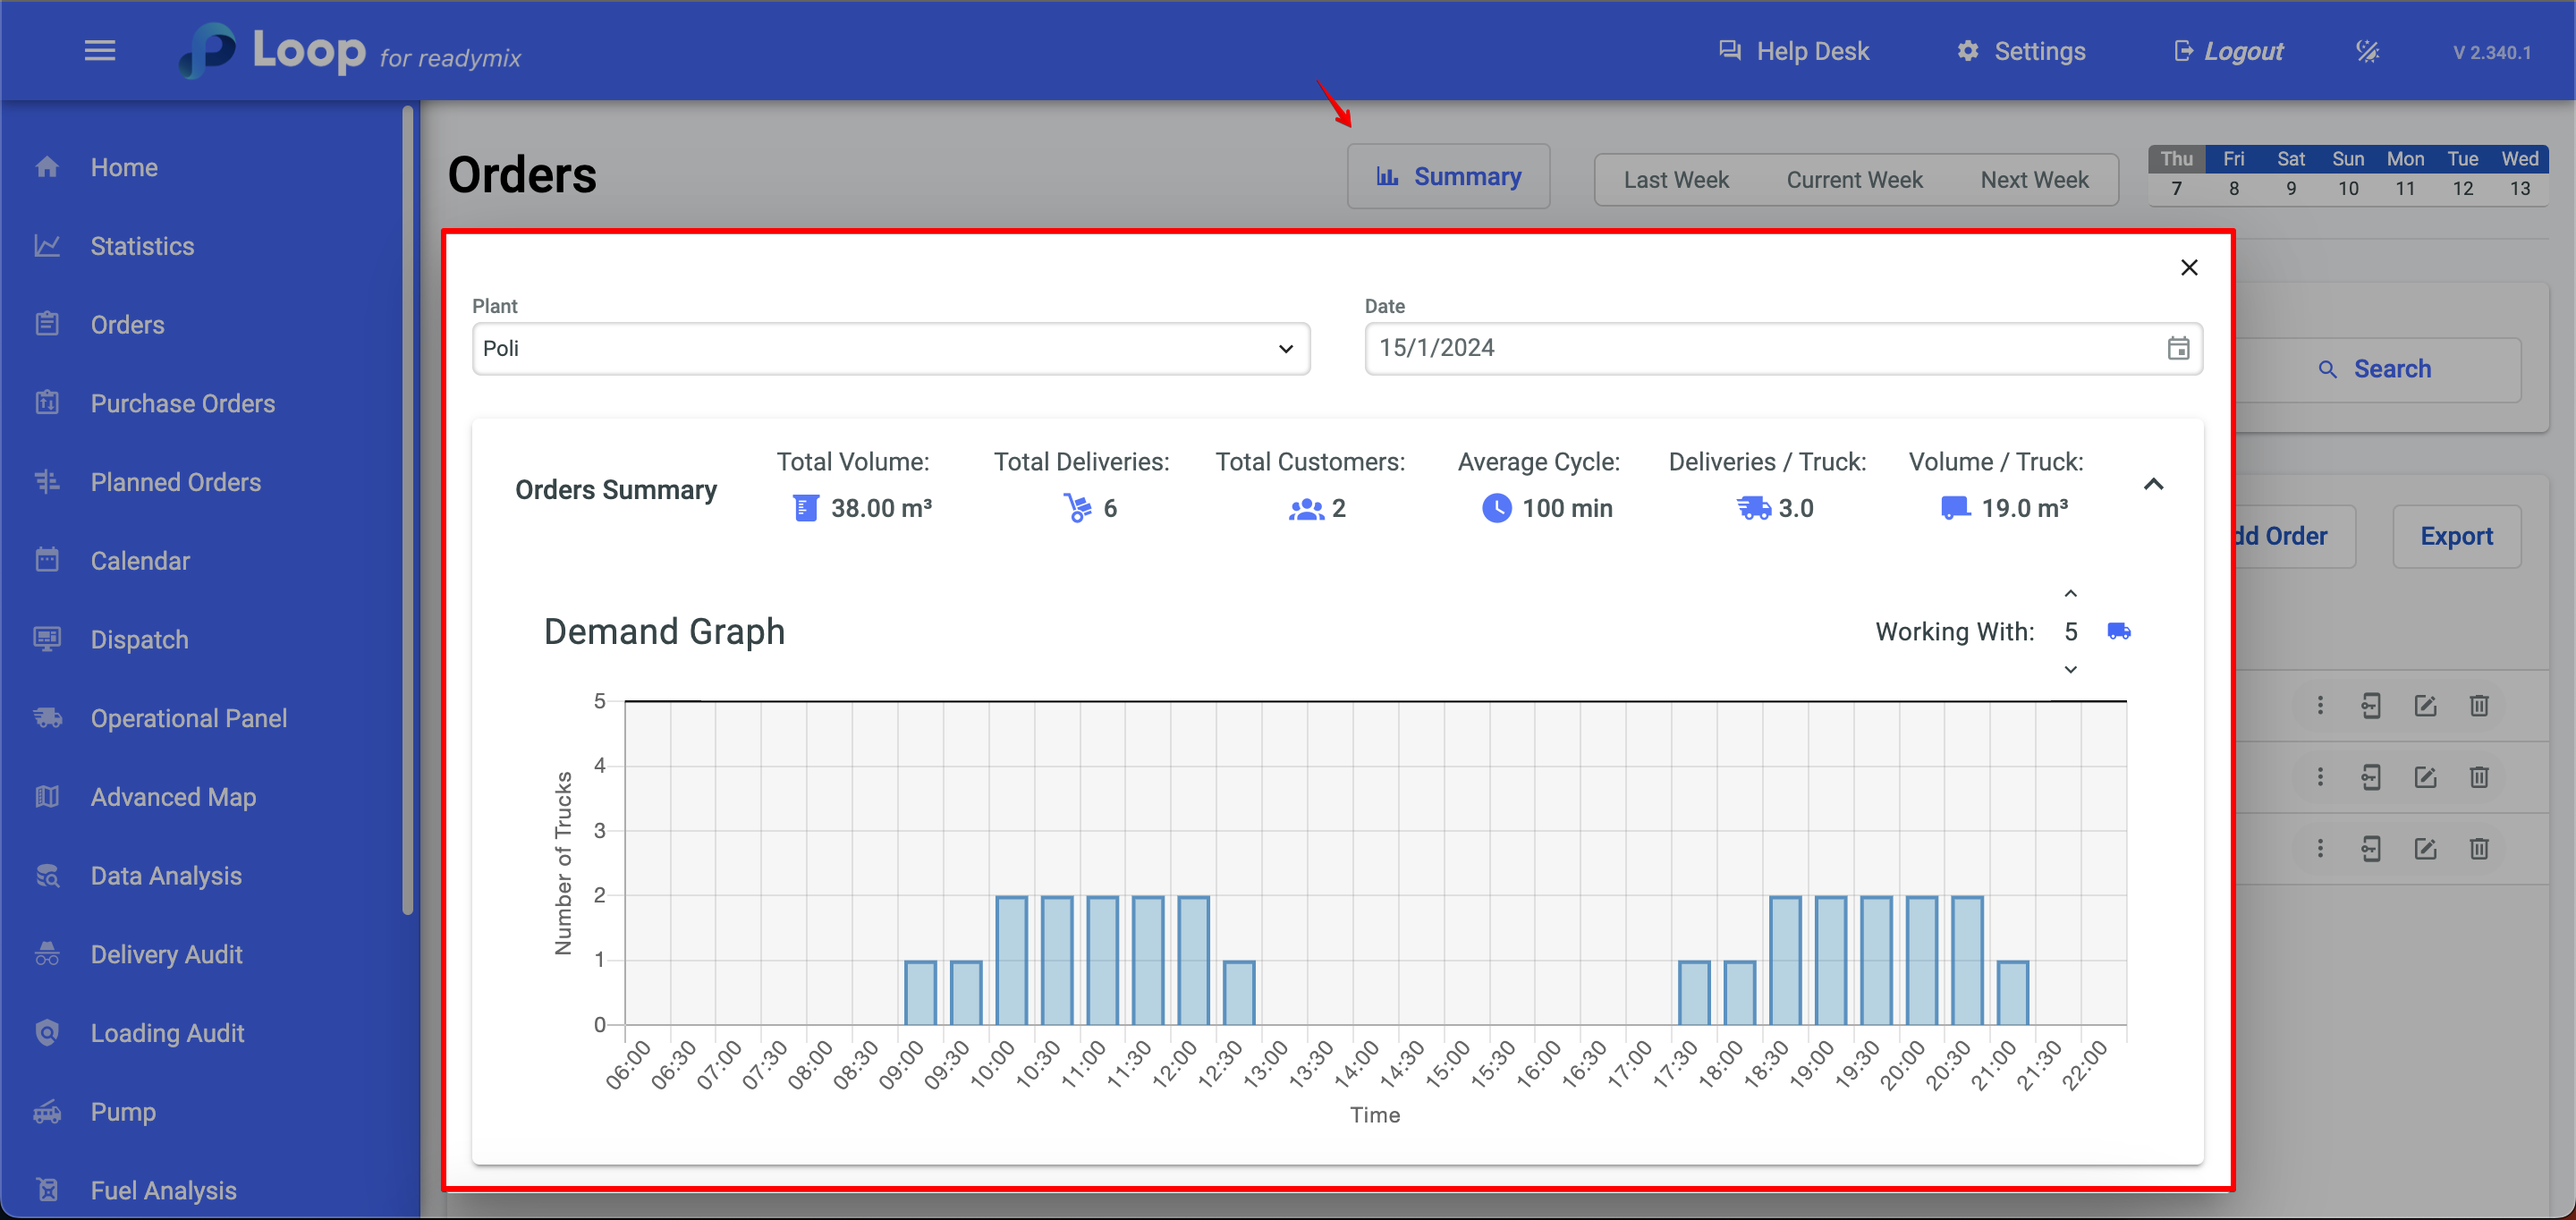
You can also view a summary of orders scheduled for a specific day. In the example below, we observe that on 07/05/2023, only one vehicle will be needed to work on the installation at a specific time.
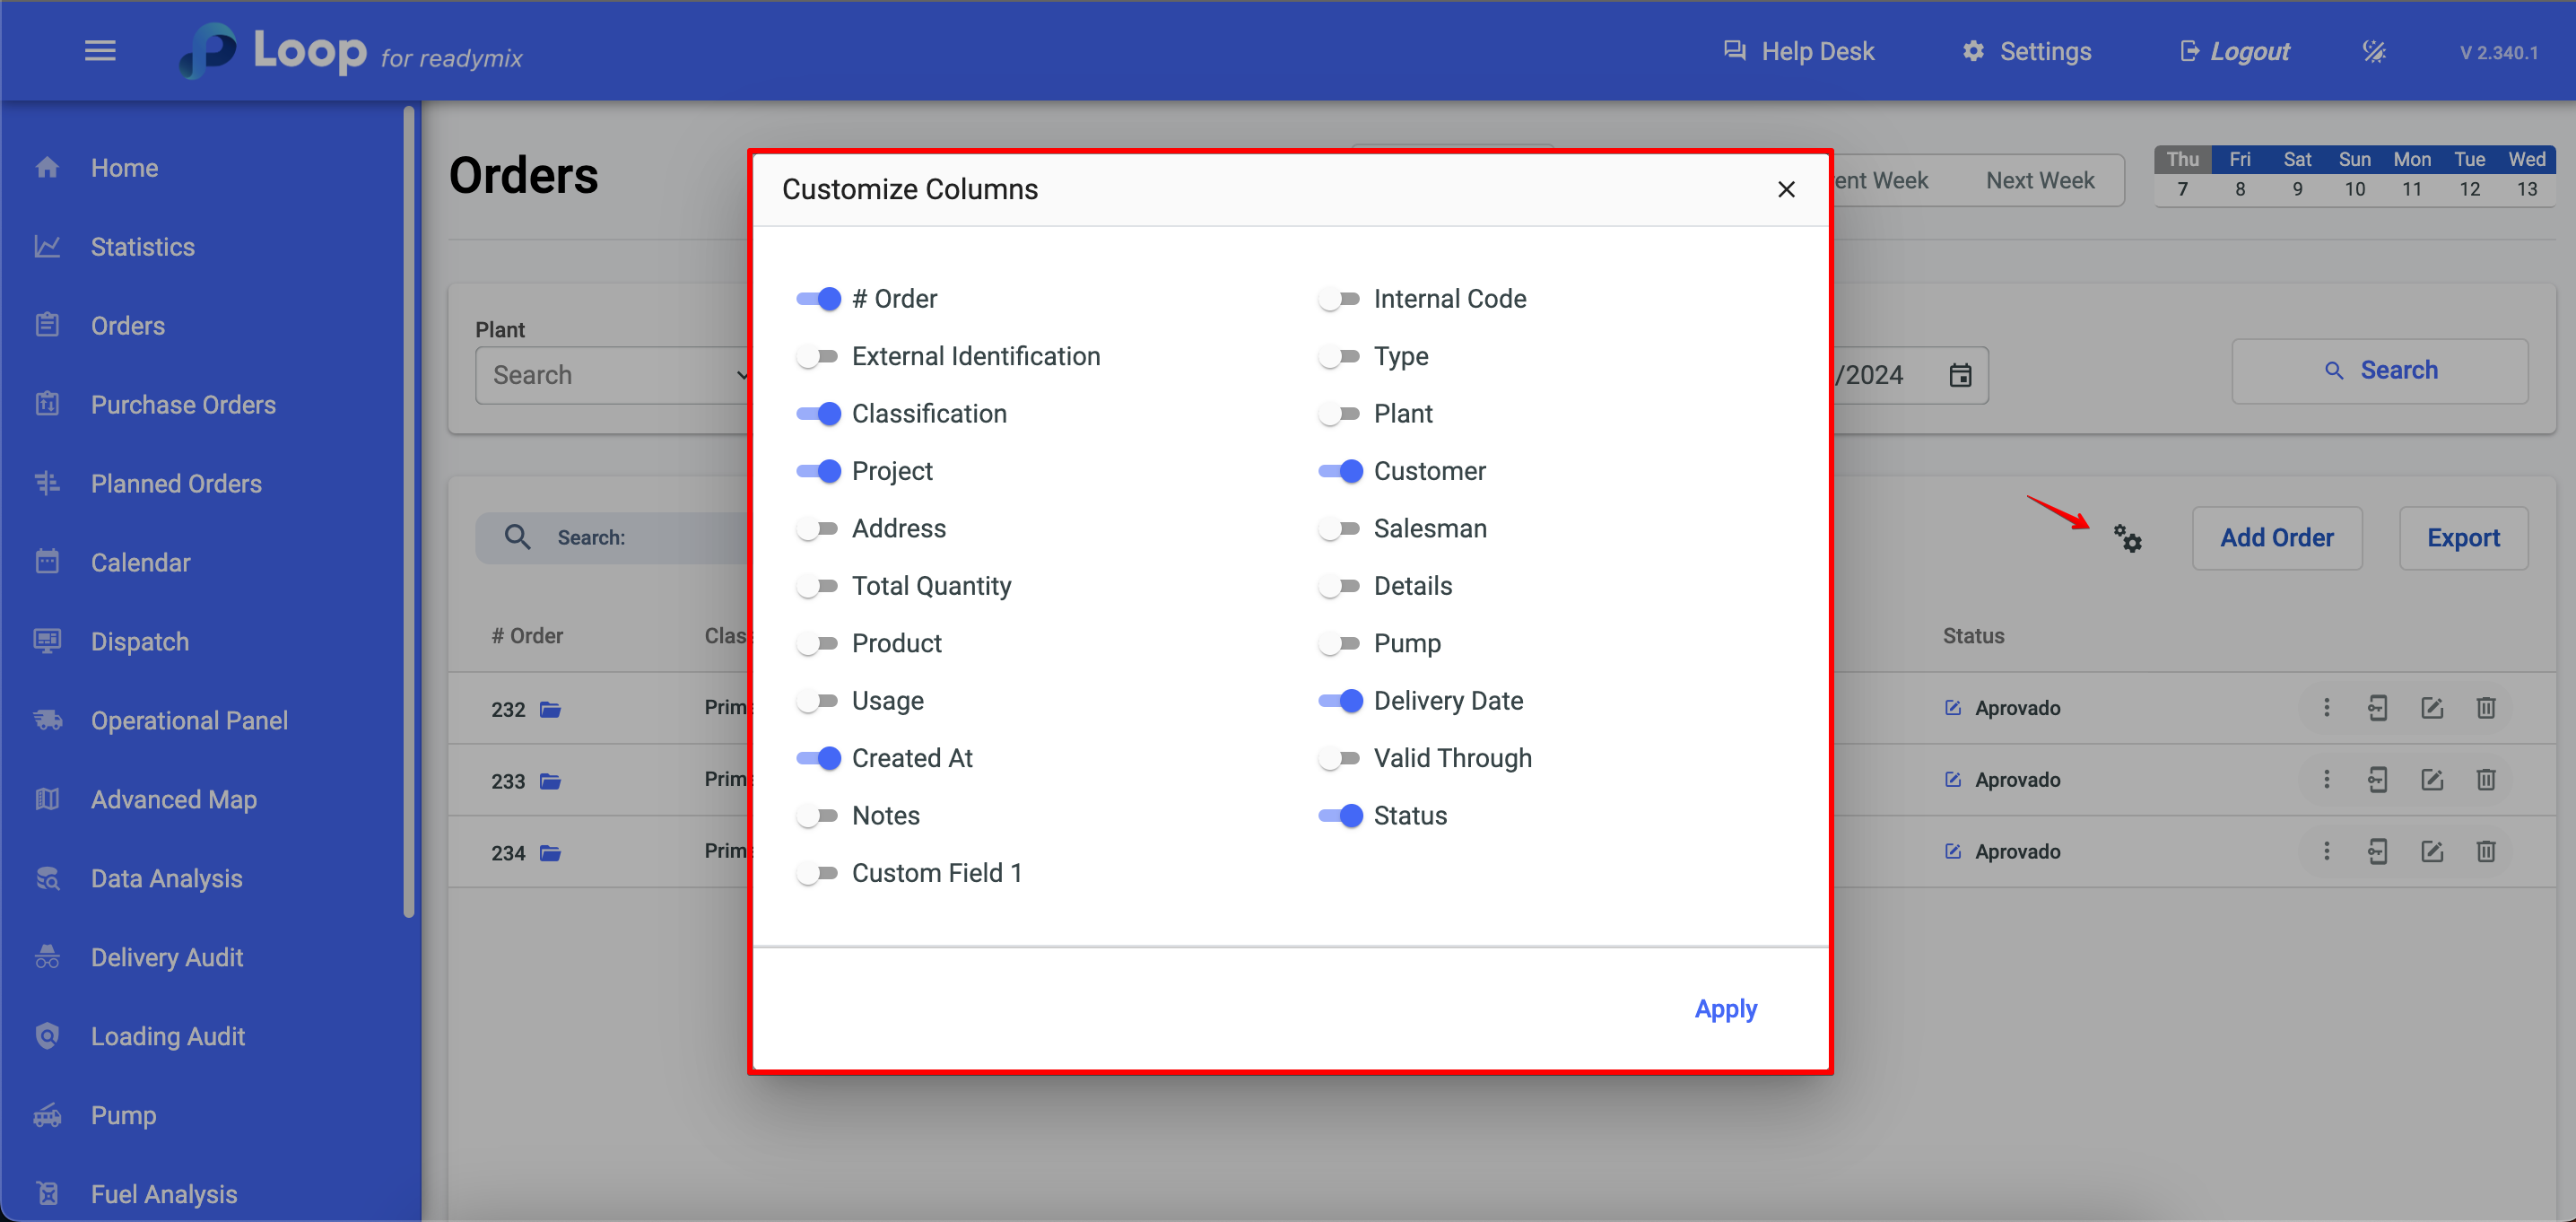
You can also customize the columns you want to see on the orders screen.
On the right corner of the screen, you'll find an icon represented by three dots, which offers the following options: Print Order, Status History, and Schedules.
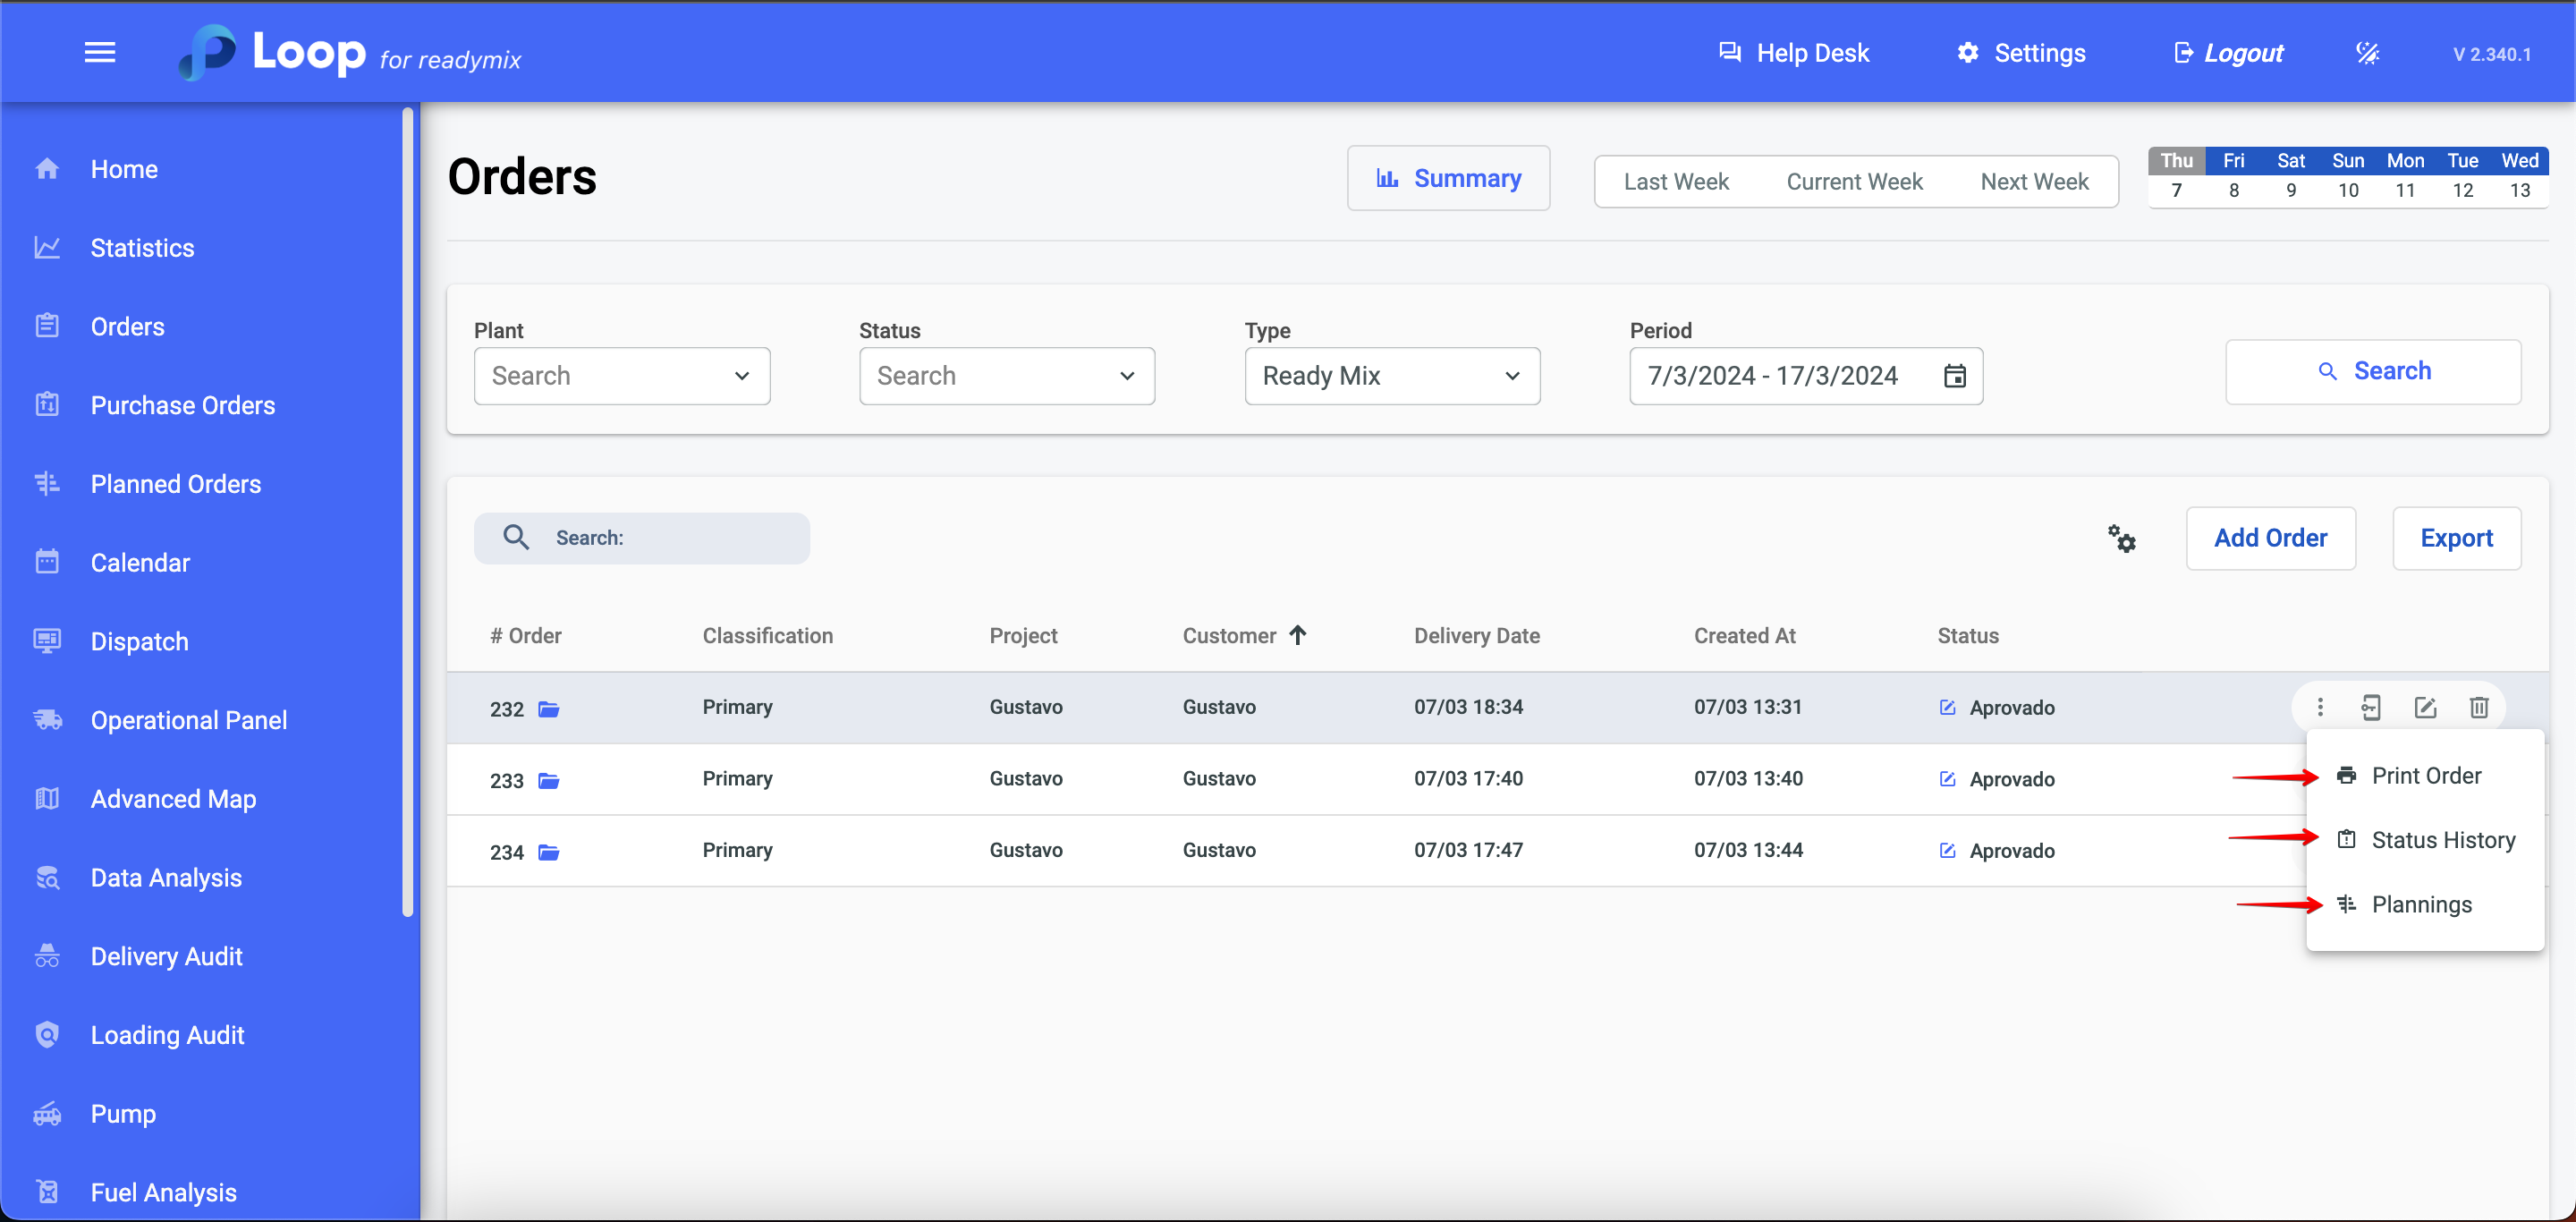
Print Order: Generates a file with all the detailed information of the order.
Status History: Shows which modifications have already occurred in the order's status.
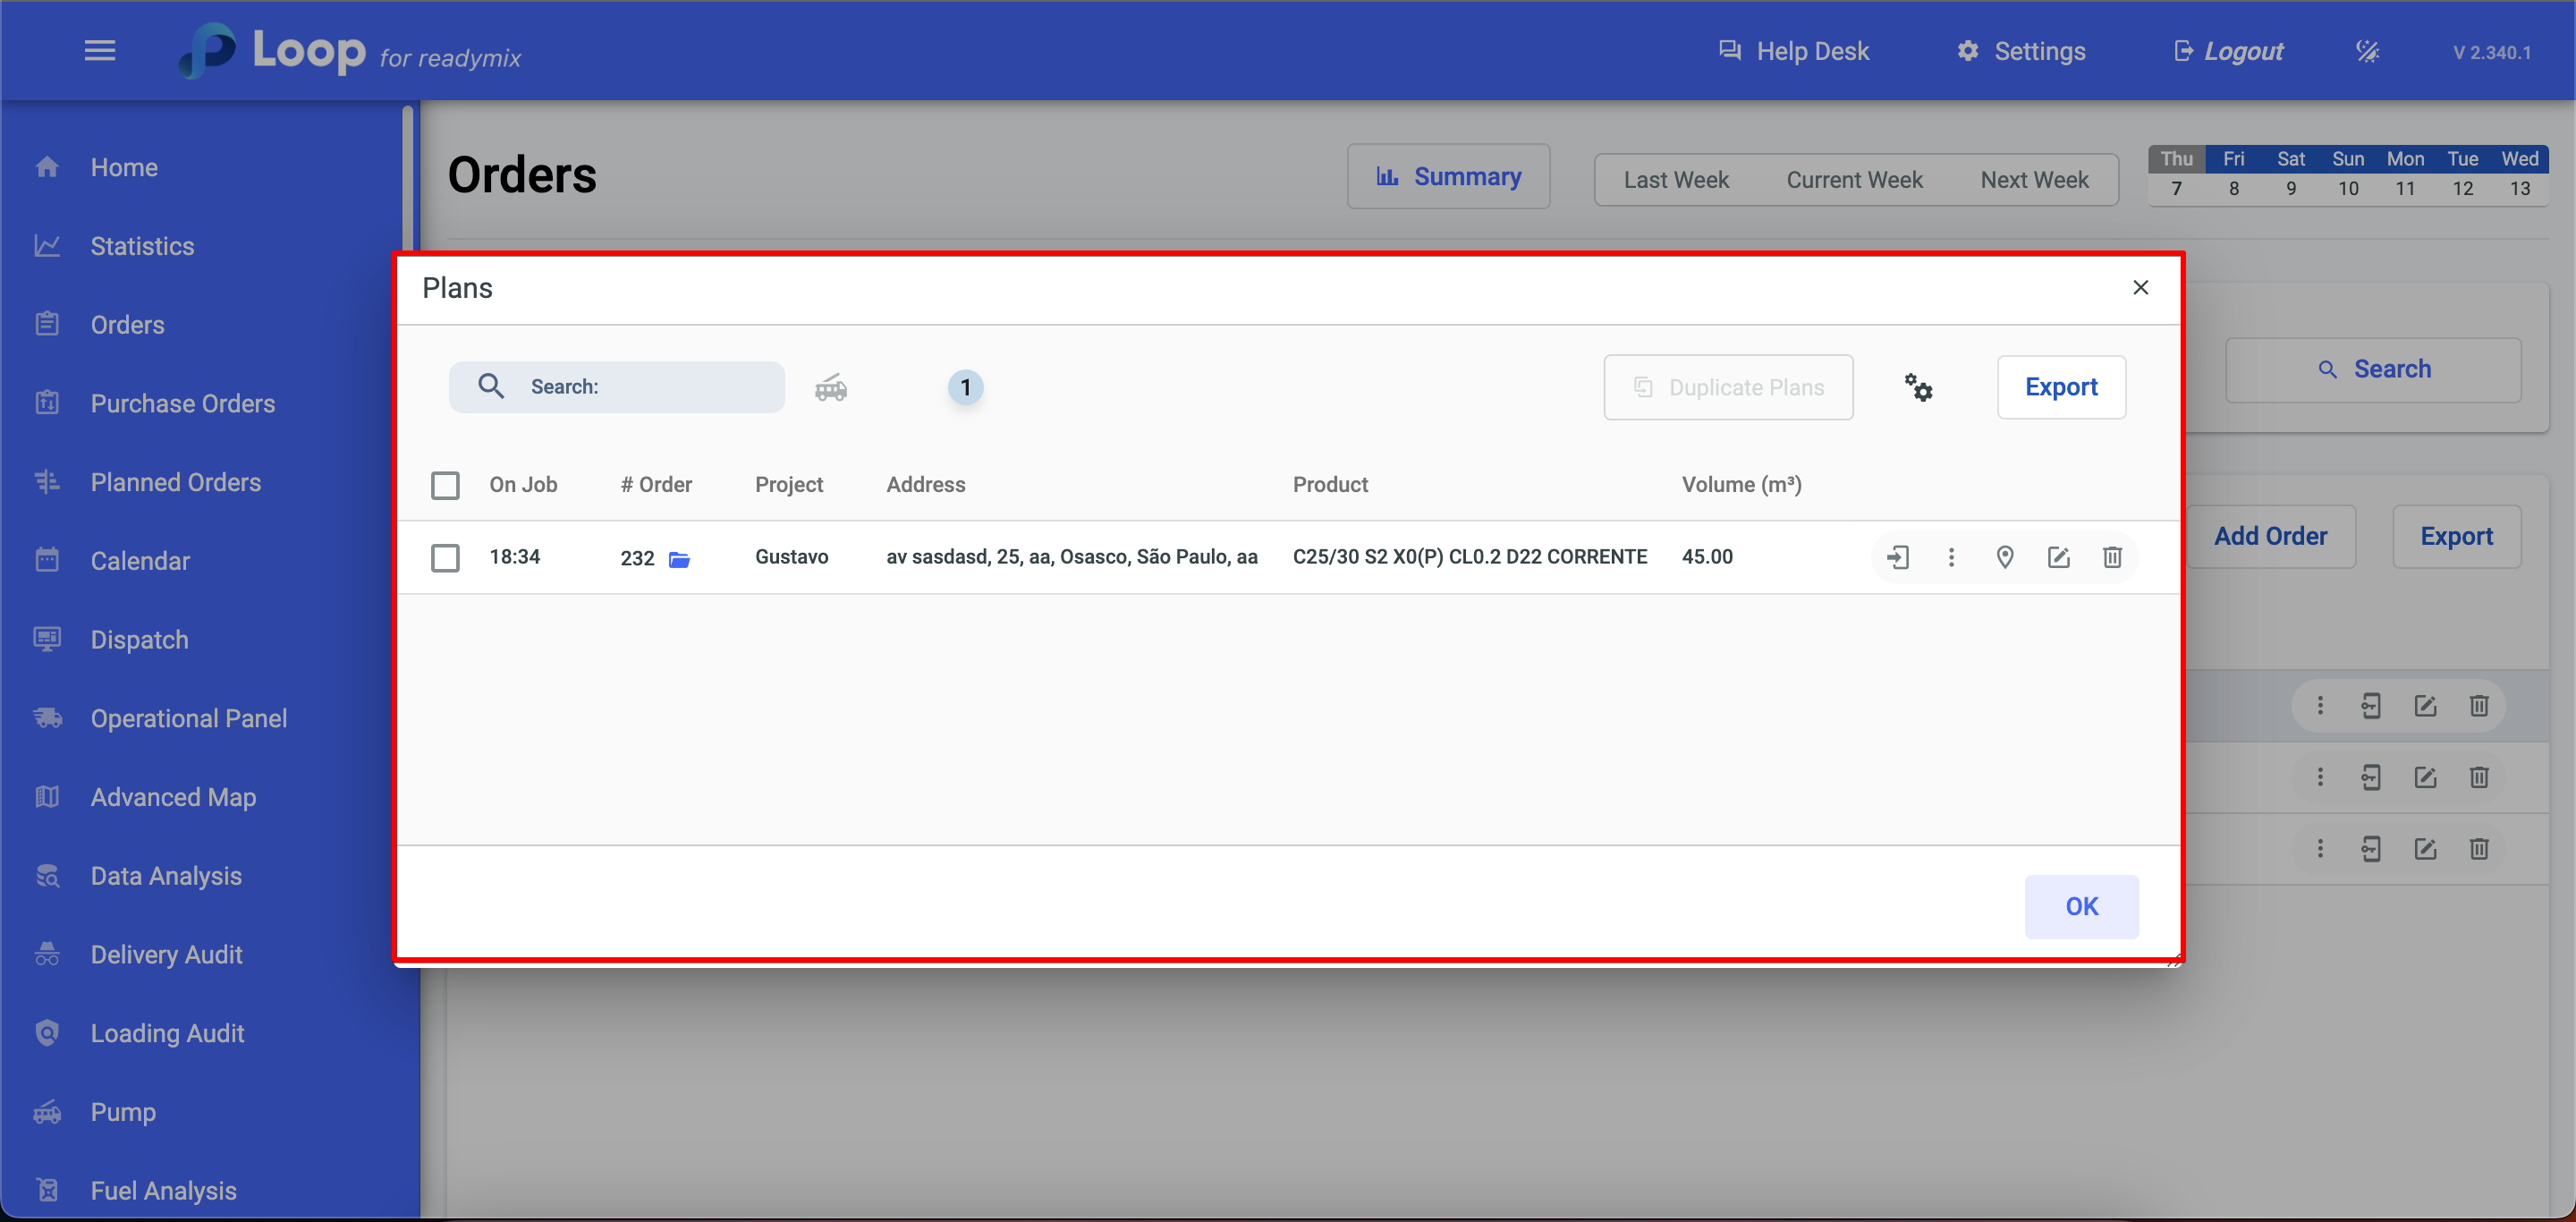
Schedules: The Schedules section displays information about the scheduling or schedules associated with an order.
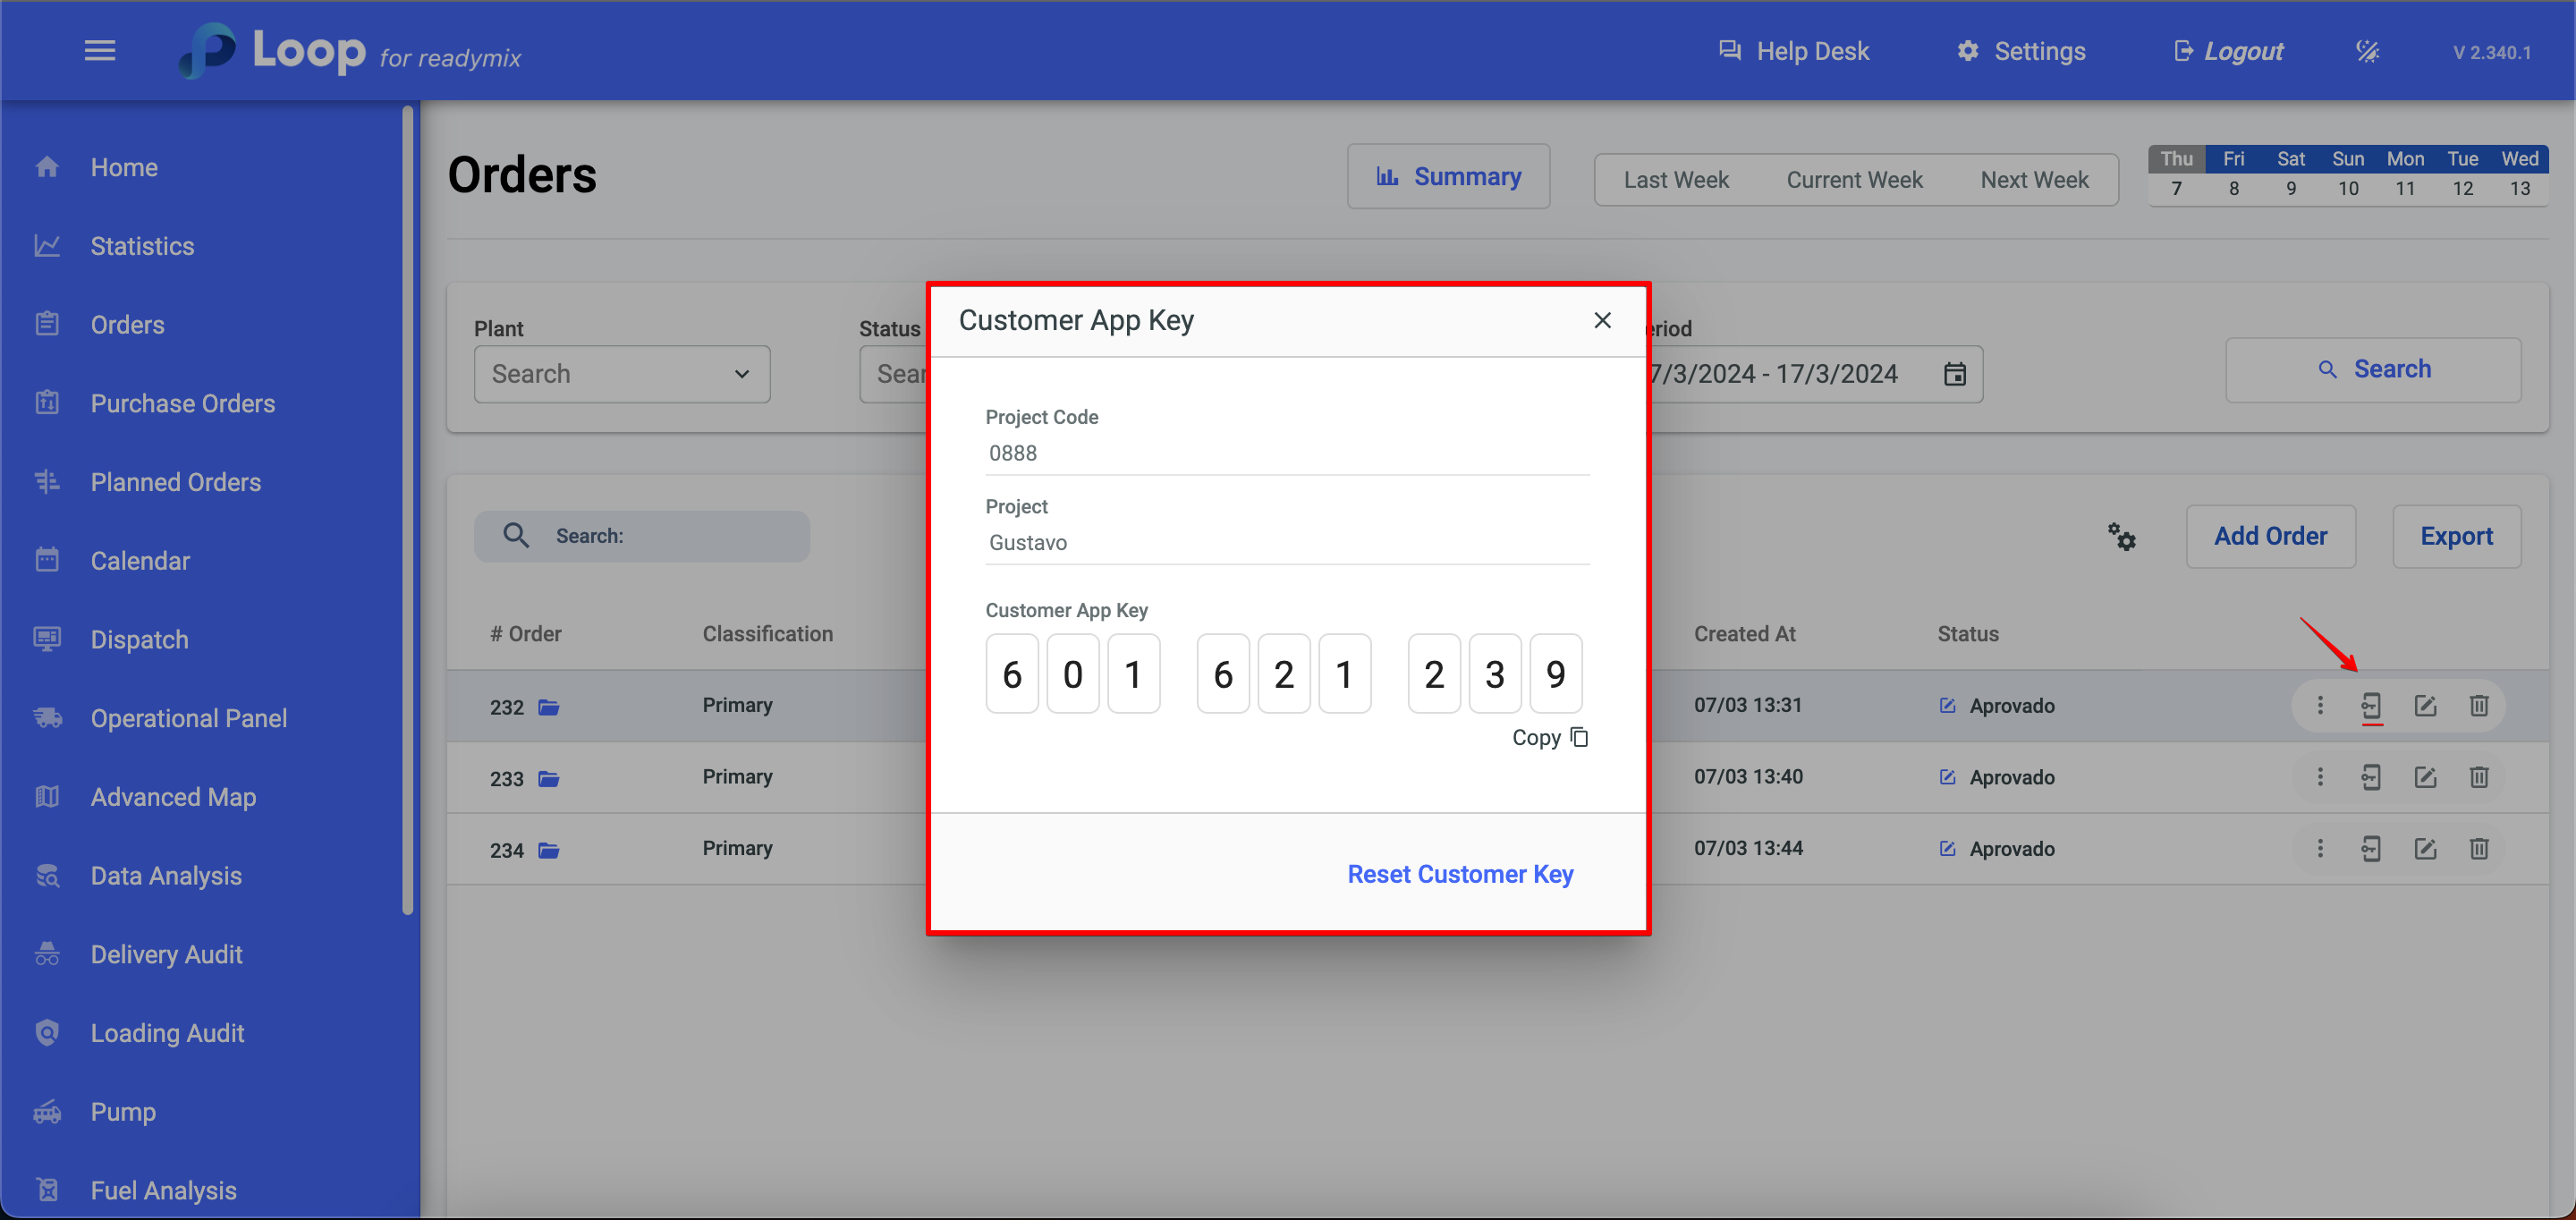
The customer app key is essential to allow the customer to track their deliveries through the Customer app.
Click on "Add an Order," select the order type, and fill in the mandatory fields marked with *:
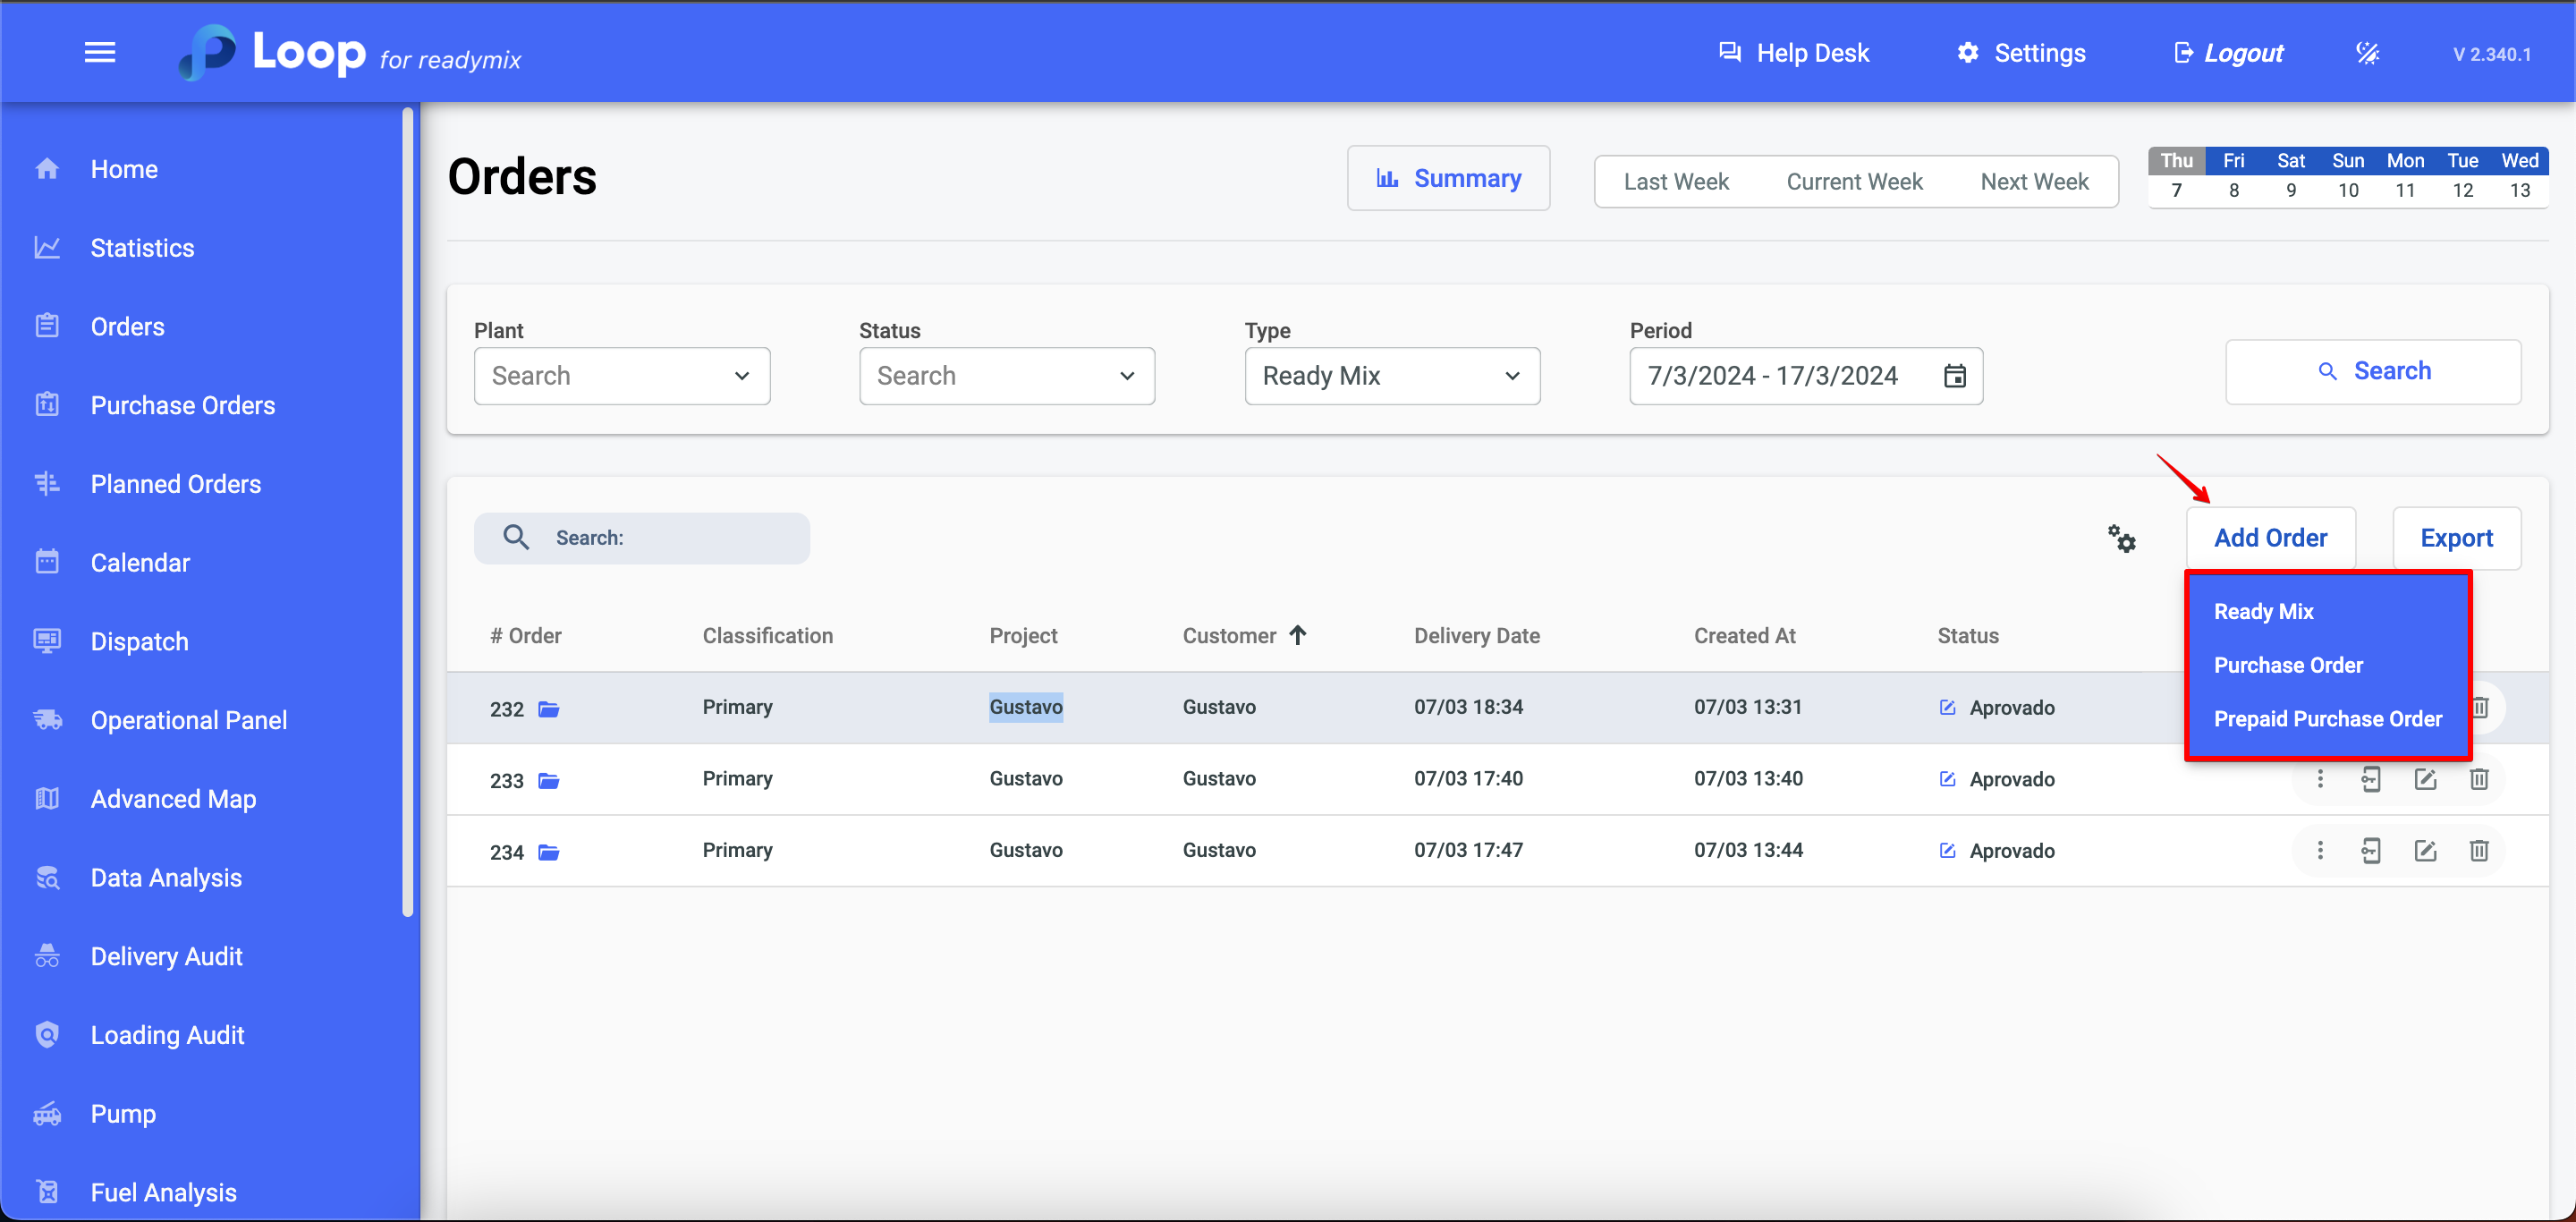
The "Add Request" option offers three possibilities:
Readymix: When selecting the "Readymix" option, you'll be able to add a new order related to the supply of ready-mix concrete. In this mode, it's possible to specify the type of concrete needed, the quantity in cubic meters (m³), the delivery date, the delivery address, among other details relevant to the customer's request.
Purchase order: This option allows you to add an order linked to a specific purchase order. Cuando elige "Orden de compra", puede seleccionar una orden de compra preexistente en el sistema para asociar la nueva orden a ella. In this way, it is easier to organize and track all commercial transactions related to the same order.
Prepaid purchase order: The option "Prepaid purchase order" is used when the customer performs the advance payment of an order or service. Al seleccionar esta opción, puede introducir los detalles del pedido de prepago, como la fecha de pago, el importe pagado, los productos o servicios adquiridos y otra información relevante.
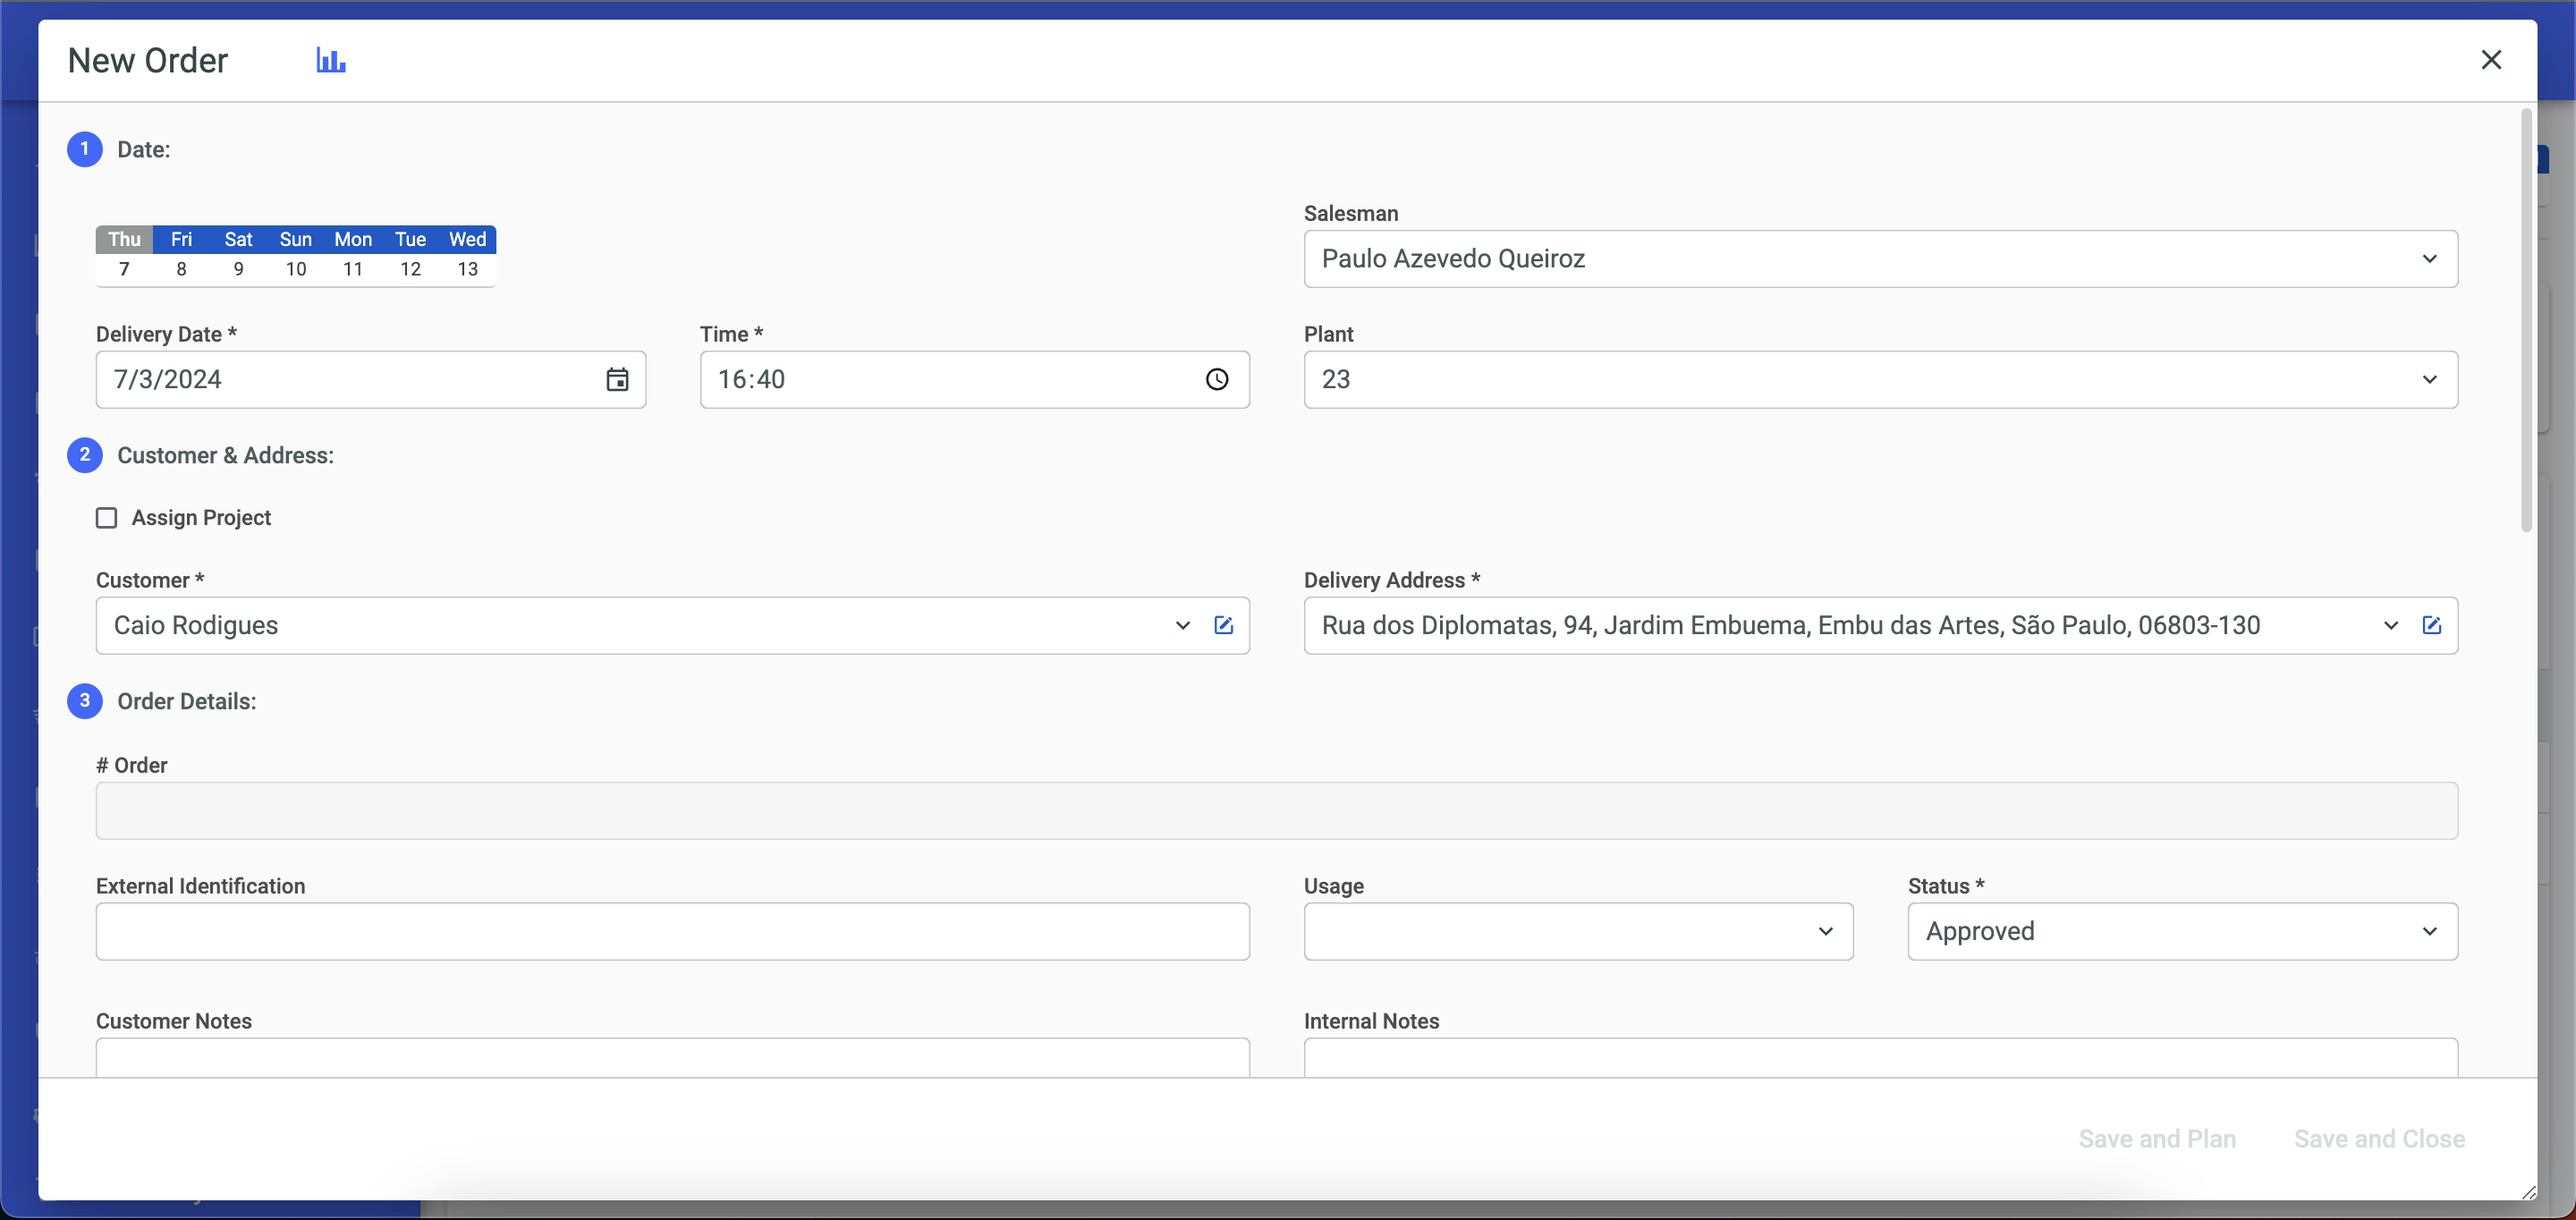
Delivery Date: In this field, enter the date on which the order should be delivered to the customer. This information is essential for scheduling and organizing the delivery logistics.
Time: Here, you specify the estimated time for delivering the order to the customer. This information helps ensure punctuality and proper scheduling of the delivery.
Customer: In this field, select the customer for whom the order is being made. This allows for clear identification of the order's recipient and maintaining accurate records of served customers.
Contract: Here, you select the contract related to the order. The contract establishes the terms and conditions agreed upon between the company and the customer, providing a legal basis for product delivery.
Status: This field indicates the current status of the order. It can have values like "Pending," "In Progress," "Completed," or others, depending on the company's workflow. The status helps track the progress of the order and identify which steps still need to be completed.
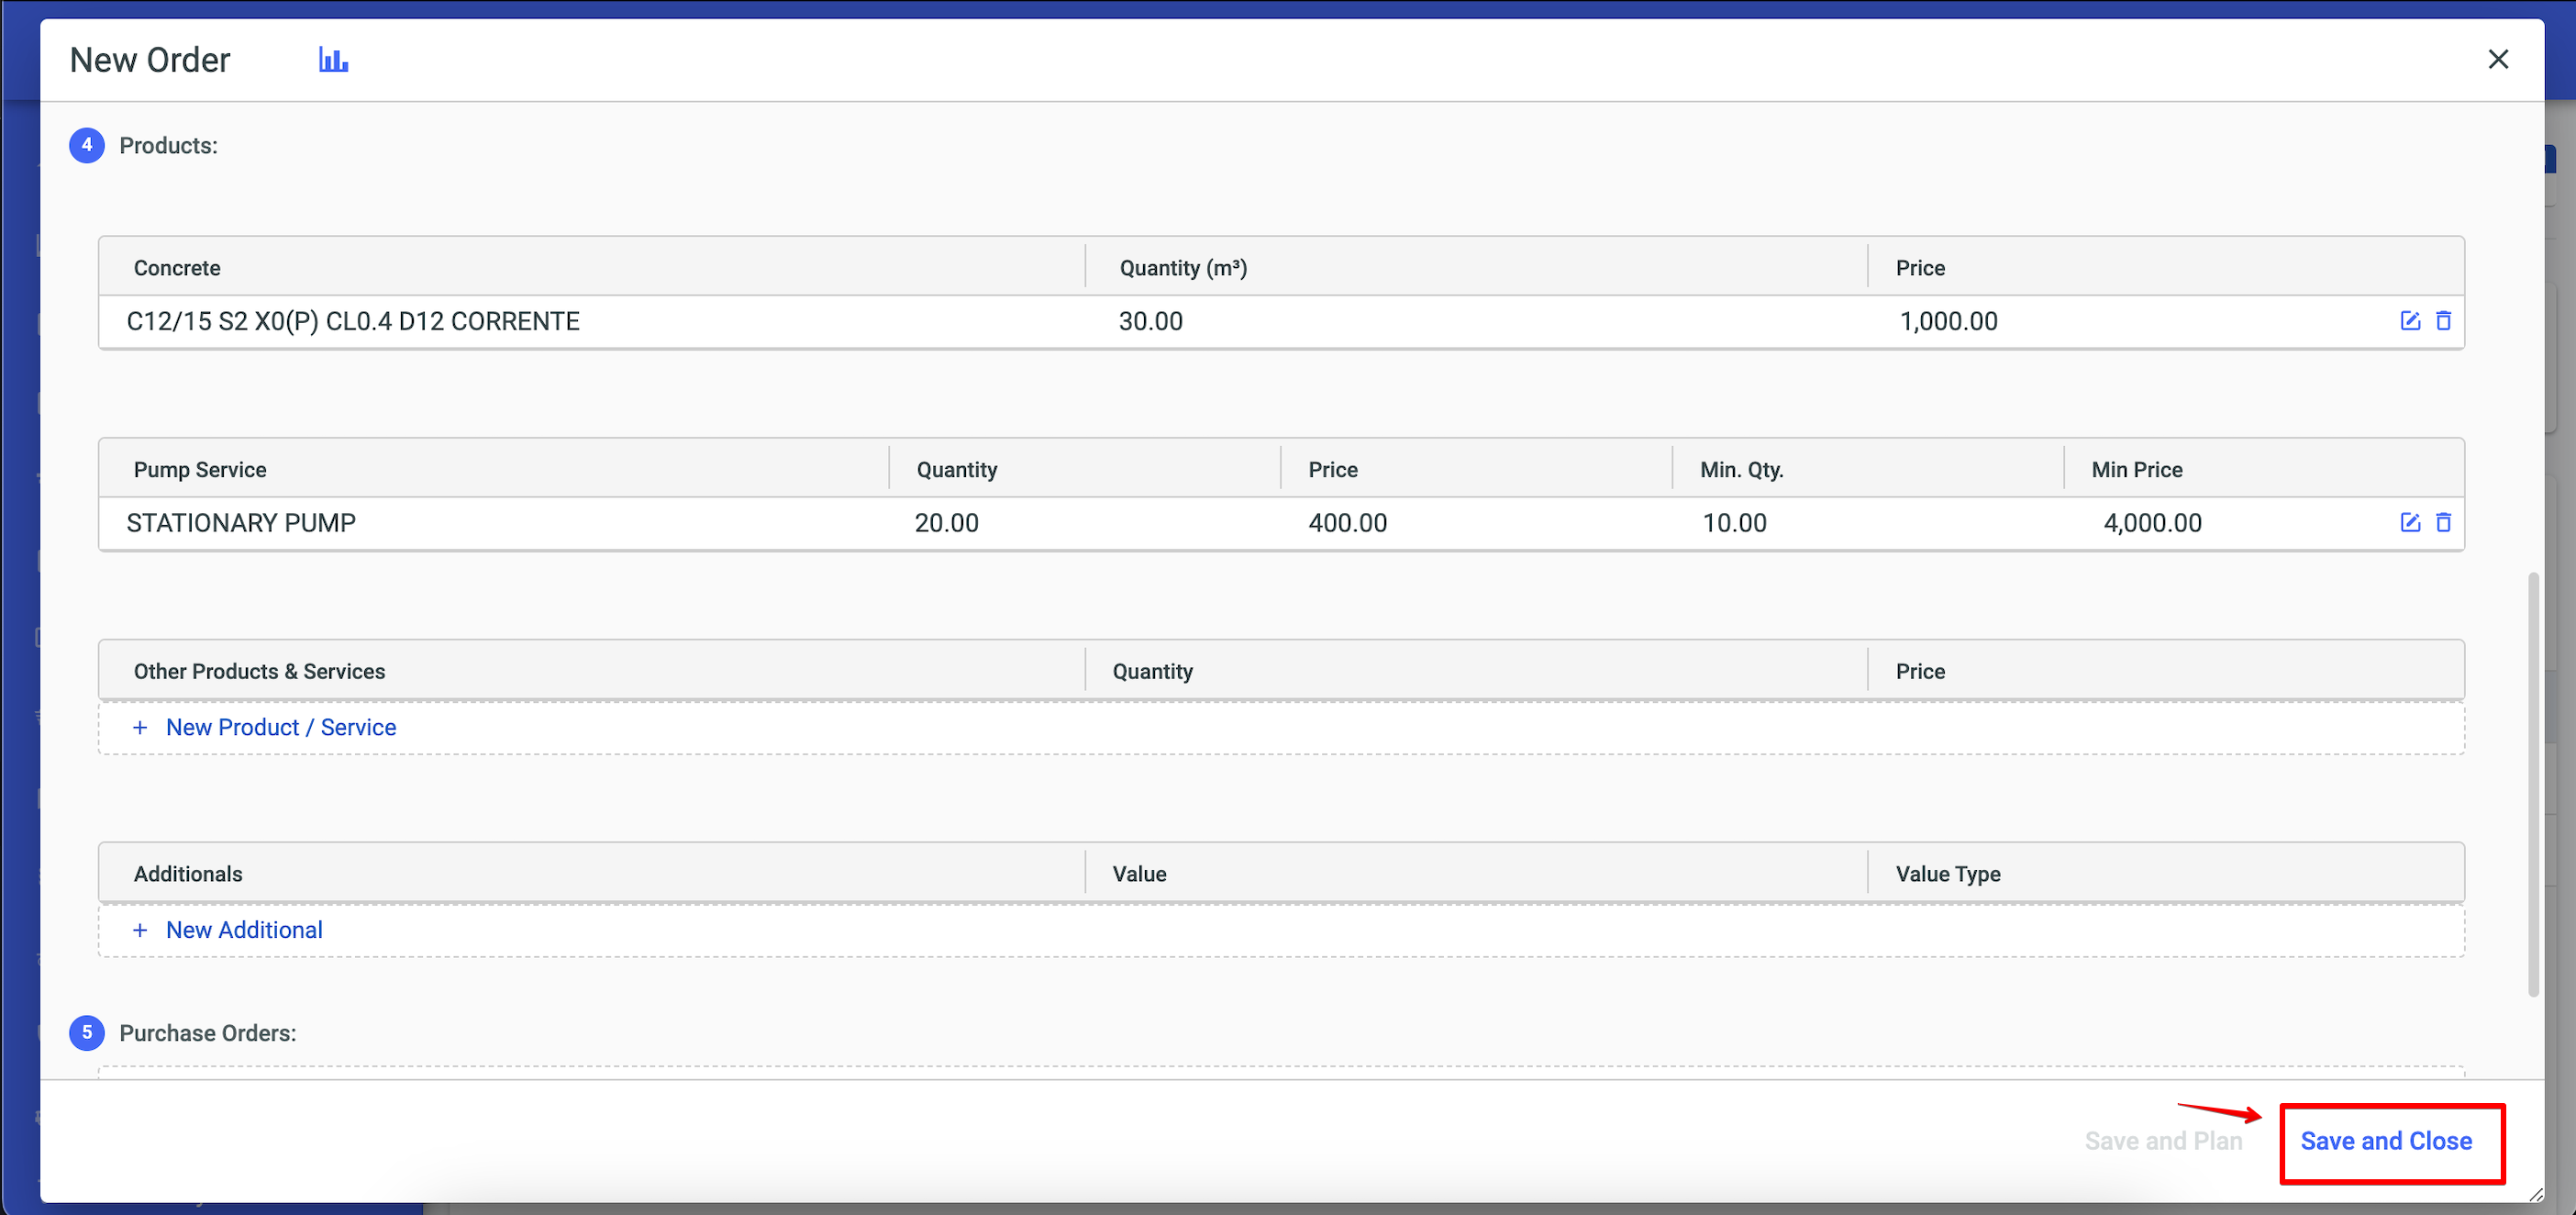
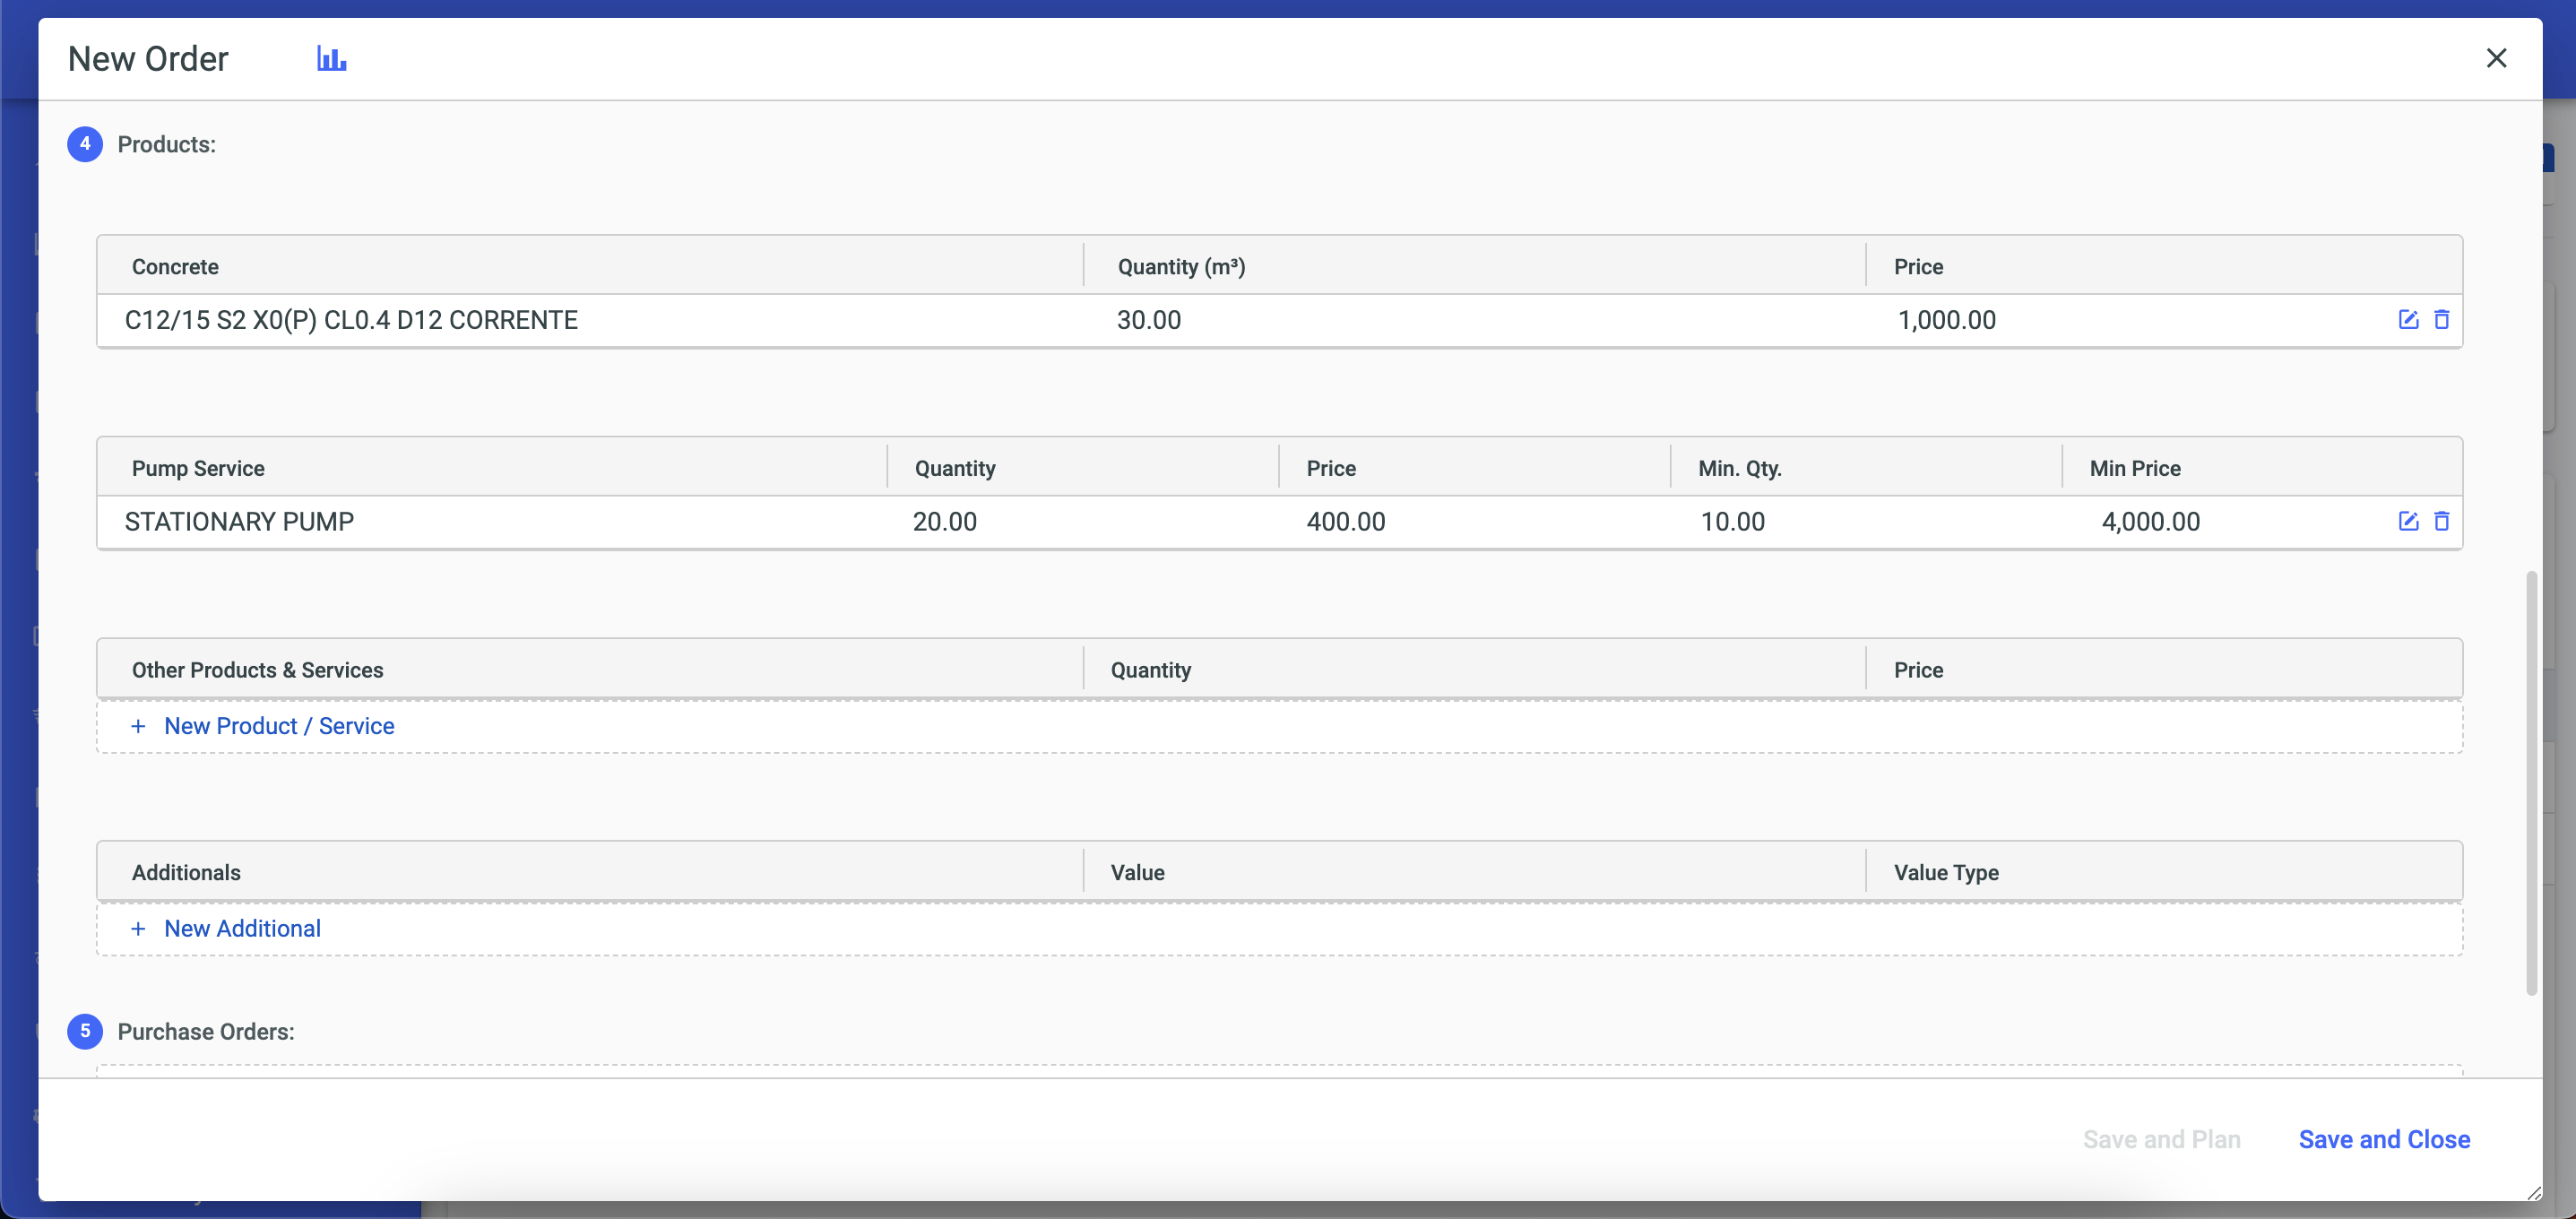
Products: In this field, specify the products requested in the order. You can select different types of Ready mix products, such as different strengths, compositions, or sizes. Providing accurate information about the requested products is essential to ensure they are delivered correctly.
After filling in all the necessary fields, click "Save and Close."
