The Leads Manager is an essential tool for capturing and converting clients, organizing crucial information, and facilitating the monitoring of the sales process. Additionally, it provides valuable analytics to adjust strategies and offers flexibility at each stage of the lead process, thus optimizing sales efficiency and performance.
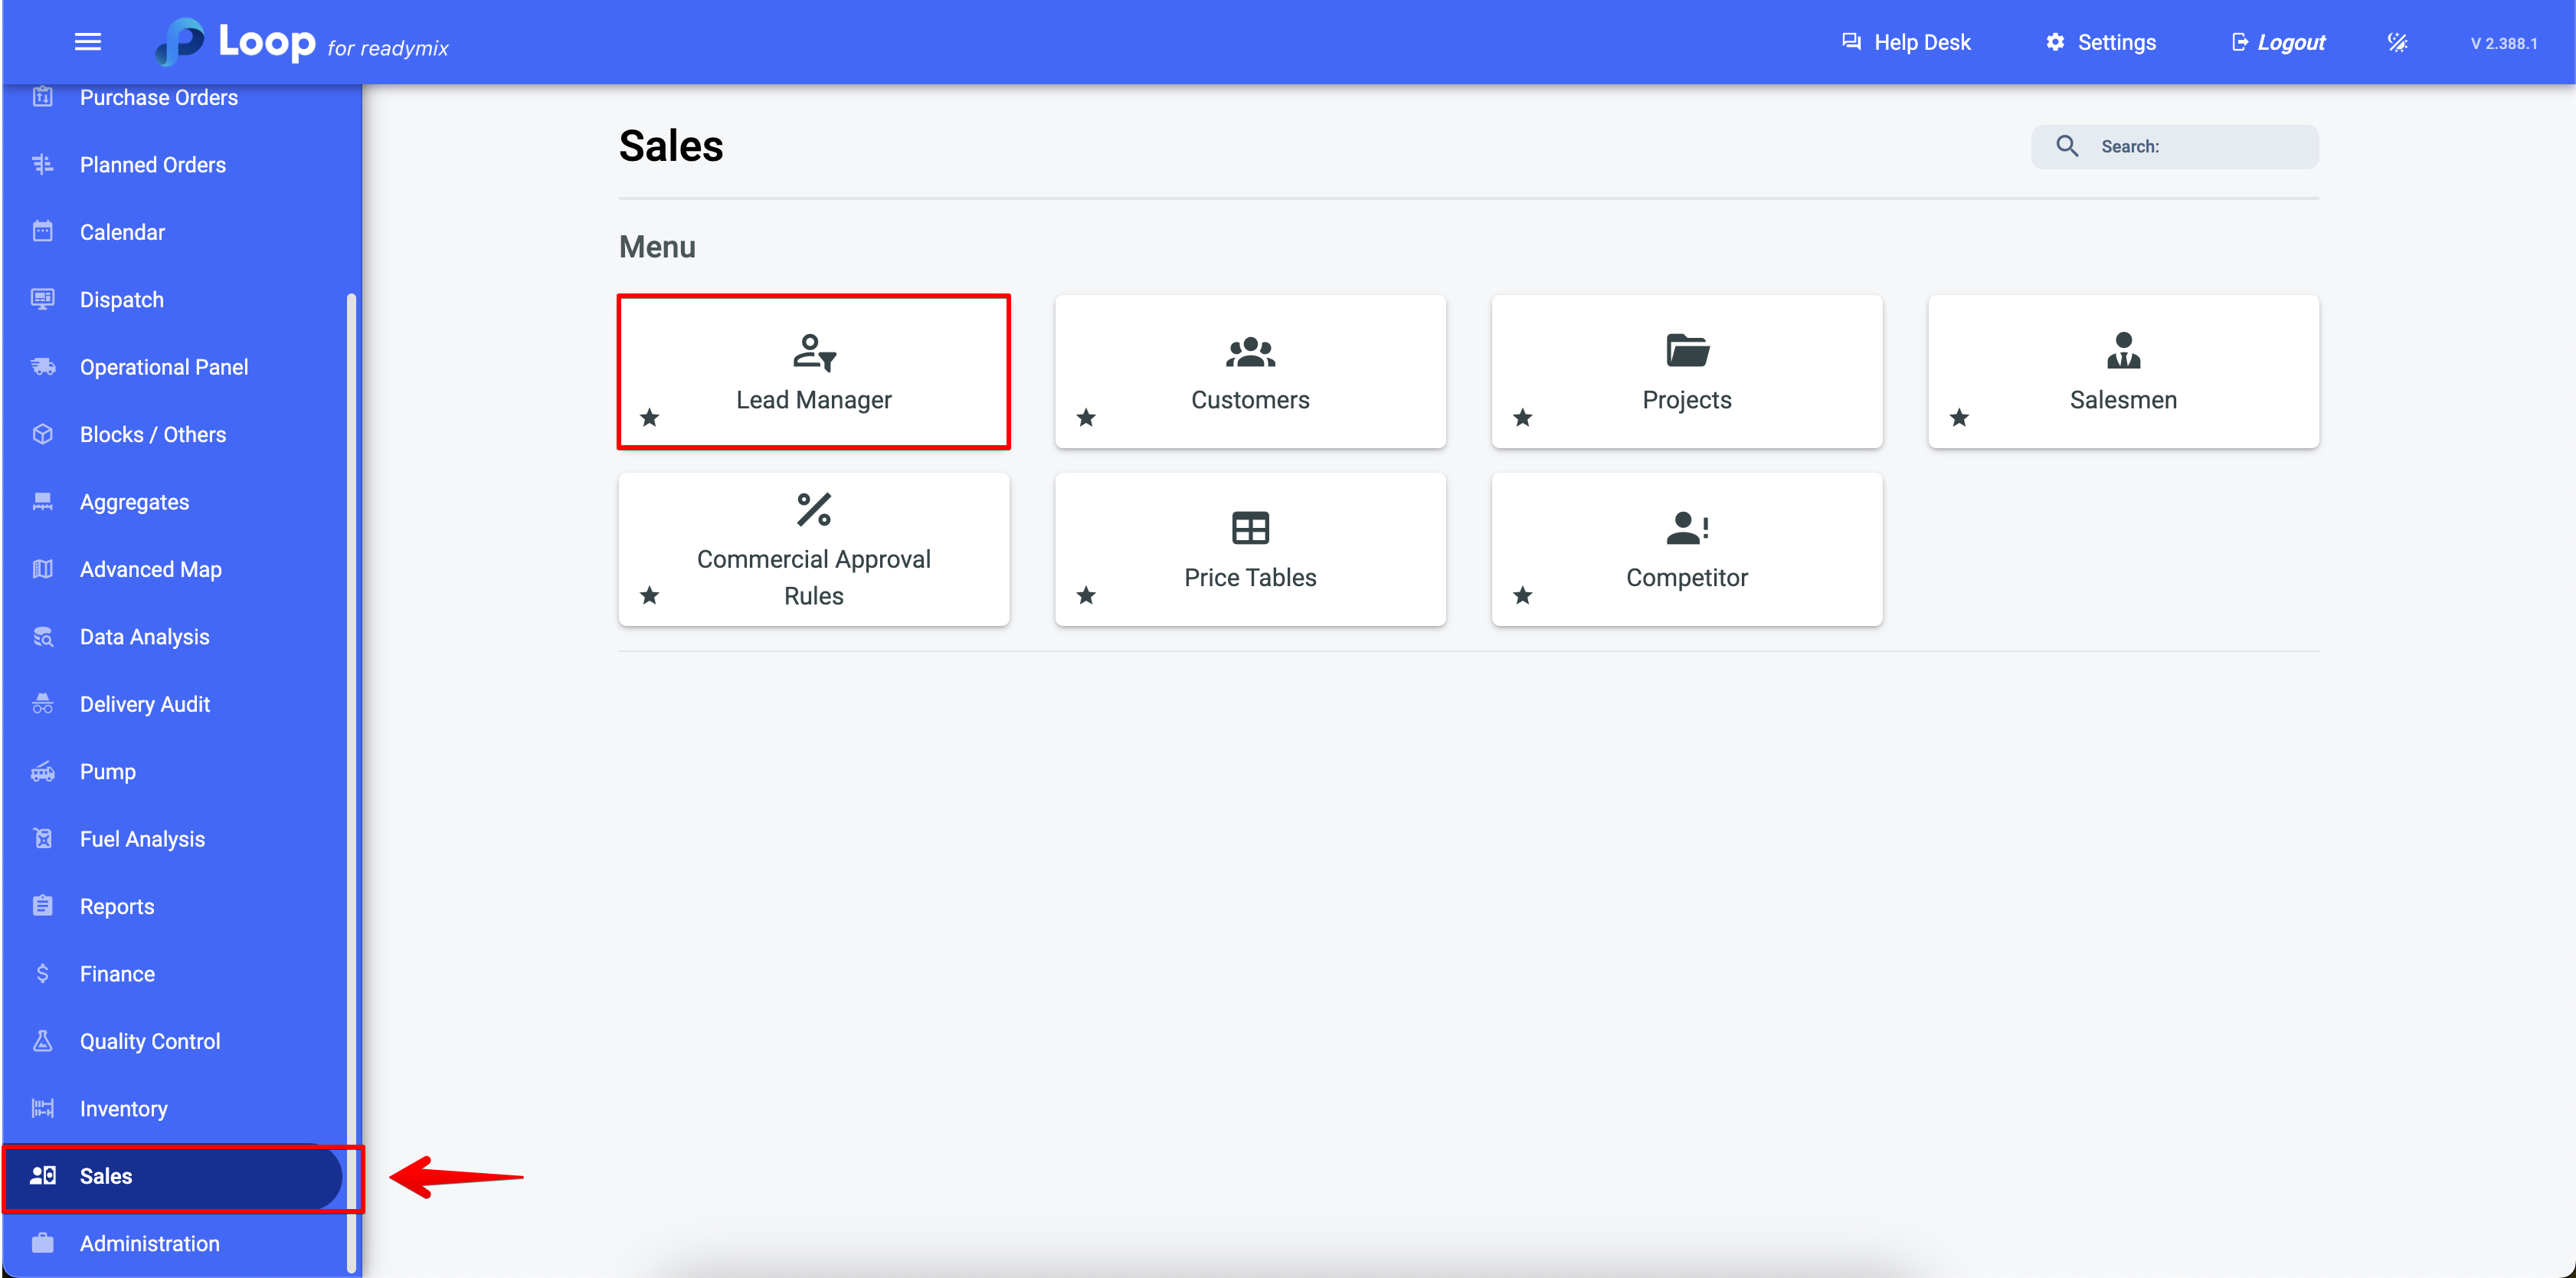
Open the menu on the left side of the screen and select "Sales" - "Leads Manager".
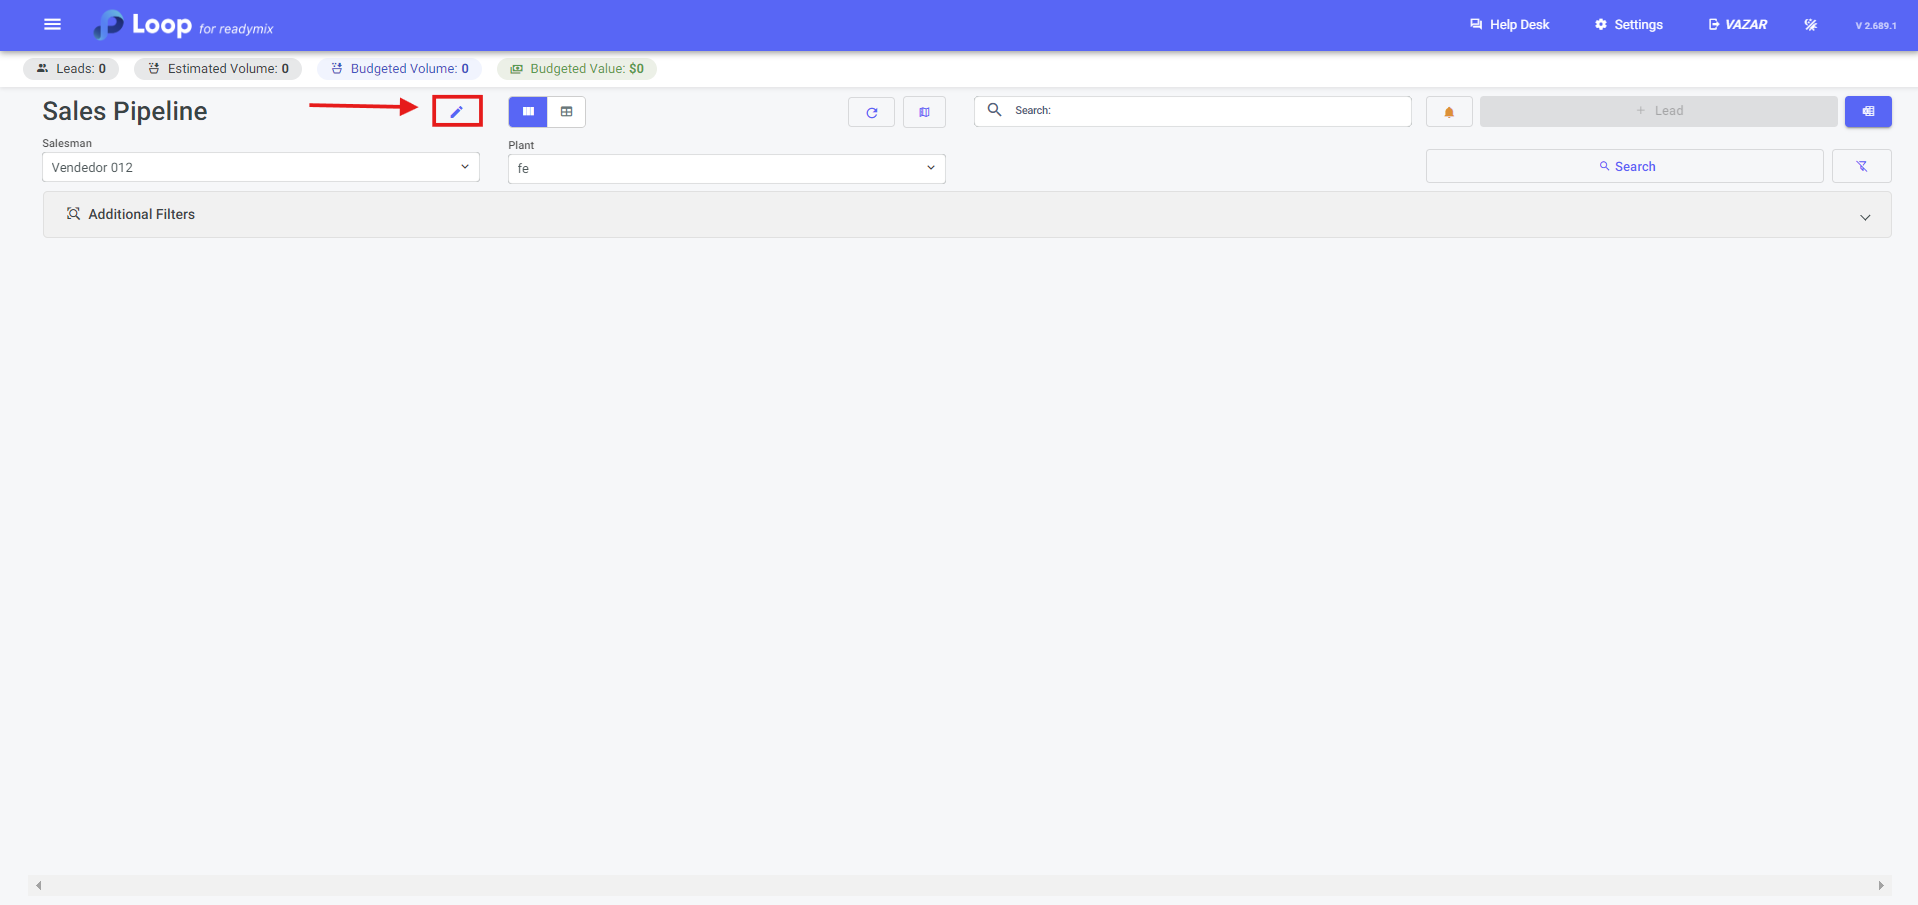
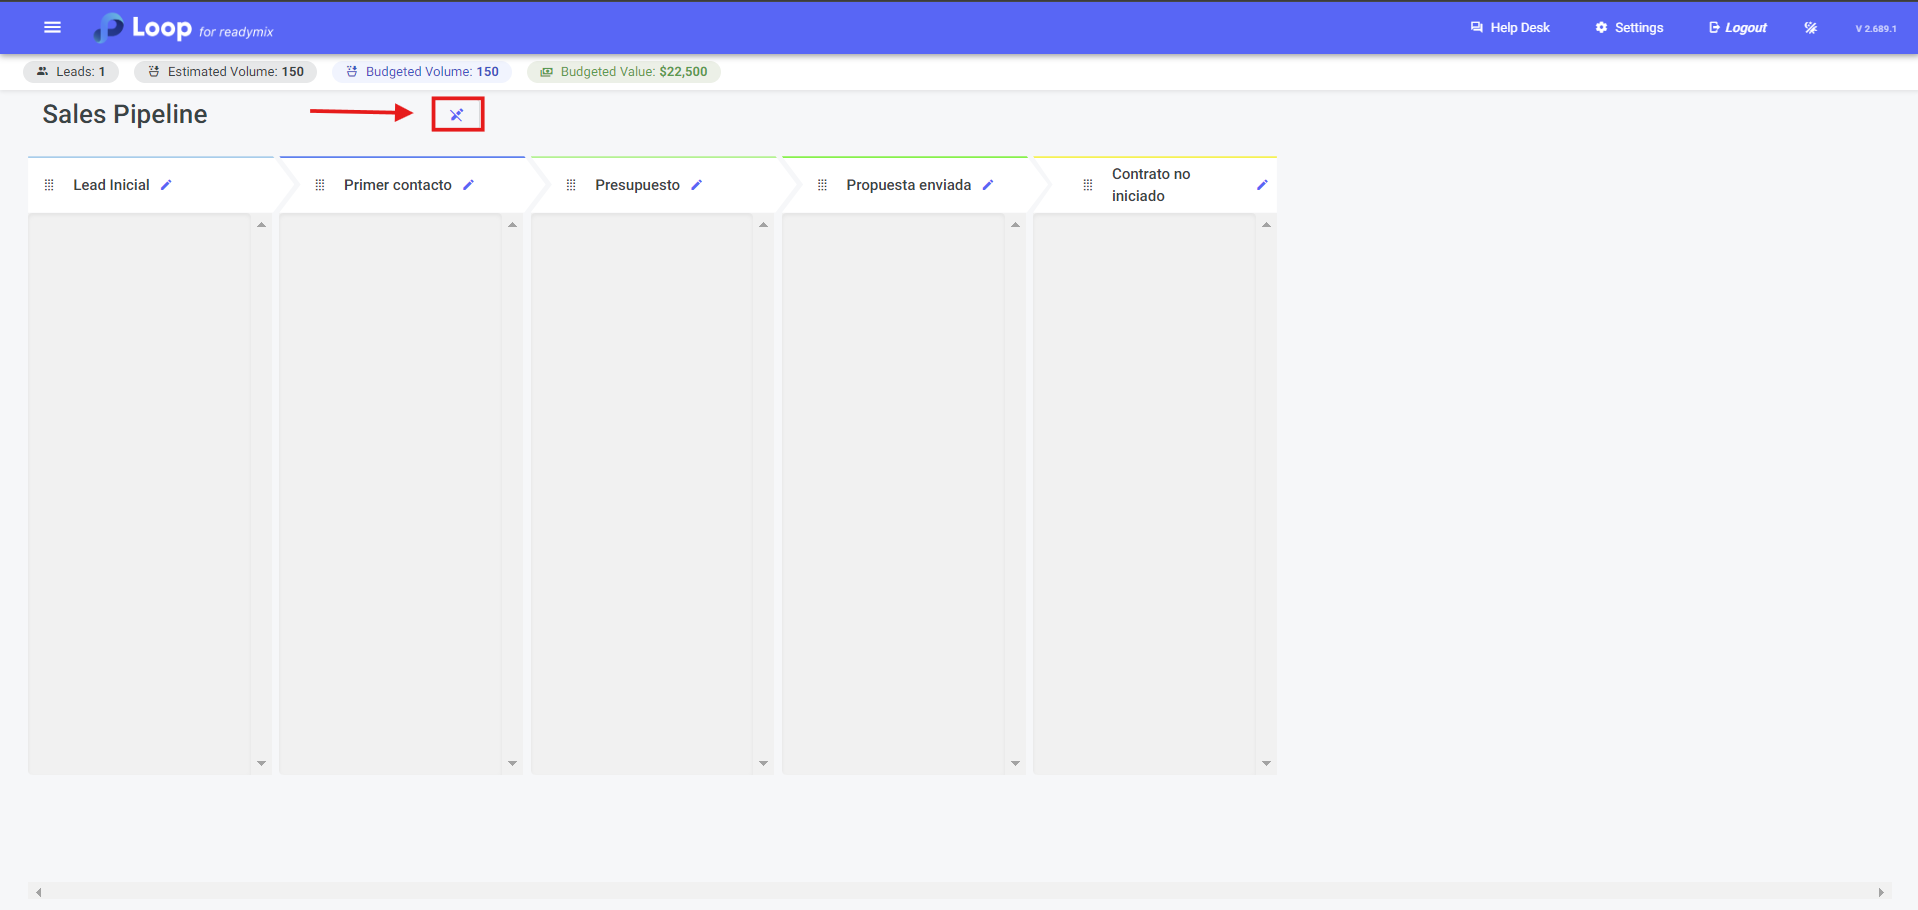
When accessing the Lead Manager, you will be directed to this screen. By clicking on this icon, you can create your sales funnels.
After that, you can click on this icon to start creating your sales funnels.
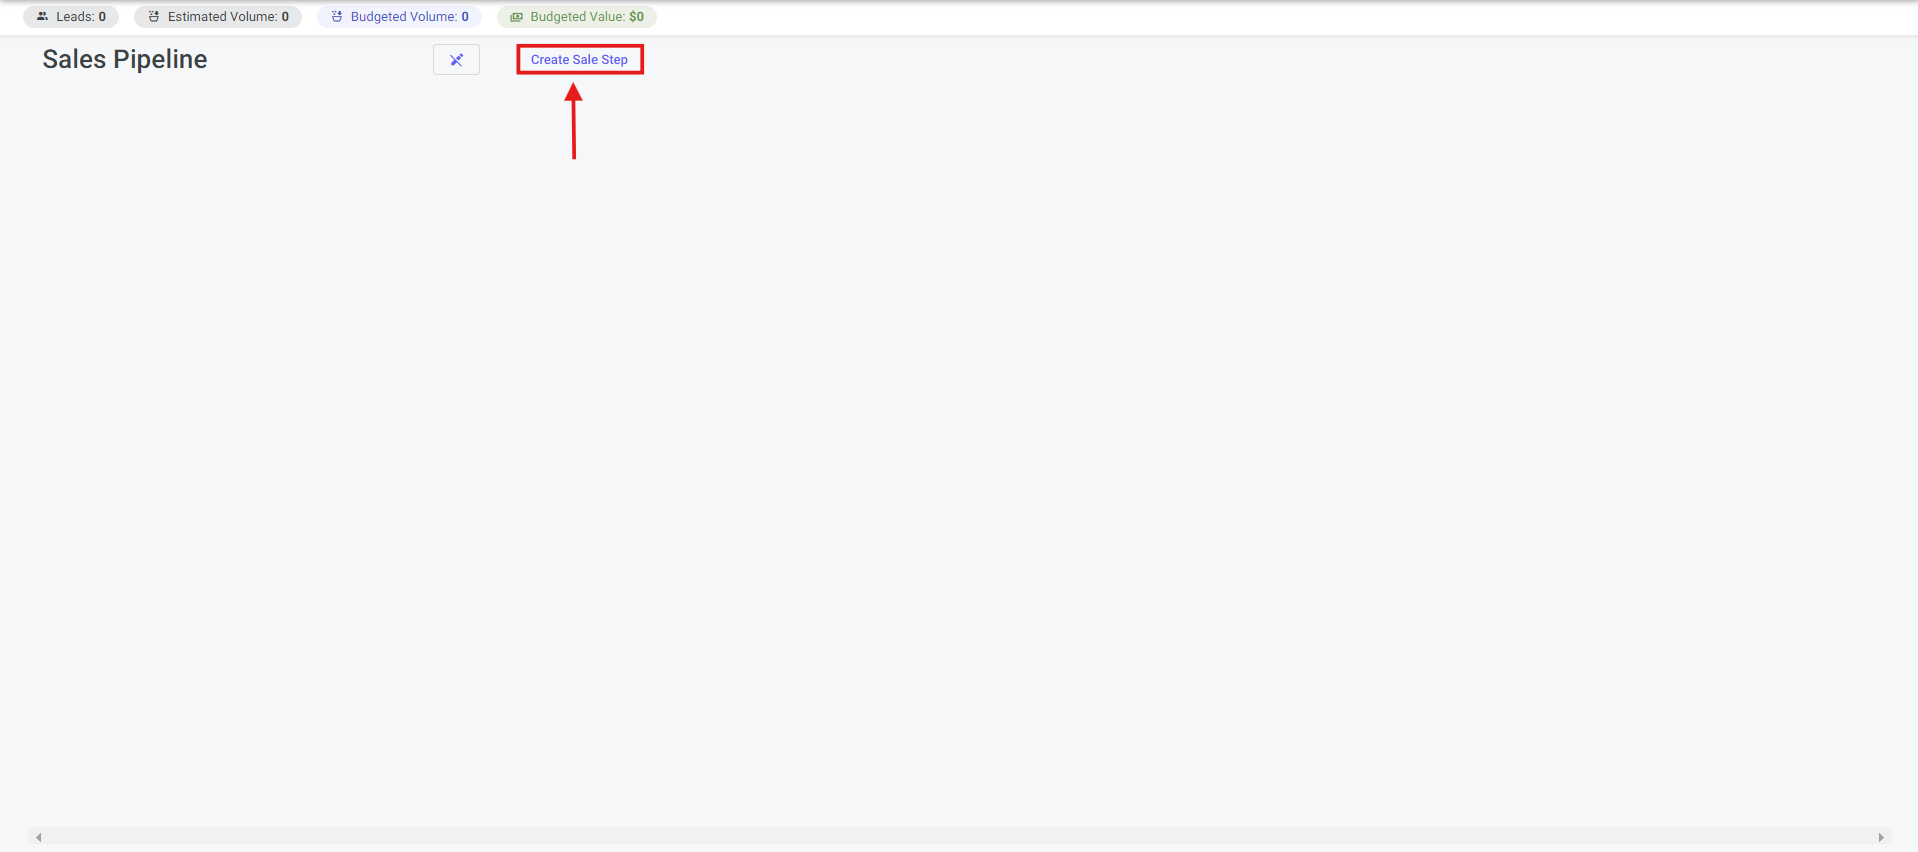
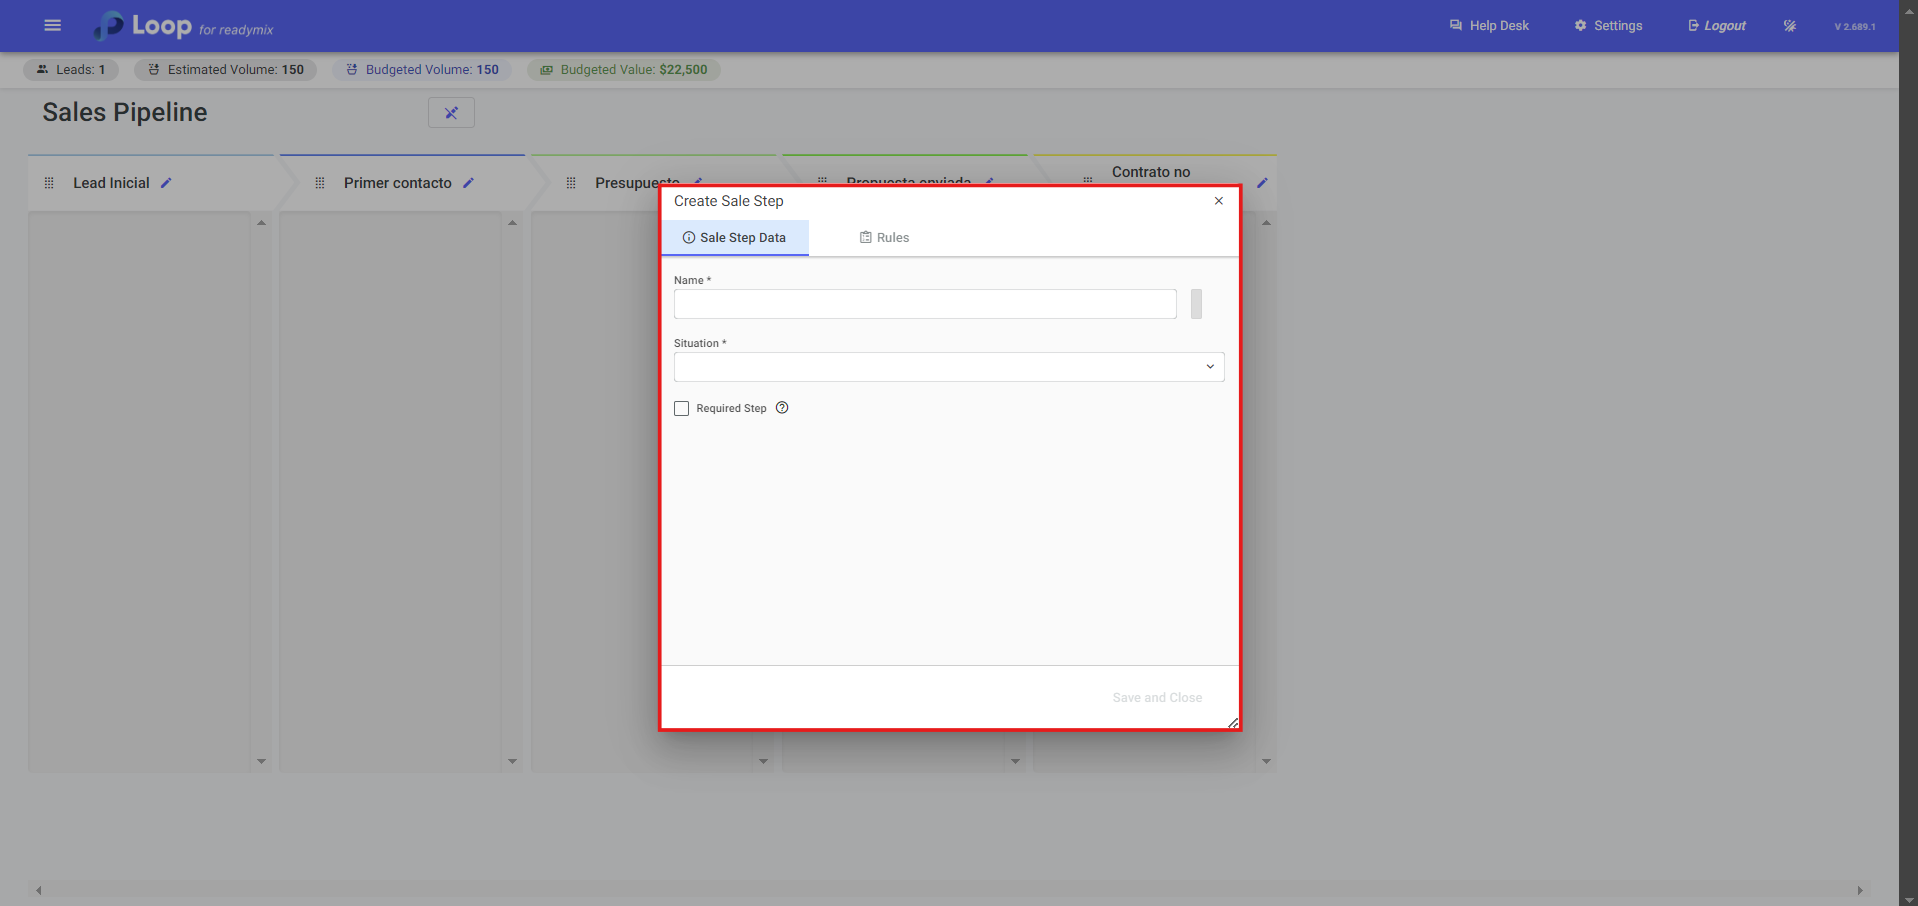
When you click, you will need to provide the name, the status, whether this stage will be mandatory, and optionally, add a color to the filter.
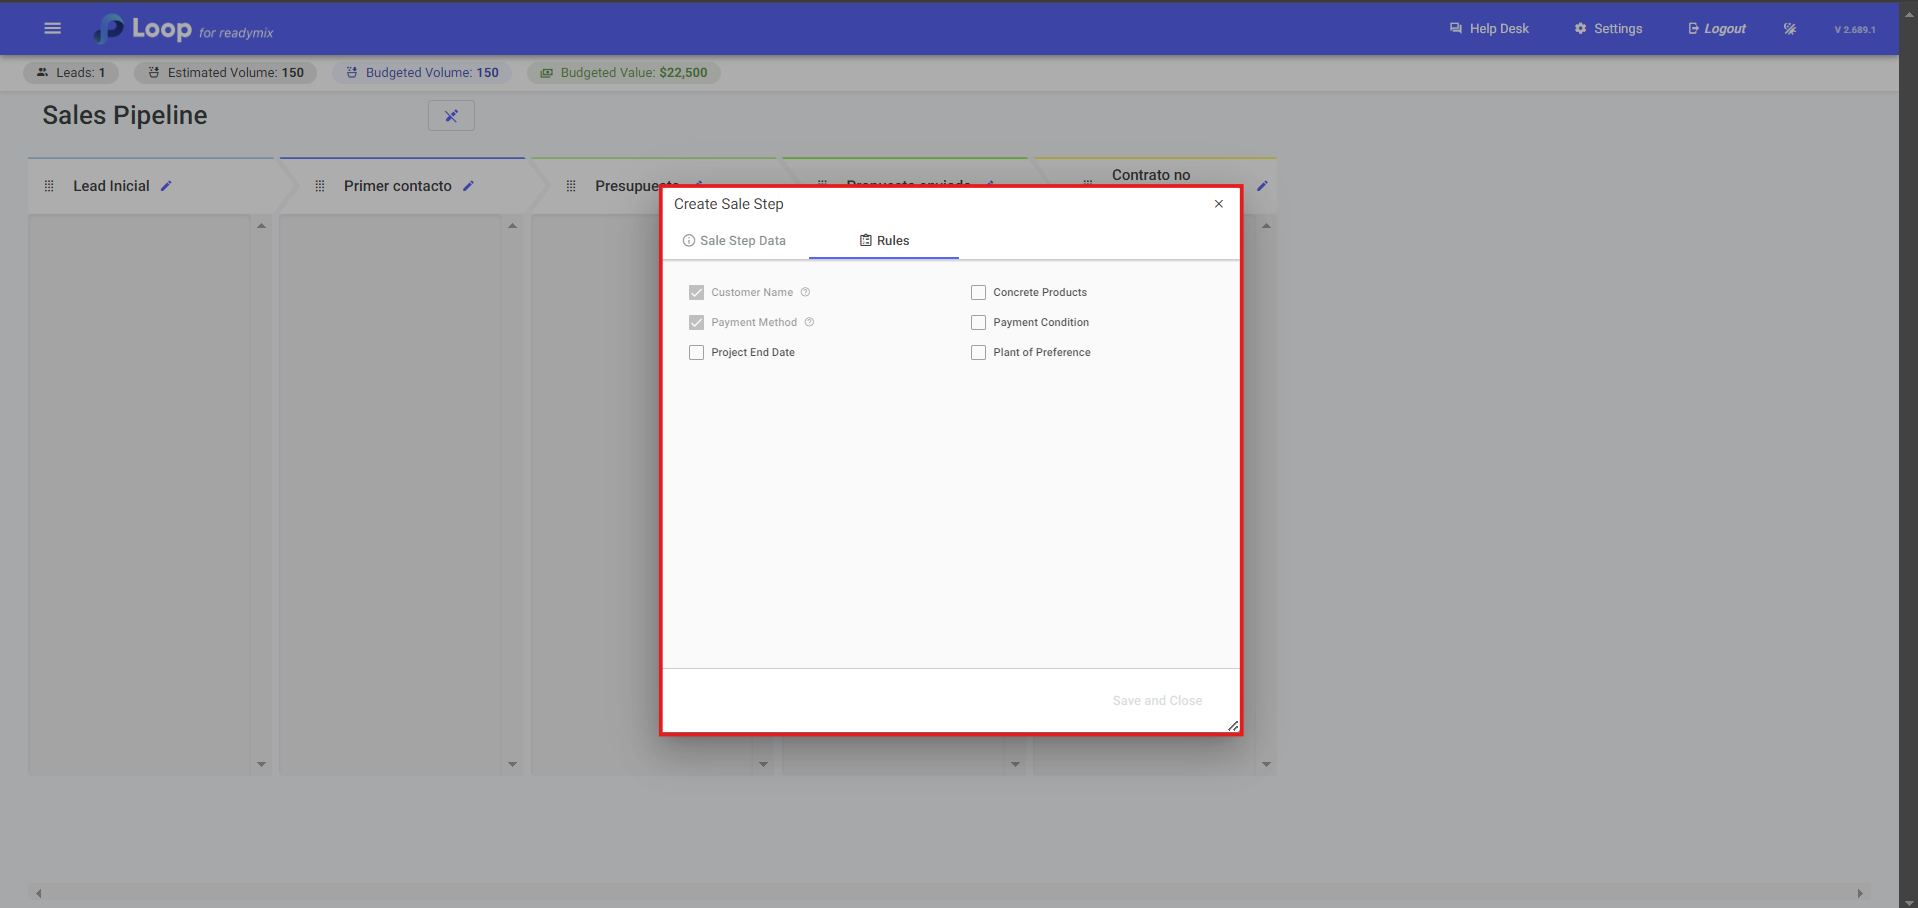
We can also select rules for each filter.
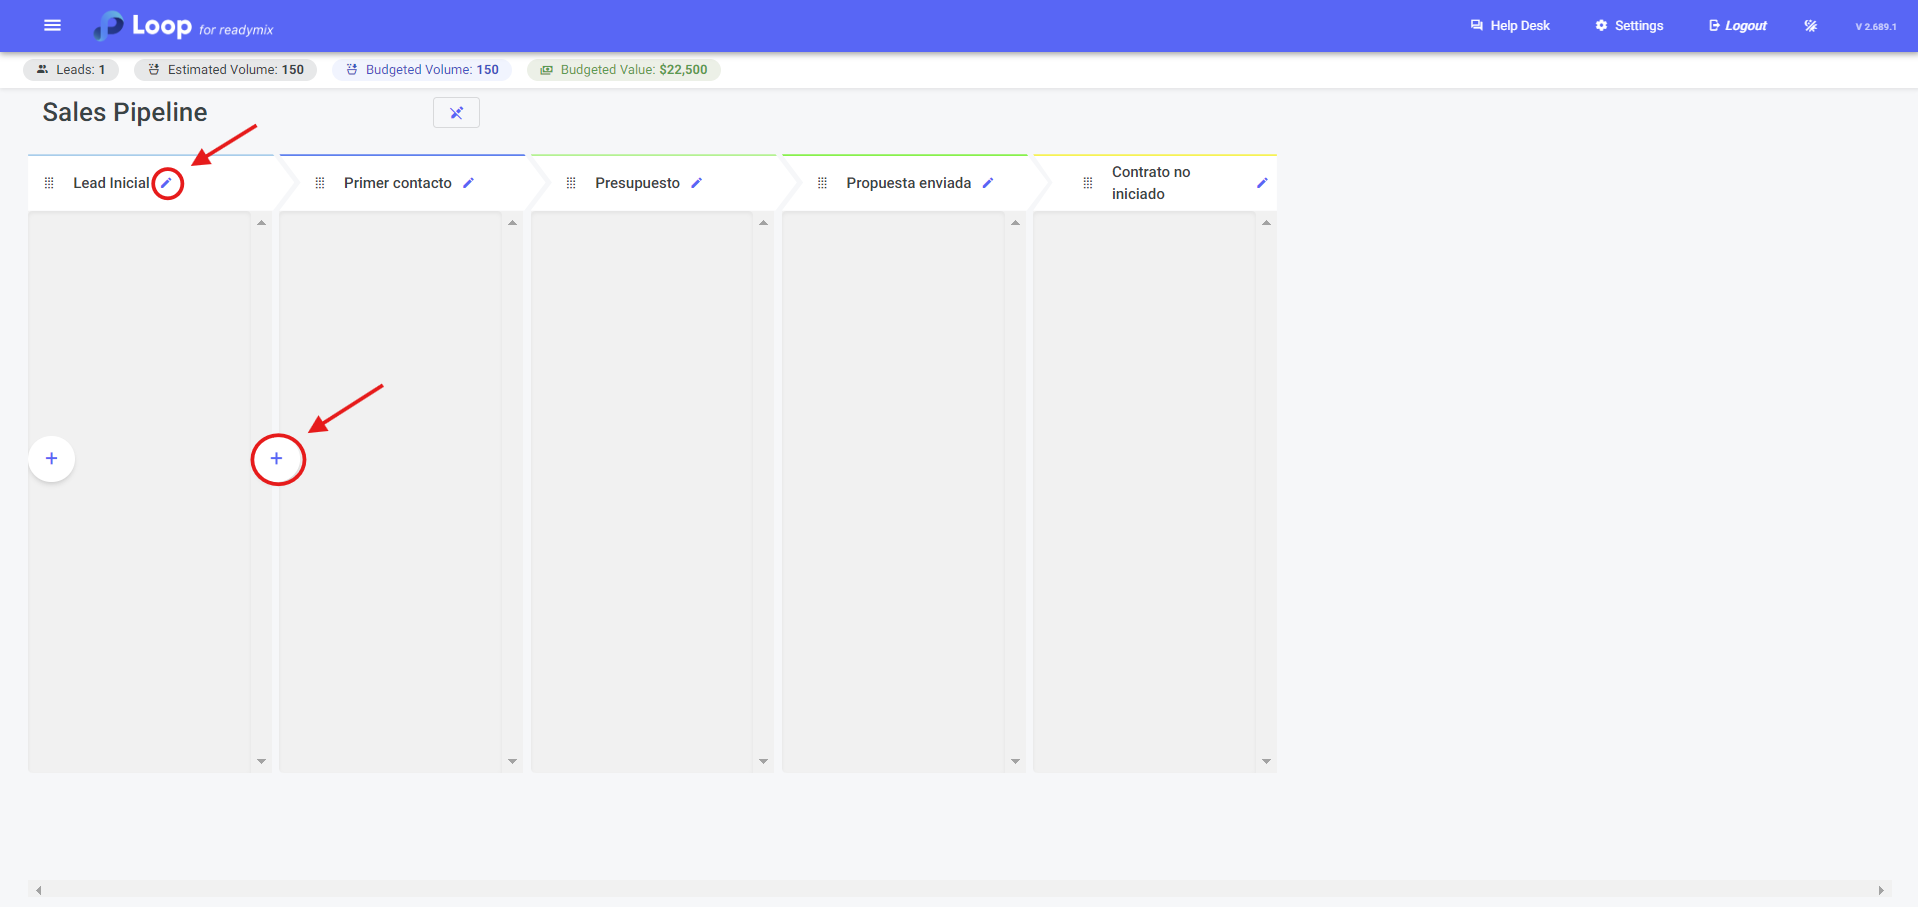
After creating the first filter, simply click on this icon to add new filters, both in front and behind. Additionally, it is possible to edit each filter individually.
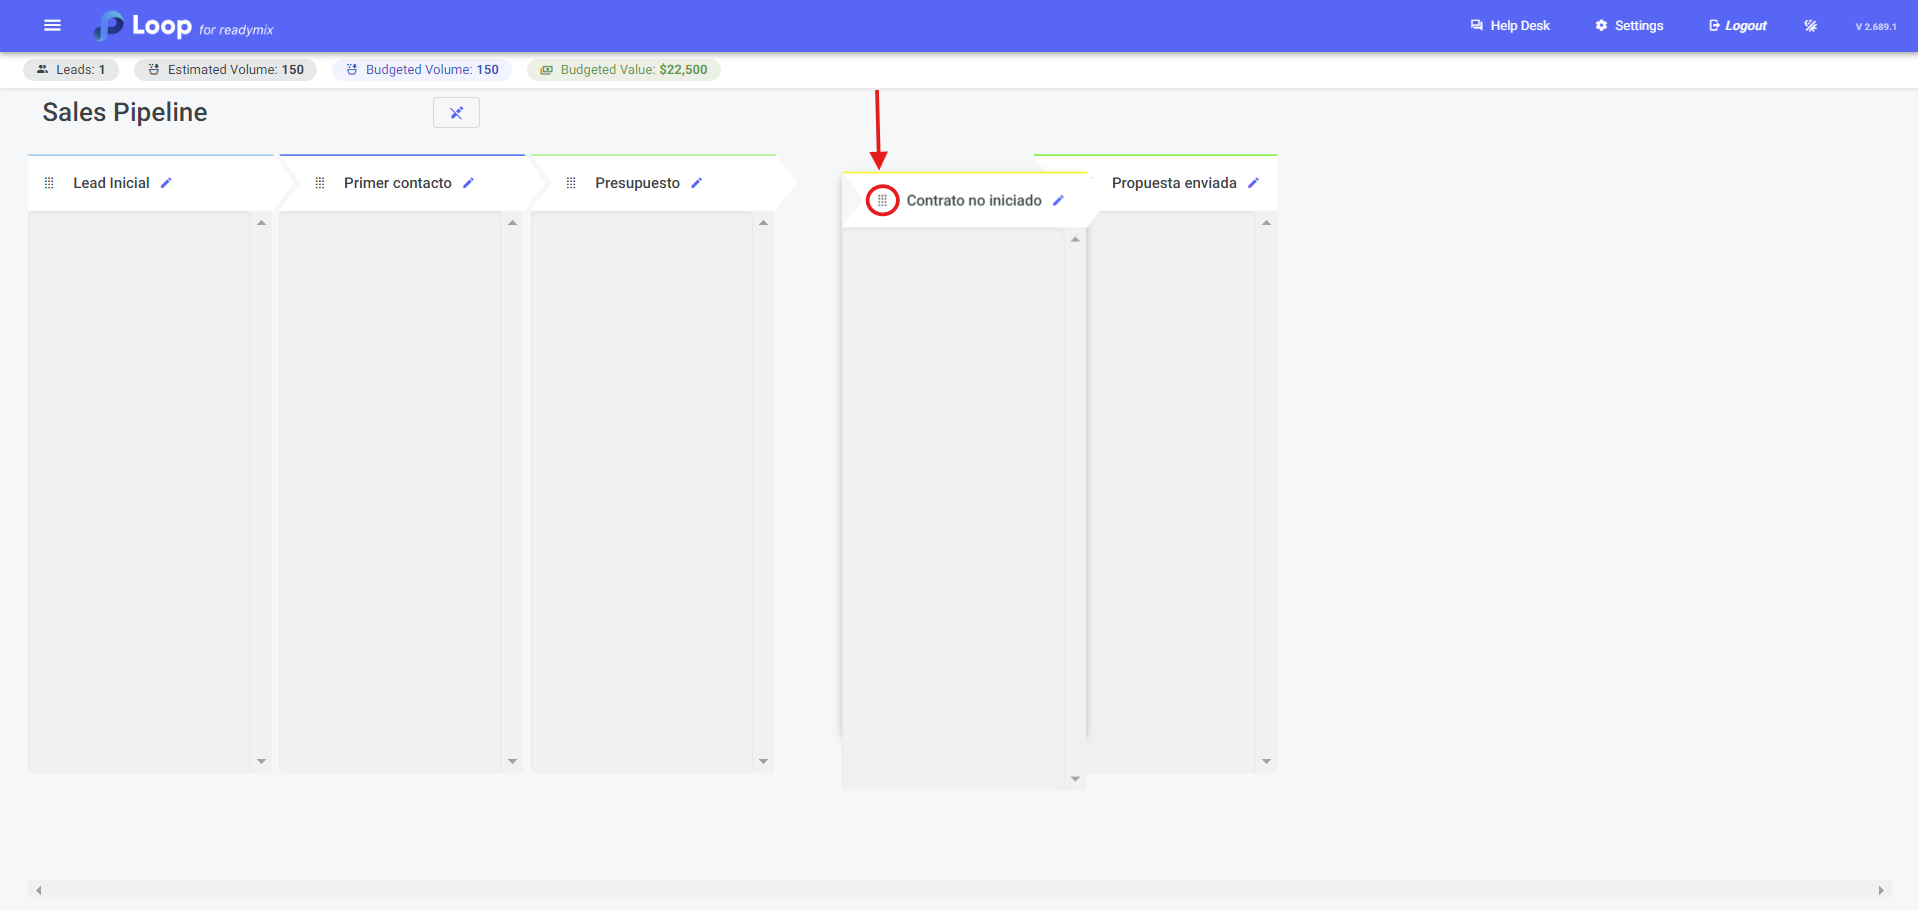
By hovering the mouse cursor over this part of the funnel, you can move the stages to the positions you find most appropriate.
To return to the main screen, just click on this icon again.
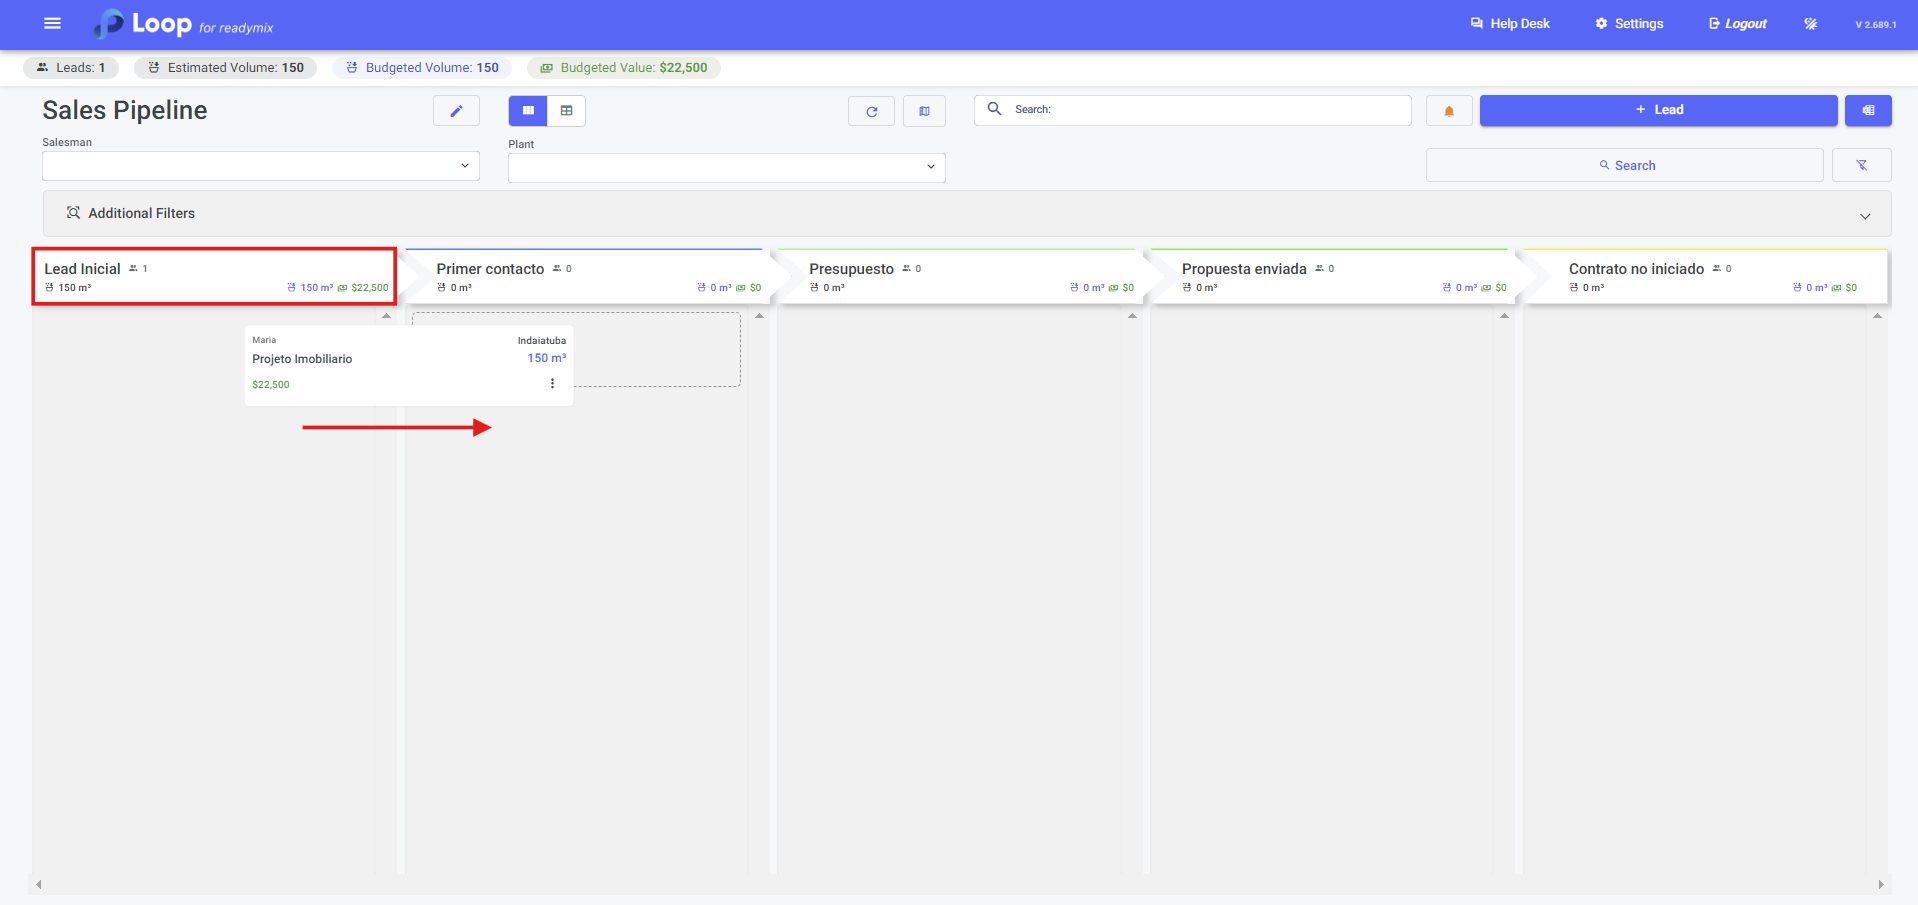
Returning to the main screen, we see all the created funnels. In each funnel, we can view the total leads, the total quantity, and the total value. It is also possible to position each lead in its respective stage.
In the top right corner, we have an overview of the Leads in progress.
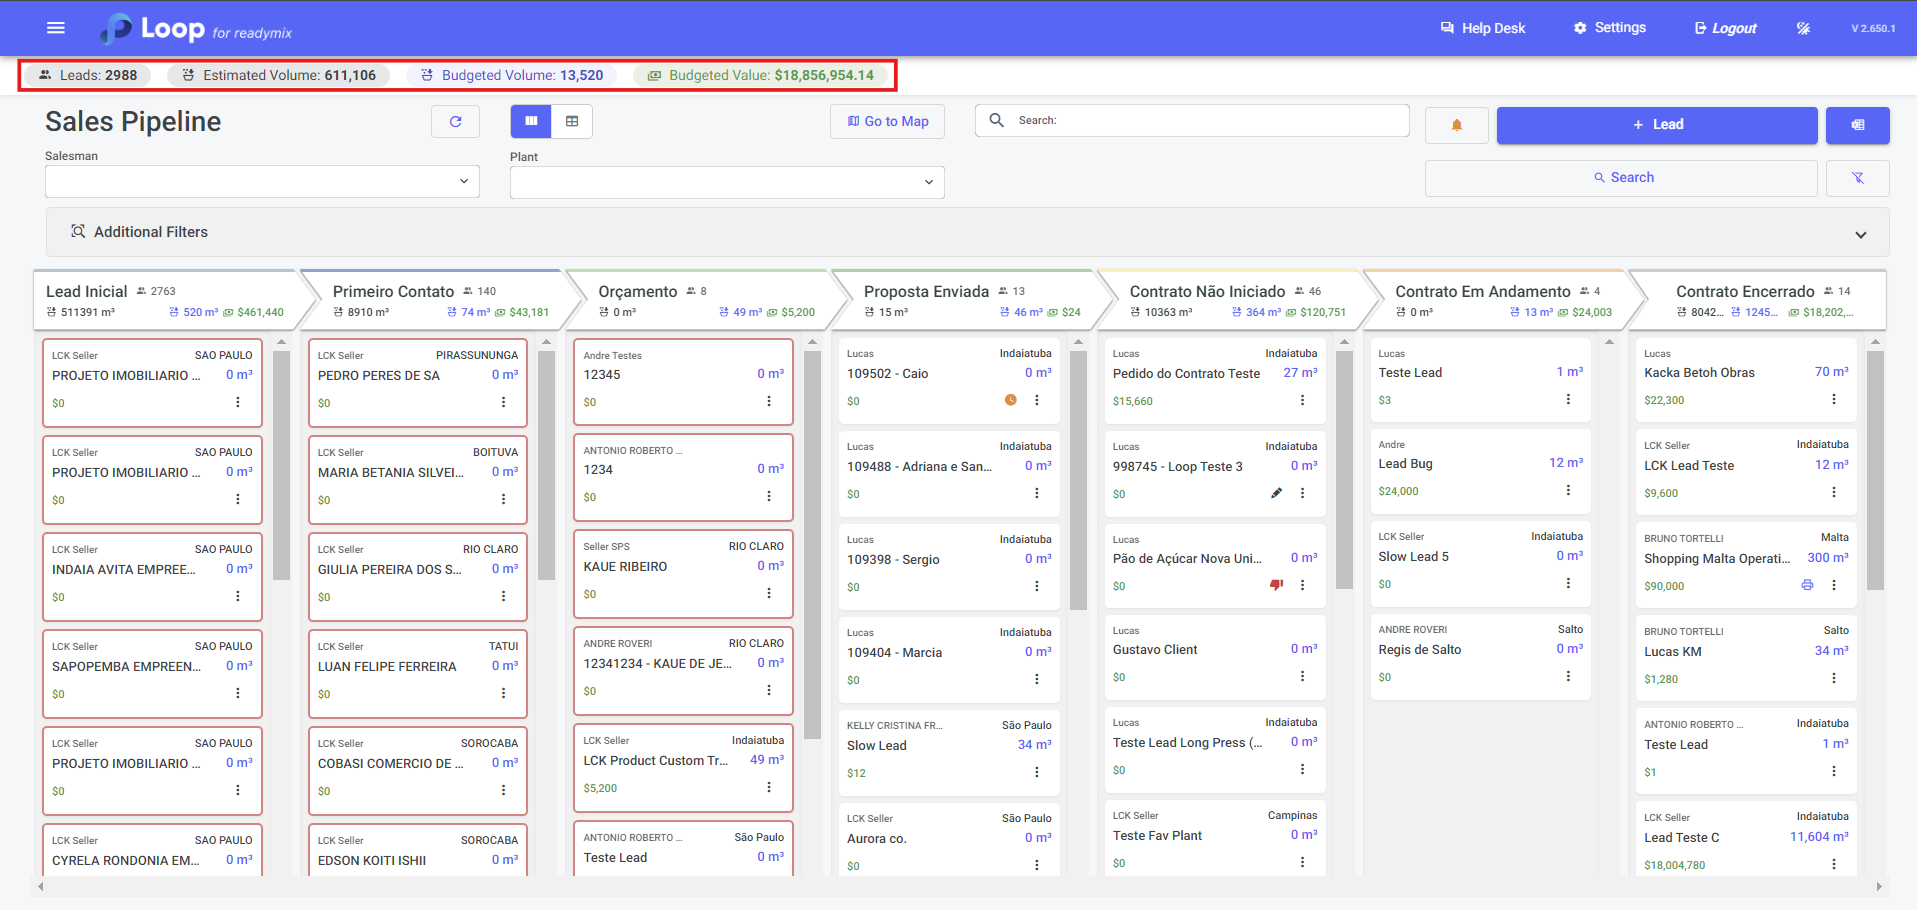
Leads: Indicates the total number of leads currently registered in the system, providing a quick view of the quantity of leads registered in the system.
Estimated Volume: Estimates the total volume of leads in cubic meters (m³), providing a clear measure of the volume potential these leads represent.
Budgeted Volume: Presents the total volume of leads in terms of cubic meters (m3), providing a measure of the business potential represented by the leads.
Budgeted Value: Indicates the total estimated value of leads that have sales proposals sent or contracts in process, offering a financial perspective of the revenue potential represented by the leads.
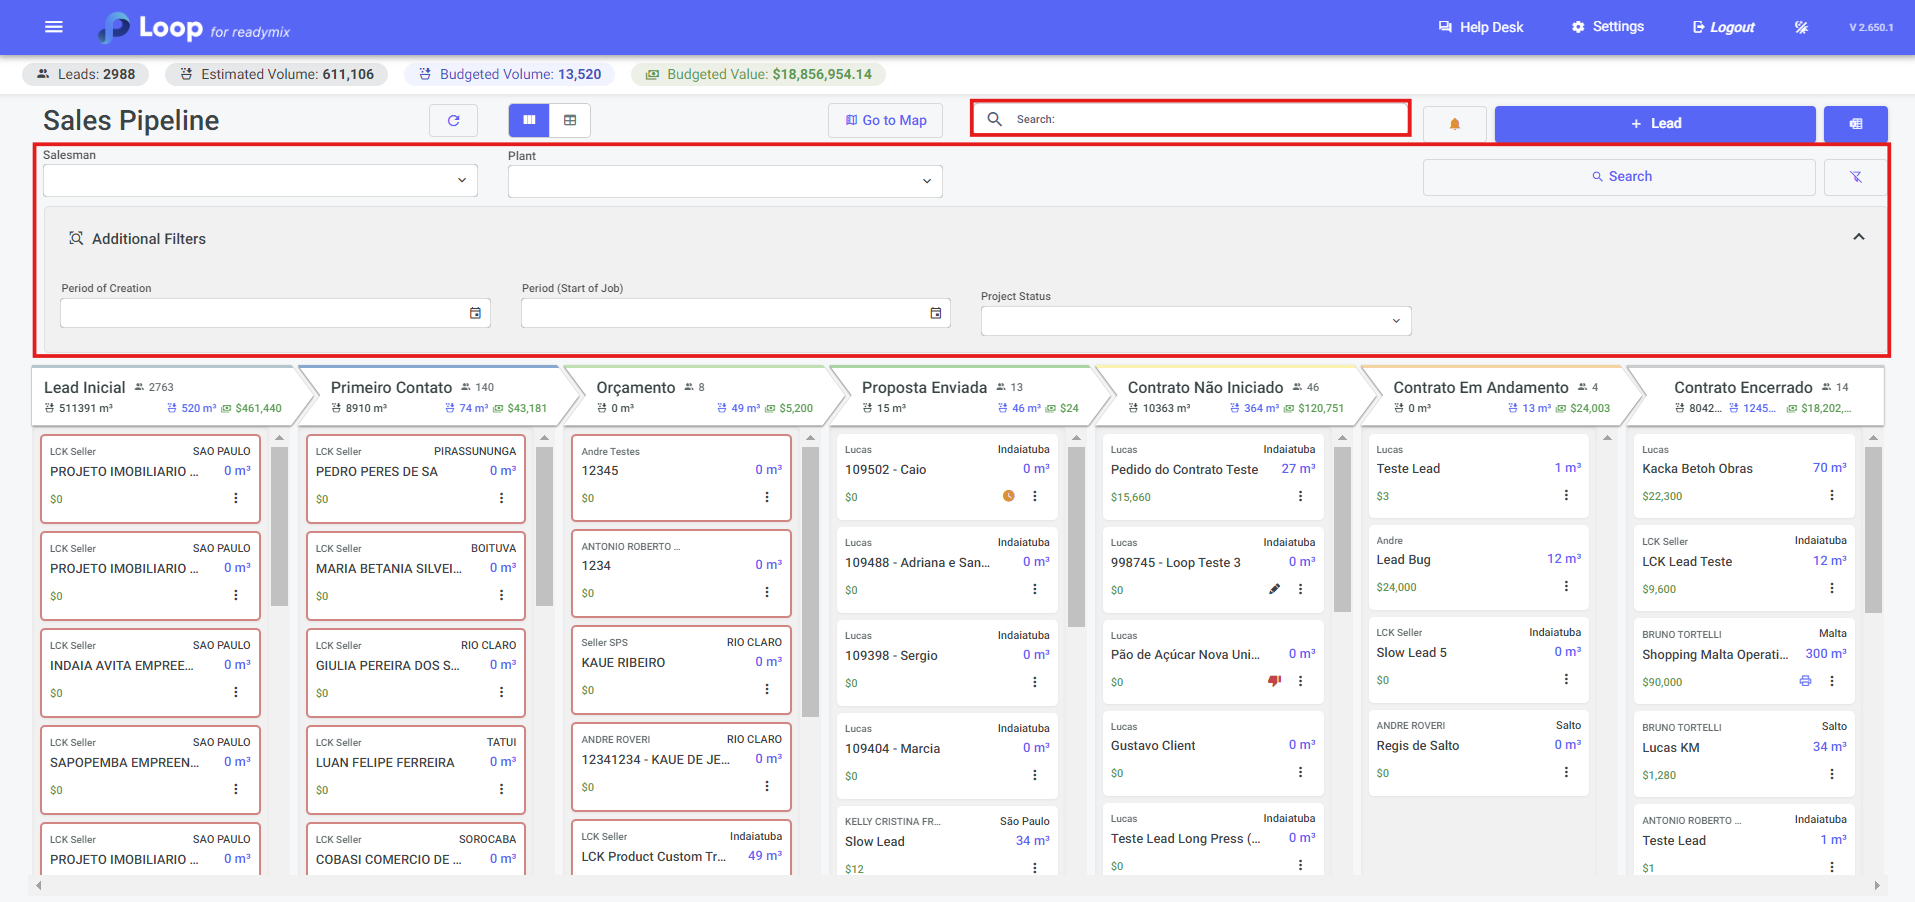
Additionally, we provide specific viewing filters that enable locating a lead by name or filtering all leads from a specific salesperson.
We also have the option to create an inactivity configuration for leads that directly affects the viewing of leads.
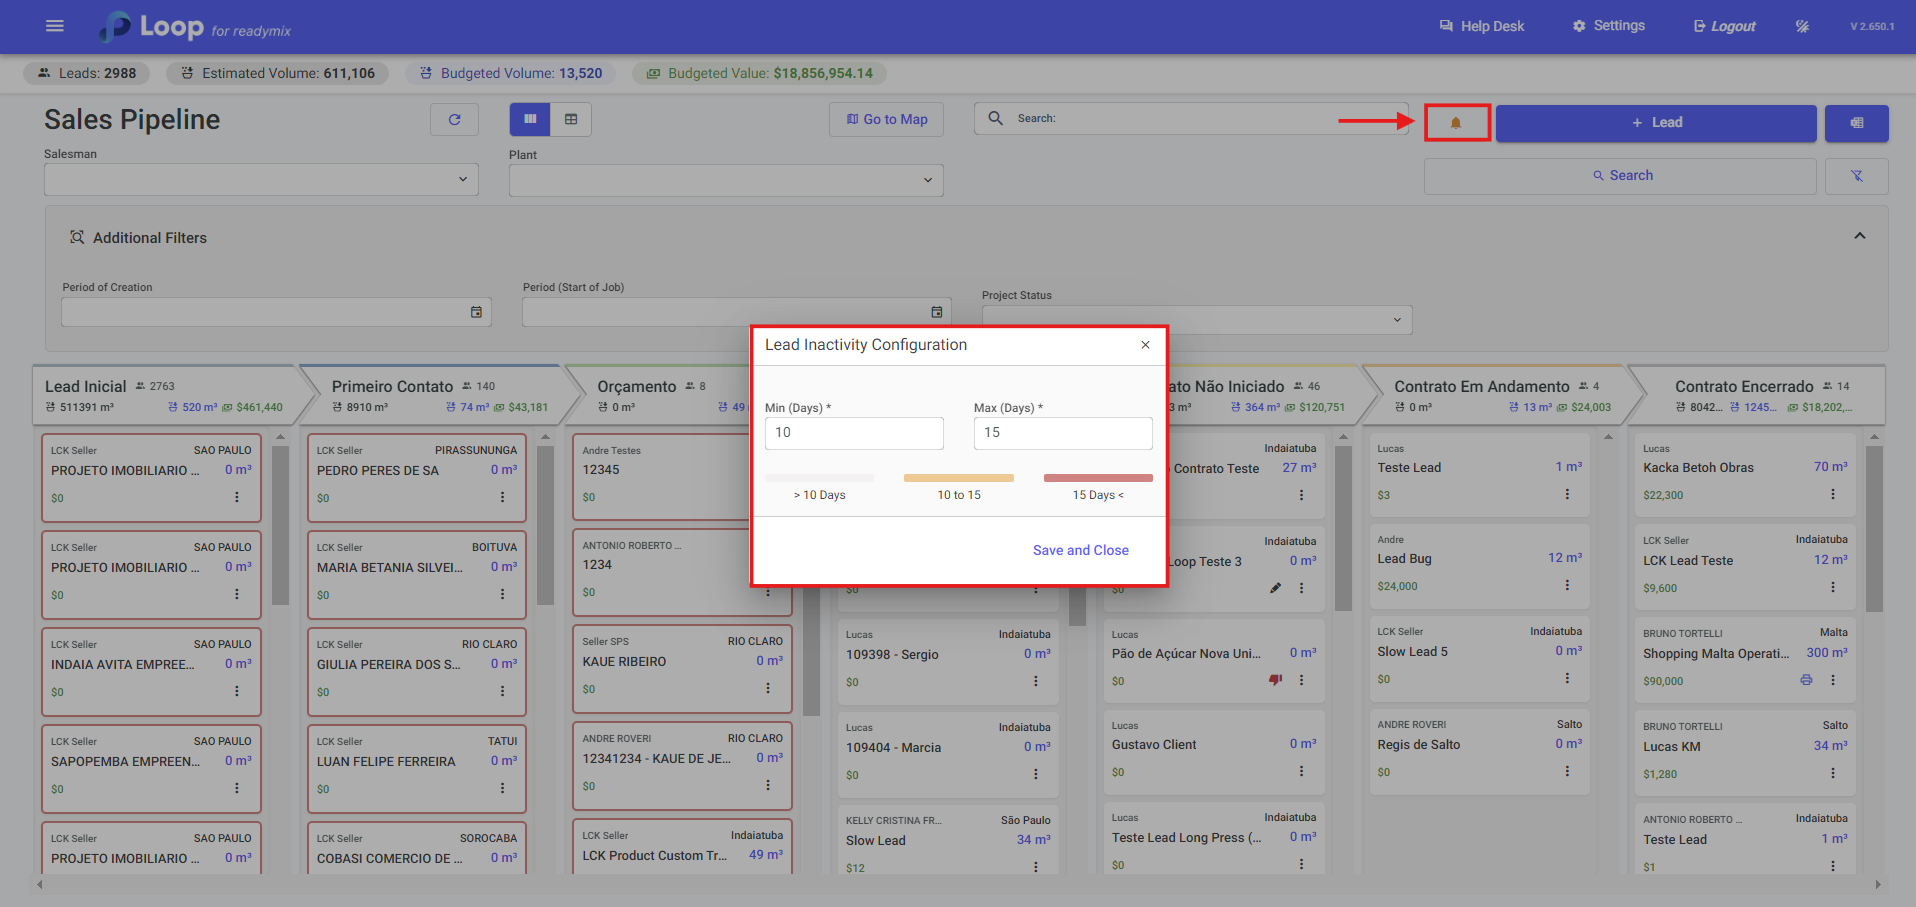
Min (Days): Allows you to set the minimum number of days of lead inactivity. When a lead's inactivity exceeds this number of days, it will be highlighted in orange, providing a visual way to identify potentially inactive leads.
Max (Days): Determines the maximum number of days a lead can be inactive. After this period, the lead will be highlighted in red, providing a visual indication that it has been inactive for an extended period.
Although the default viewing mode is "Funner" leads can also be viewed in "Table" mode.
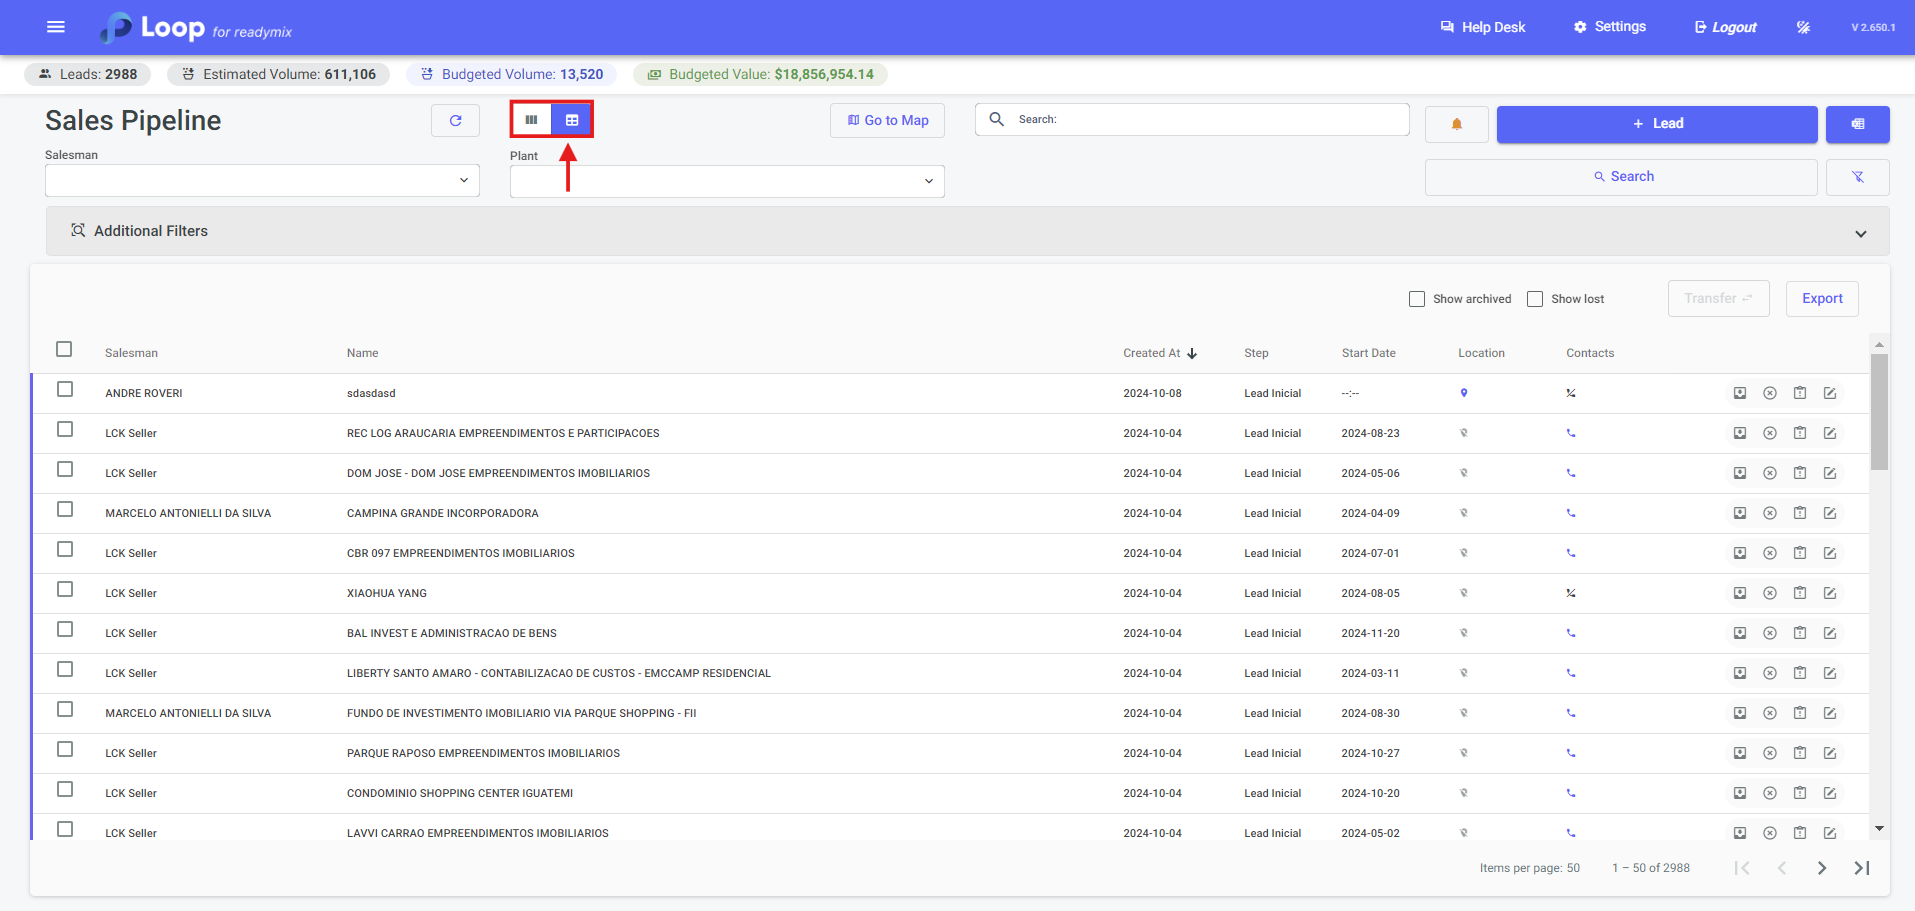
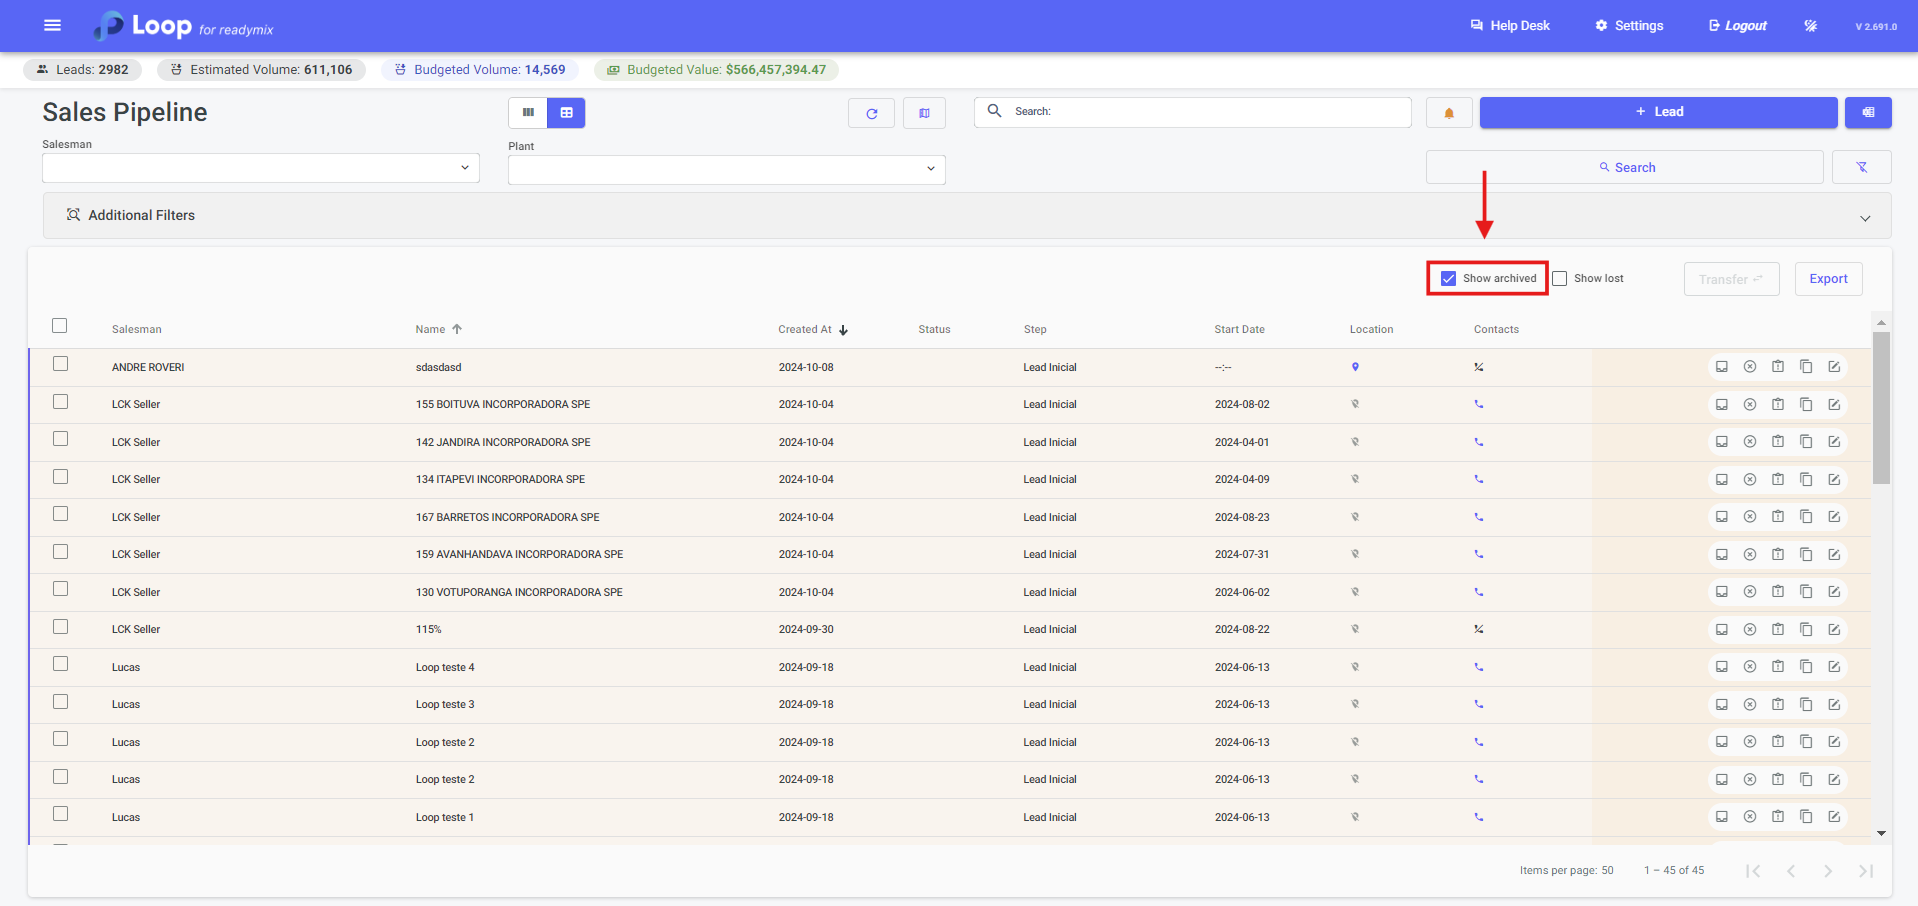
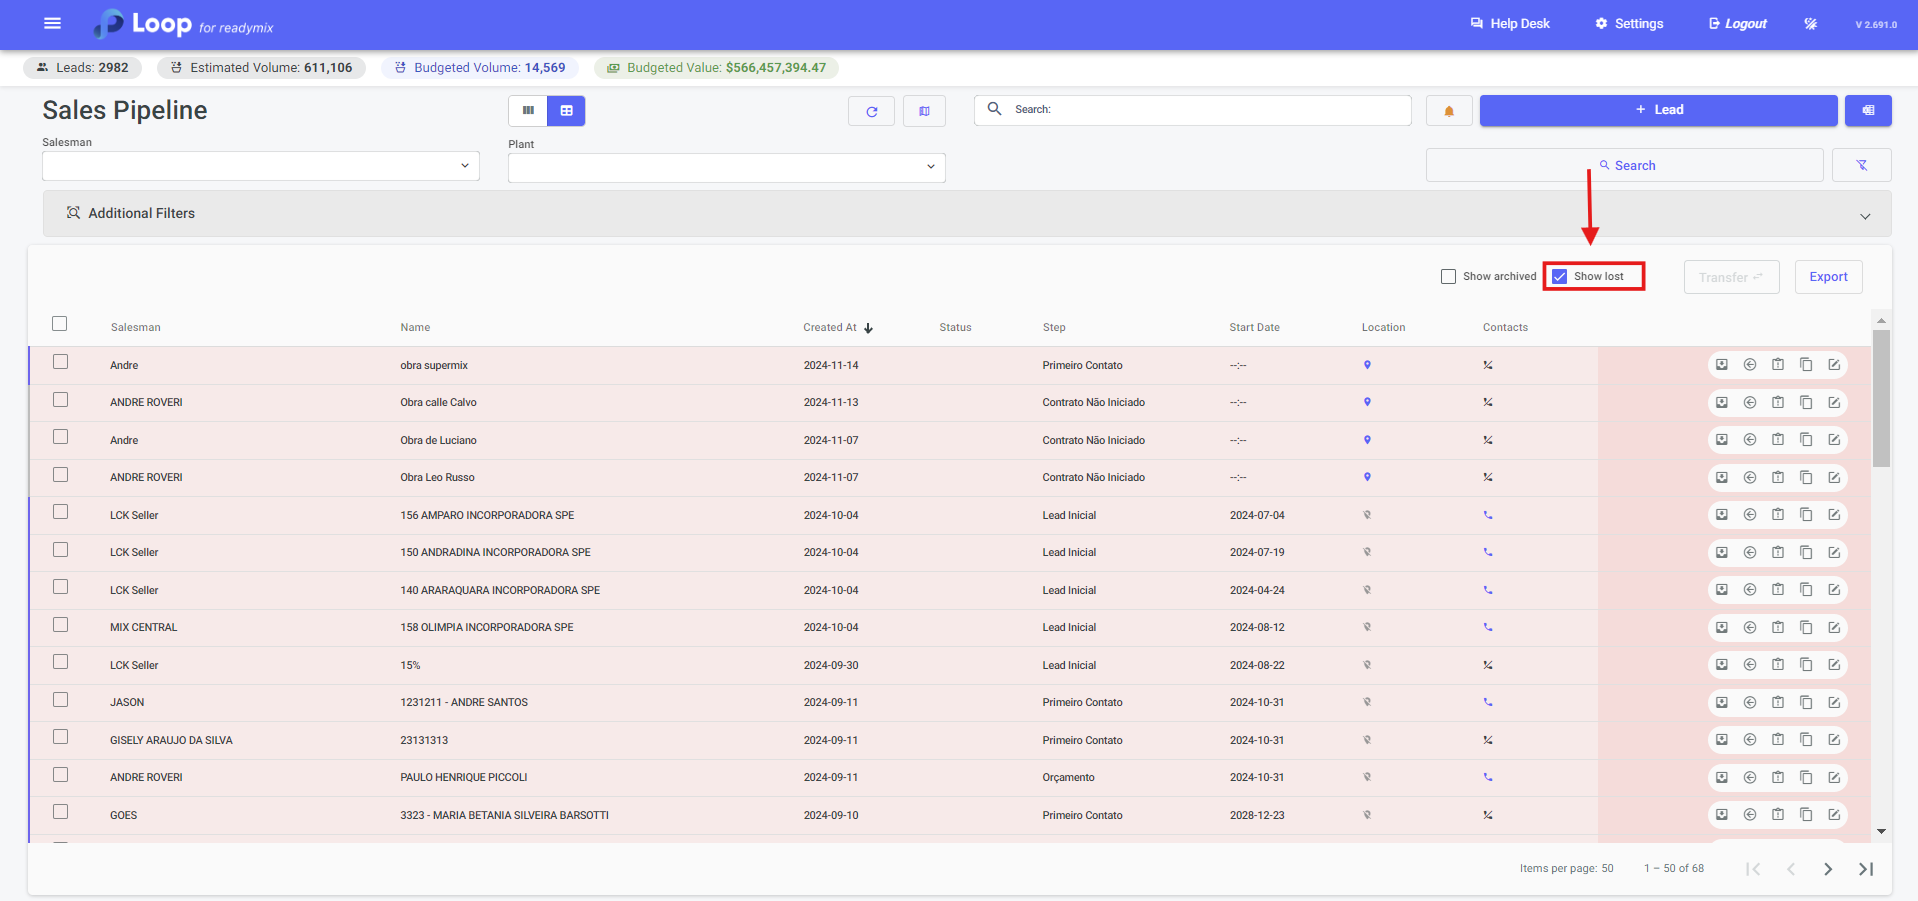
In table mode, it is possible to view not only active leads, but also lost and archived ones, allowing a detailed analysis of the reasons and stages in which they were lost and archived. This provides a comprehensive view of the effectiveness of the lead process, enabling adjustments and improvements to optimize the conversion of leads into customers.
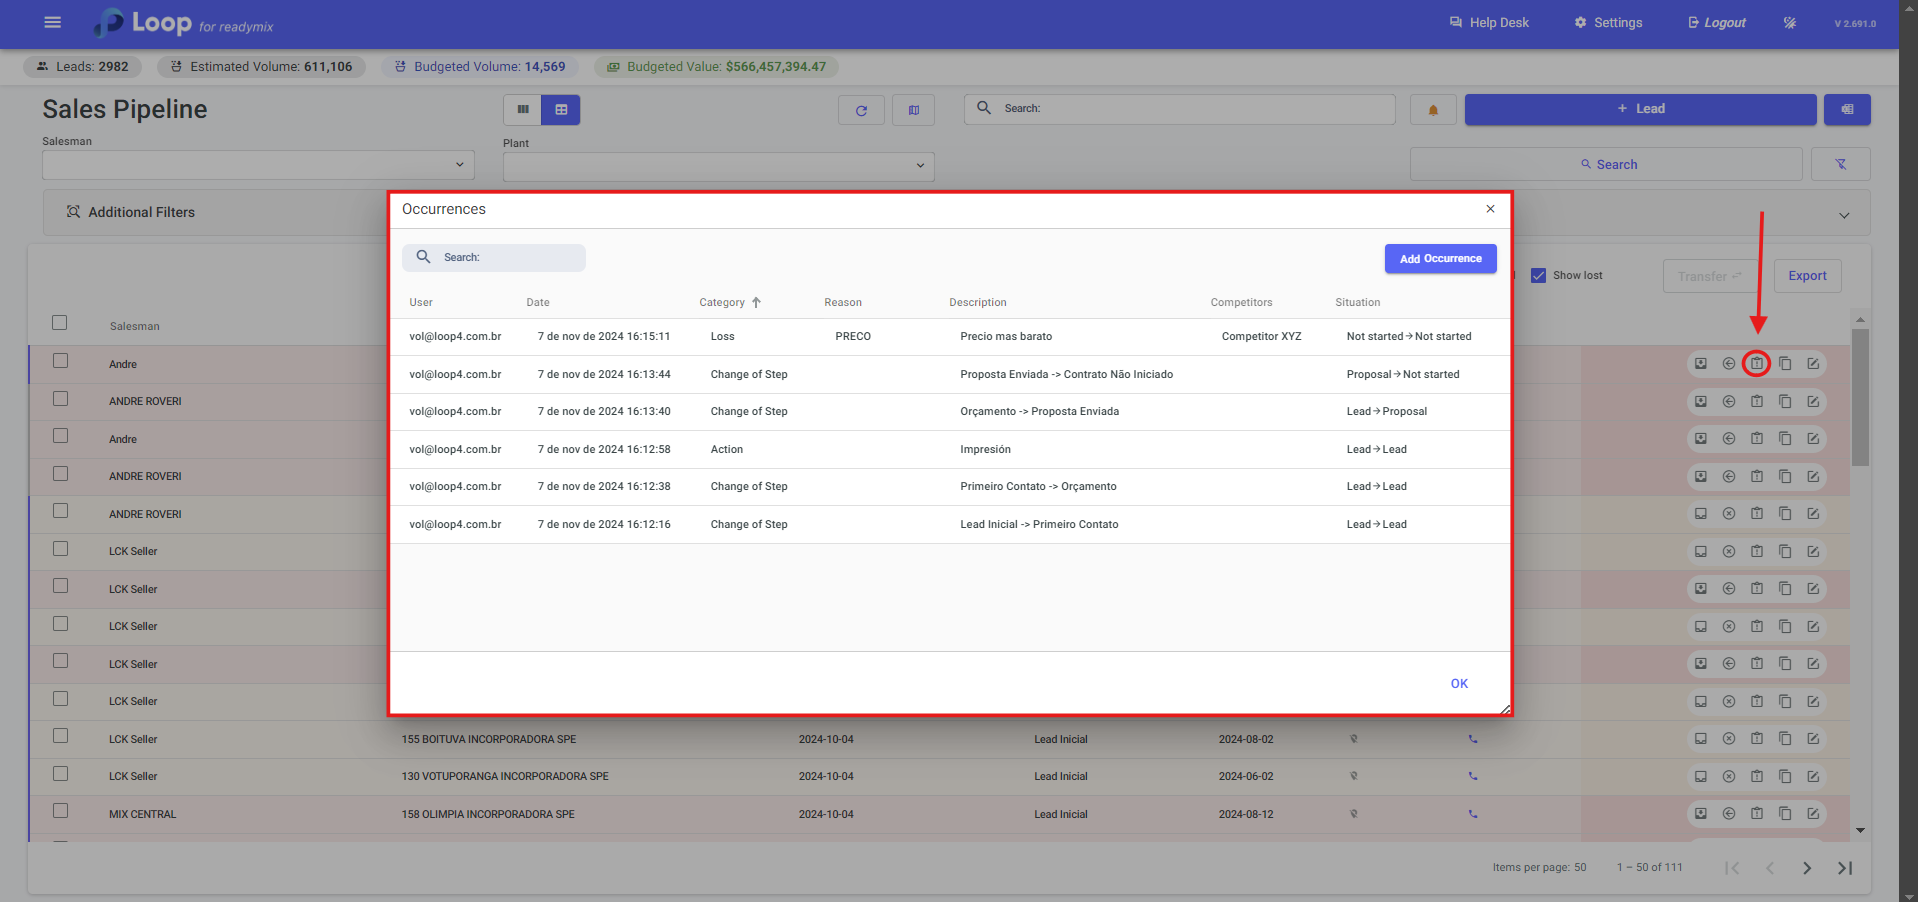
You can customize specific stages for your company, giving them the names you prefer. This provides exceptional flexibility and the ability to tailor the software to the unique needs and standards of your business.
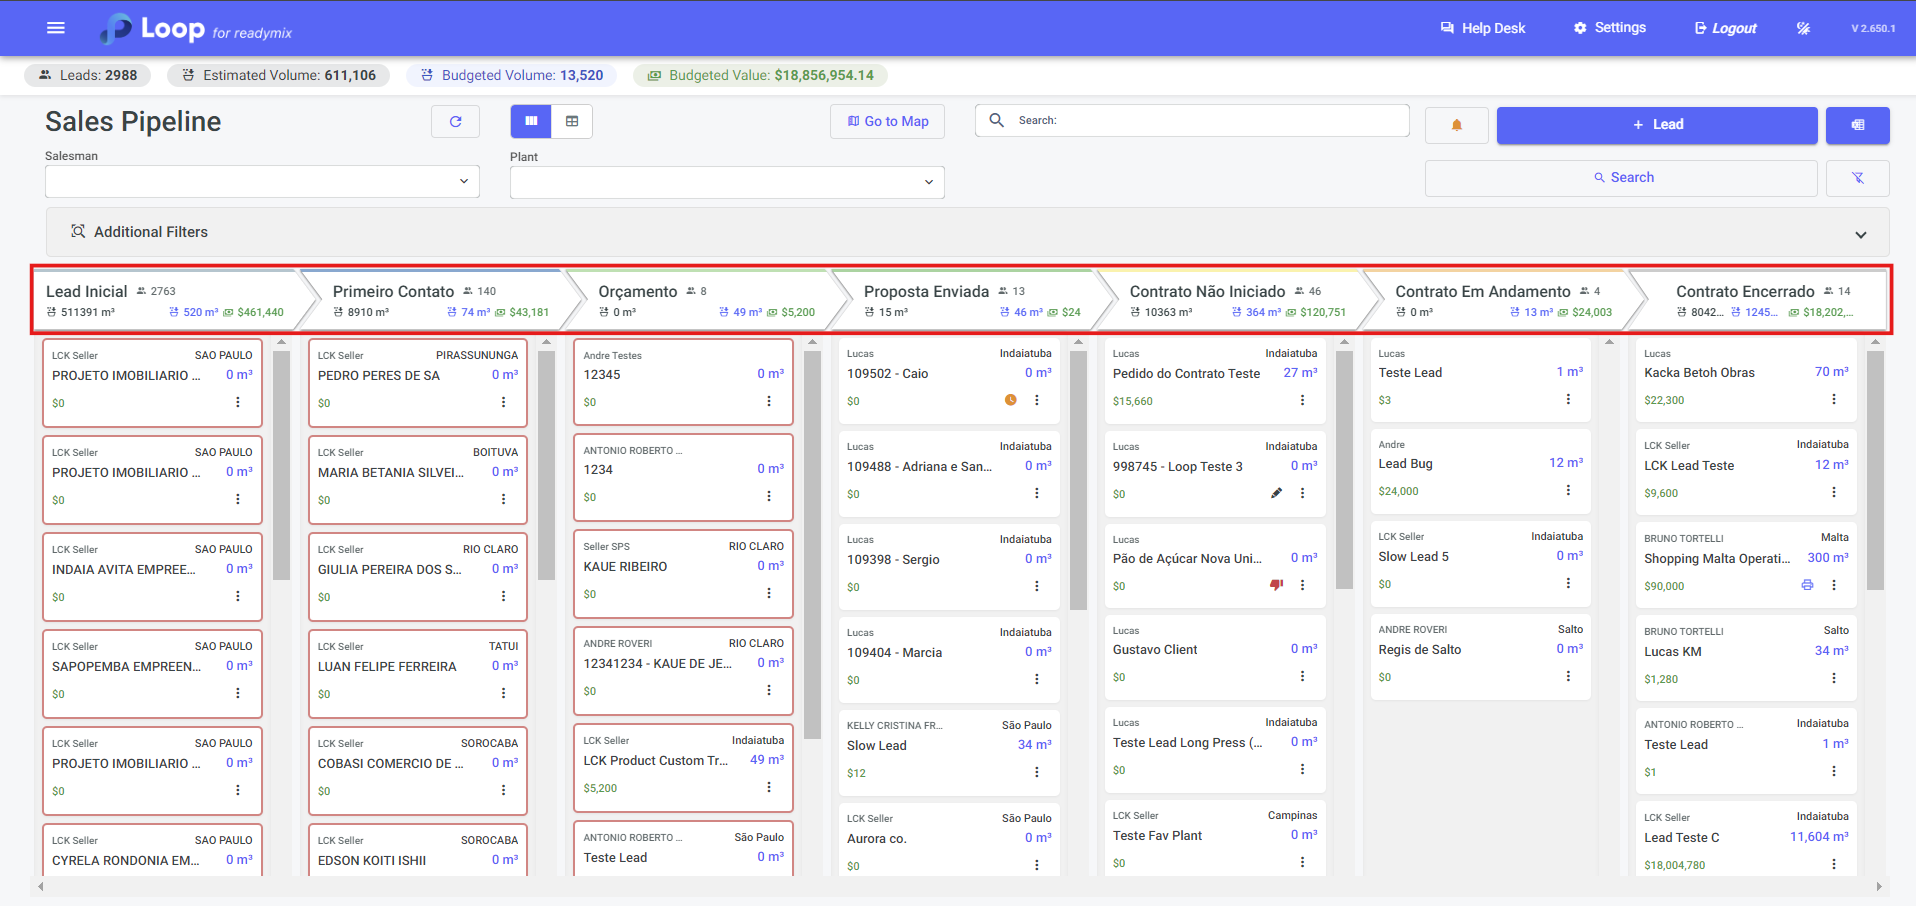
The Leads Manager is highly intuitive: to advance a lead to the next stage, simply click and drag it to the corresponding stage. This functionality simplifies the process of tracking and updating the status of leads efficiently.
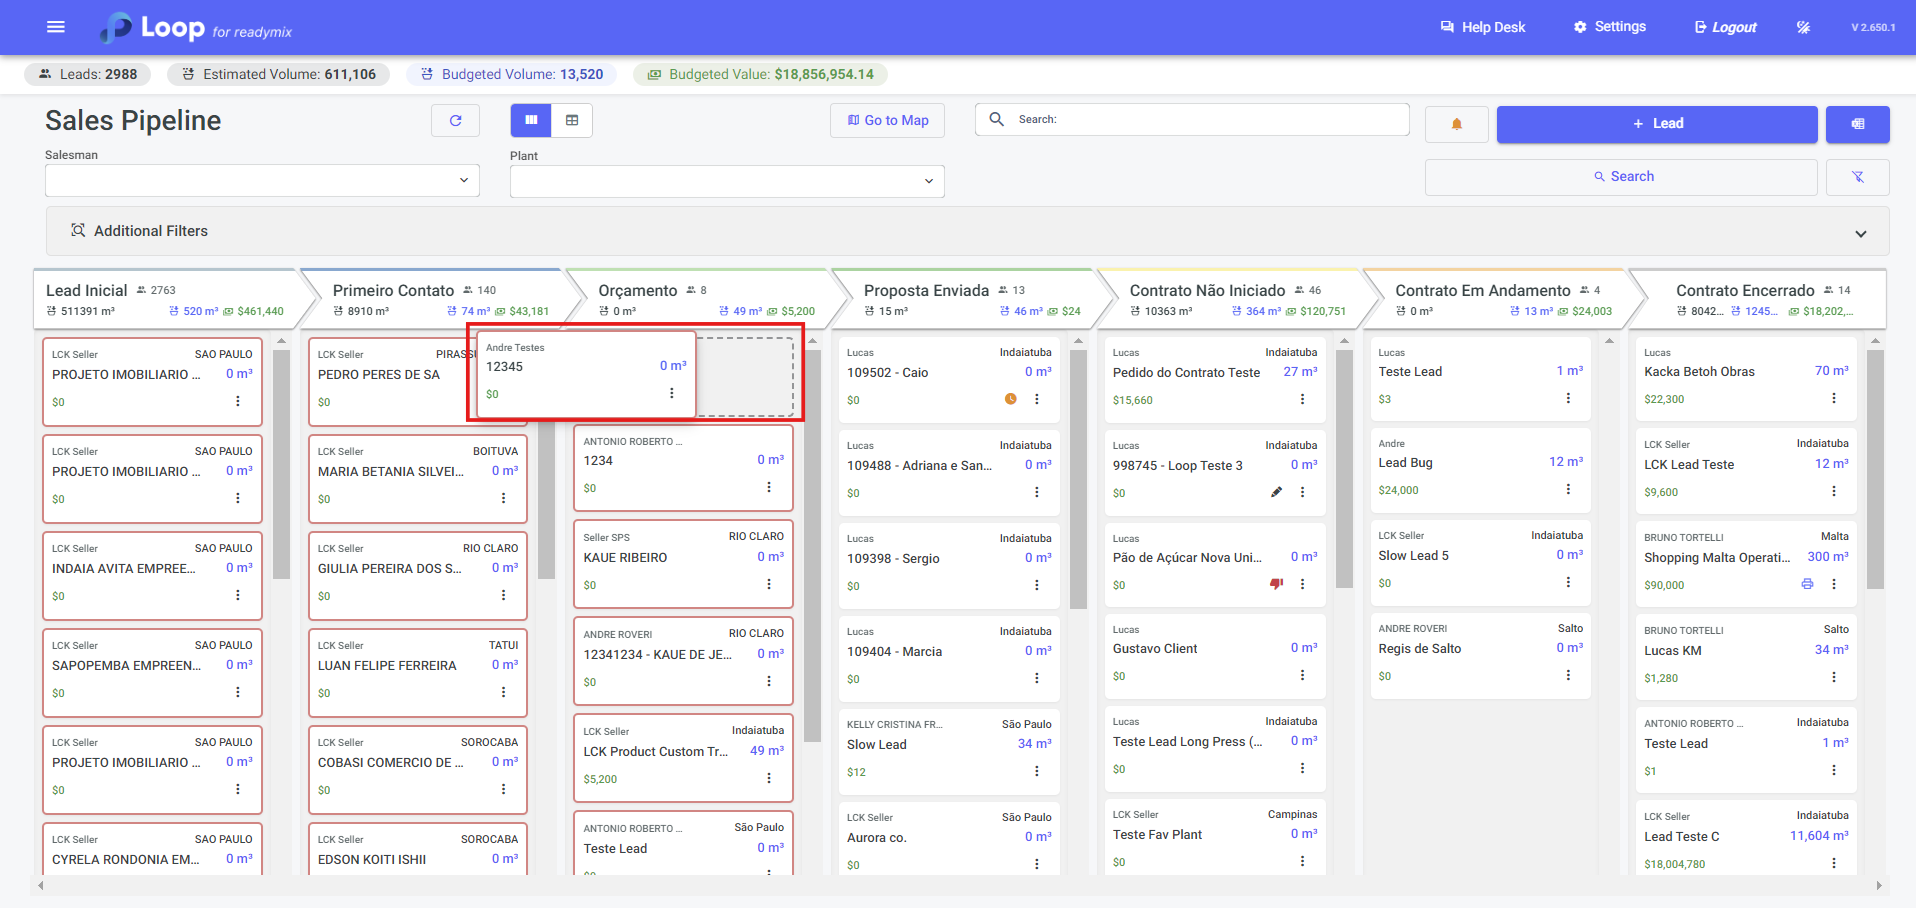
Lead actions are extremely important so that you can properly organize your lead panel.
You can make a lead as lost by clicking on the "Lost Lead" option.
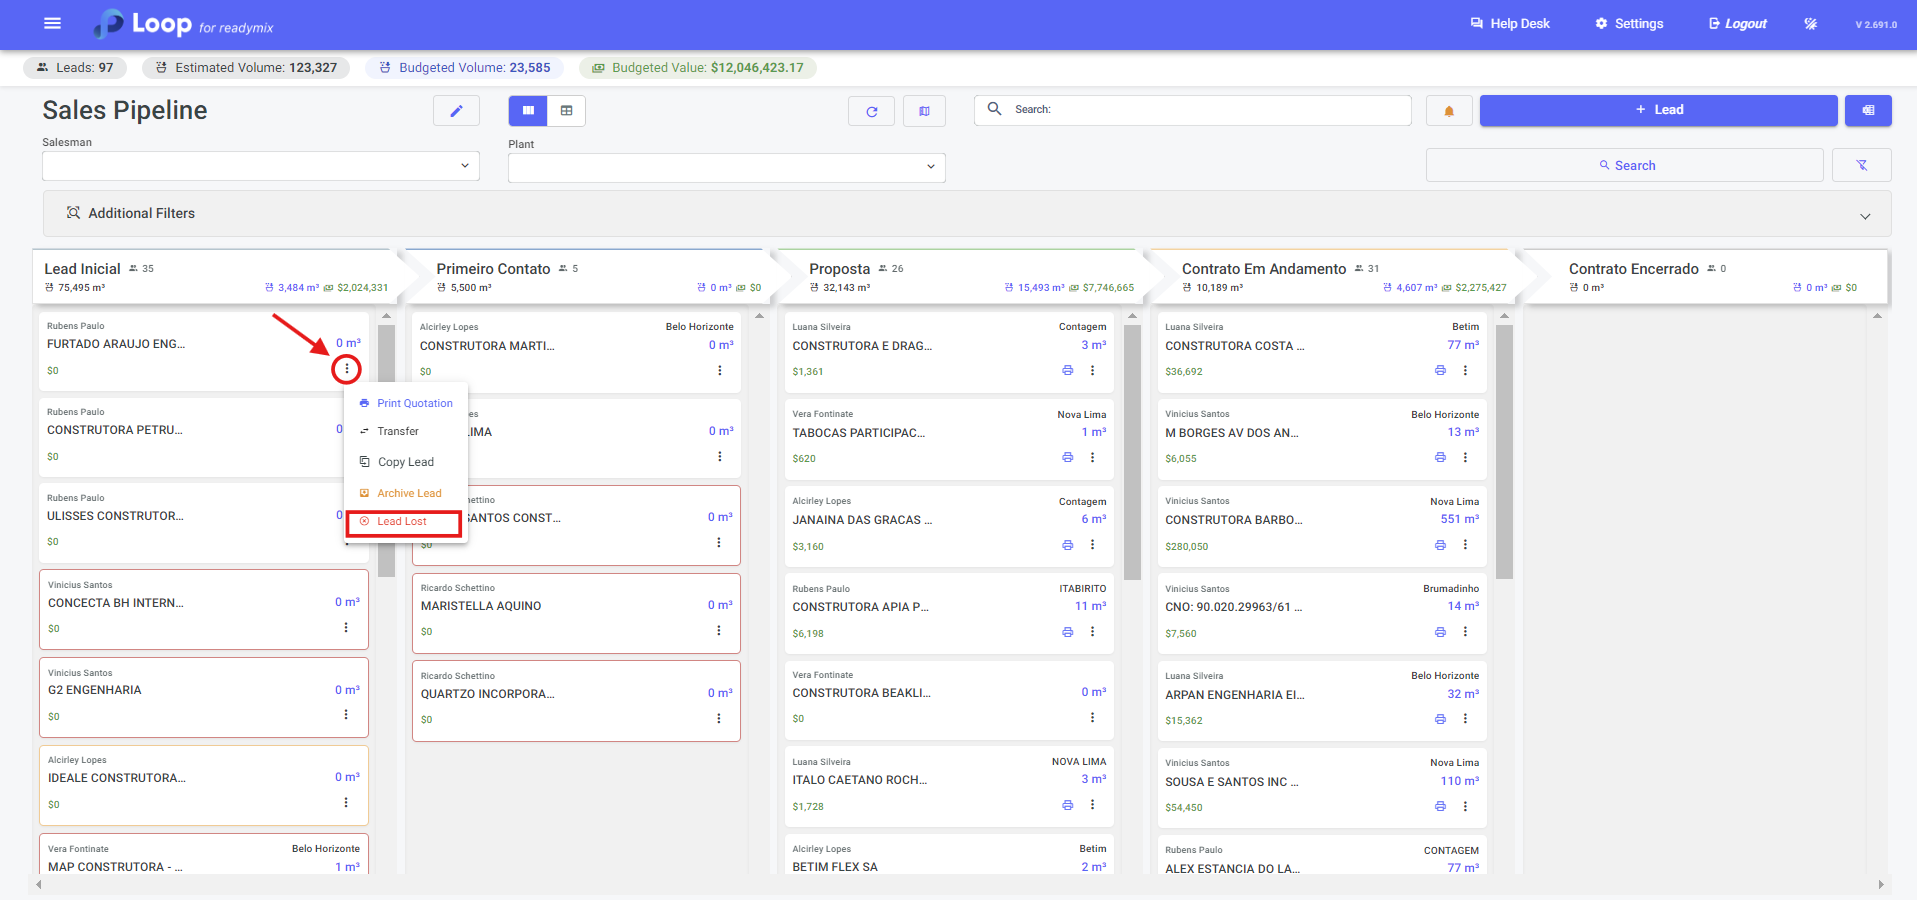
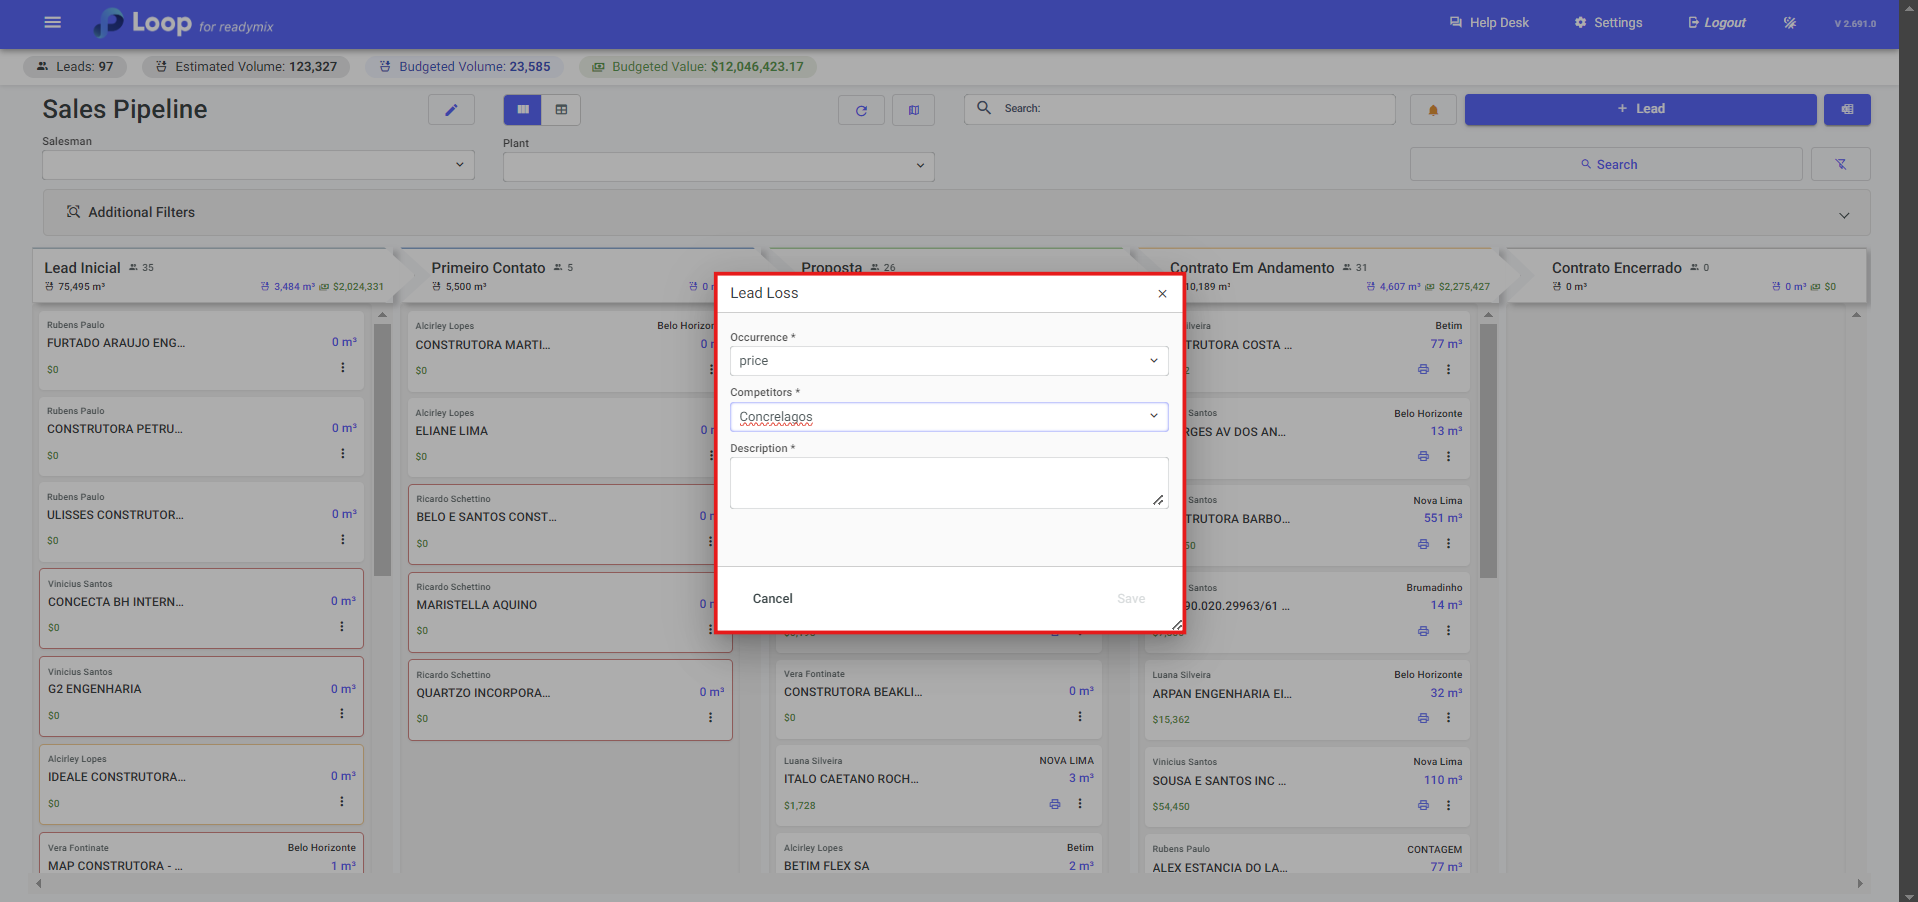
When selecting the "Lost Lead" option you must select the type of occurrence, if this lead is lost due to price as in the example below, an option will be enabled where you must add which competitor that lead was lost to and add a description.
And finally finish by clicking Save.
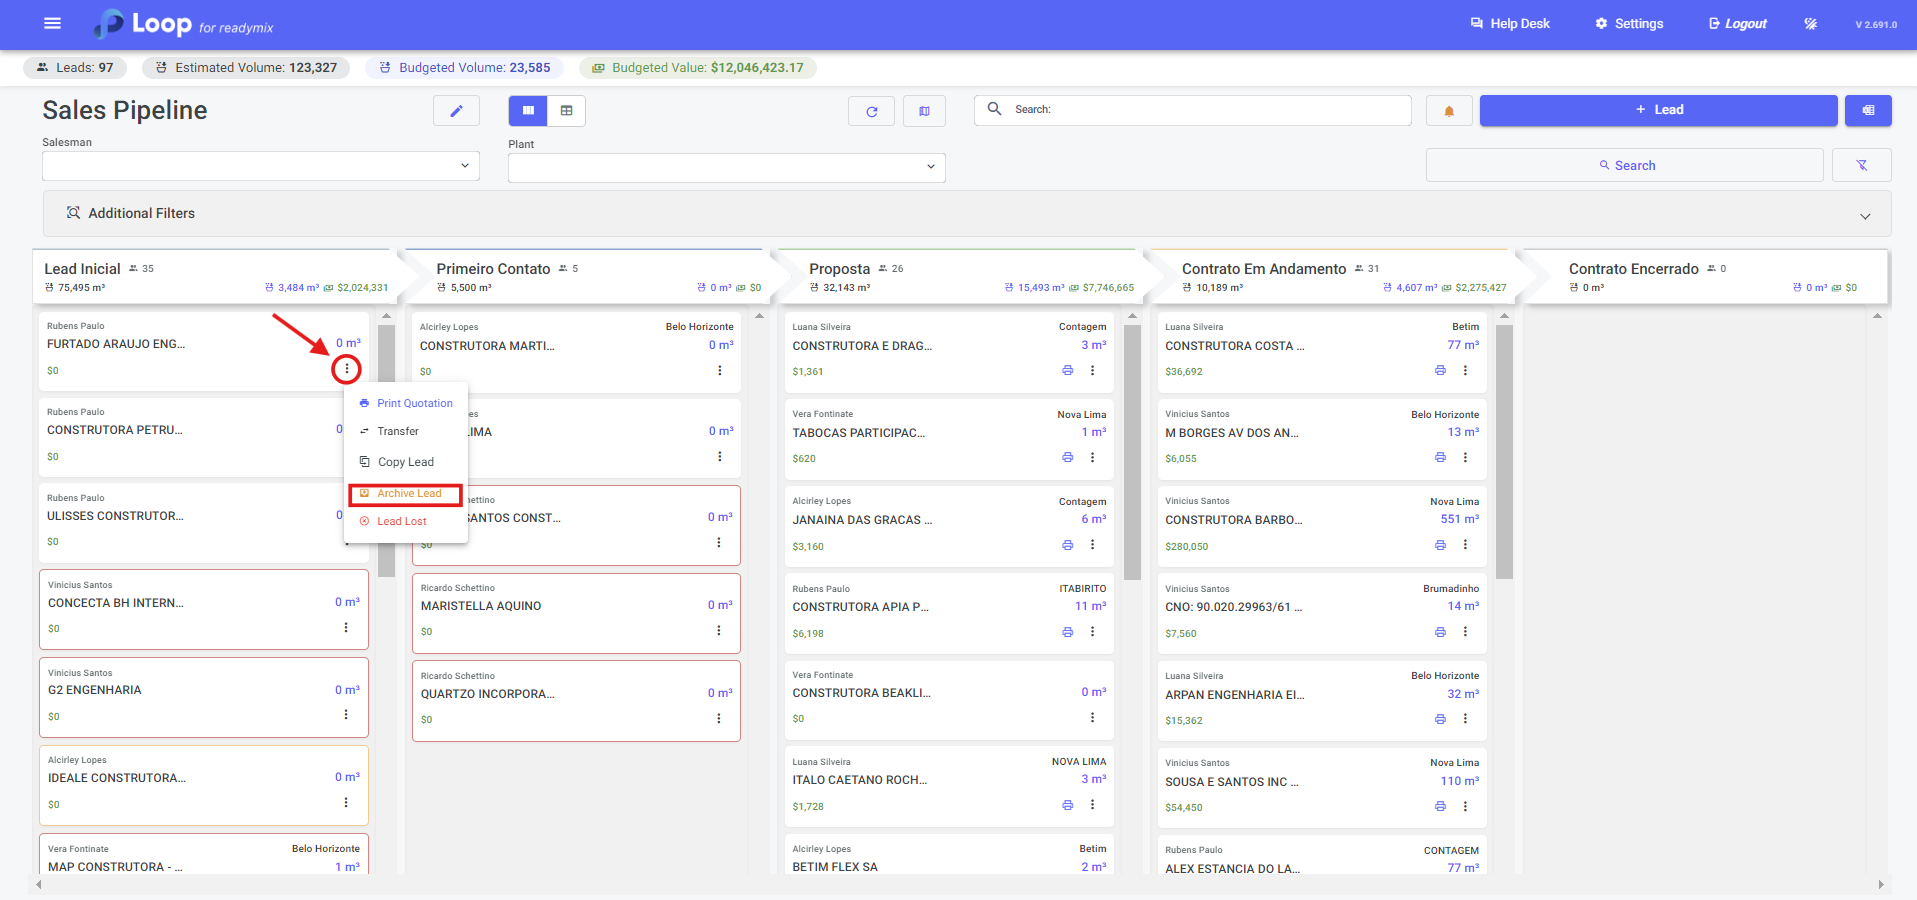
You can also archive a lead by clicking on the "Archive Lead" option.
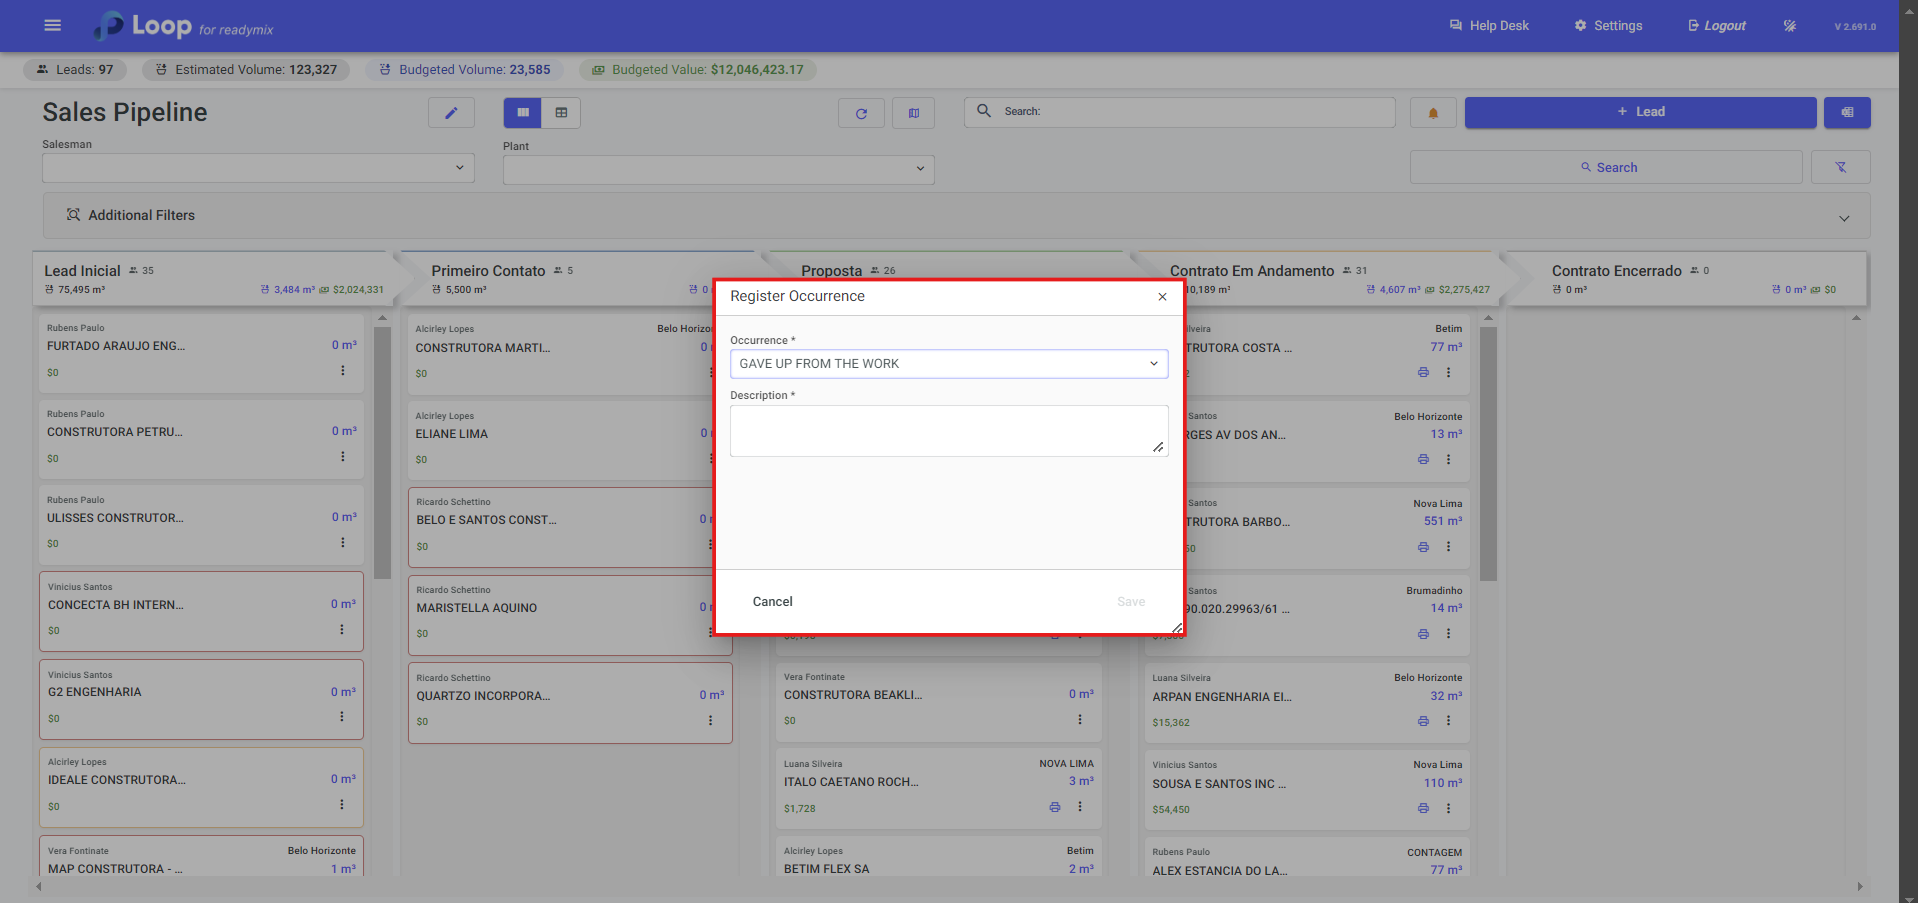
When selecting the "Archive Lead" option you must select the type of occurrence and a description, when finished you can click save.
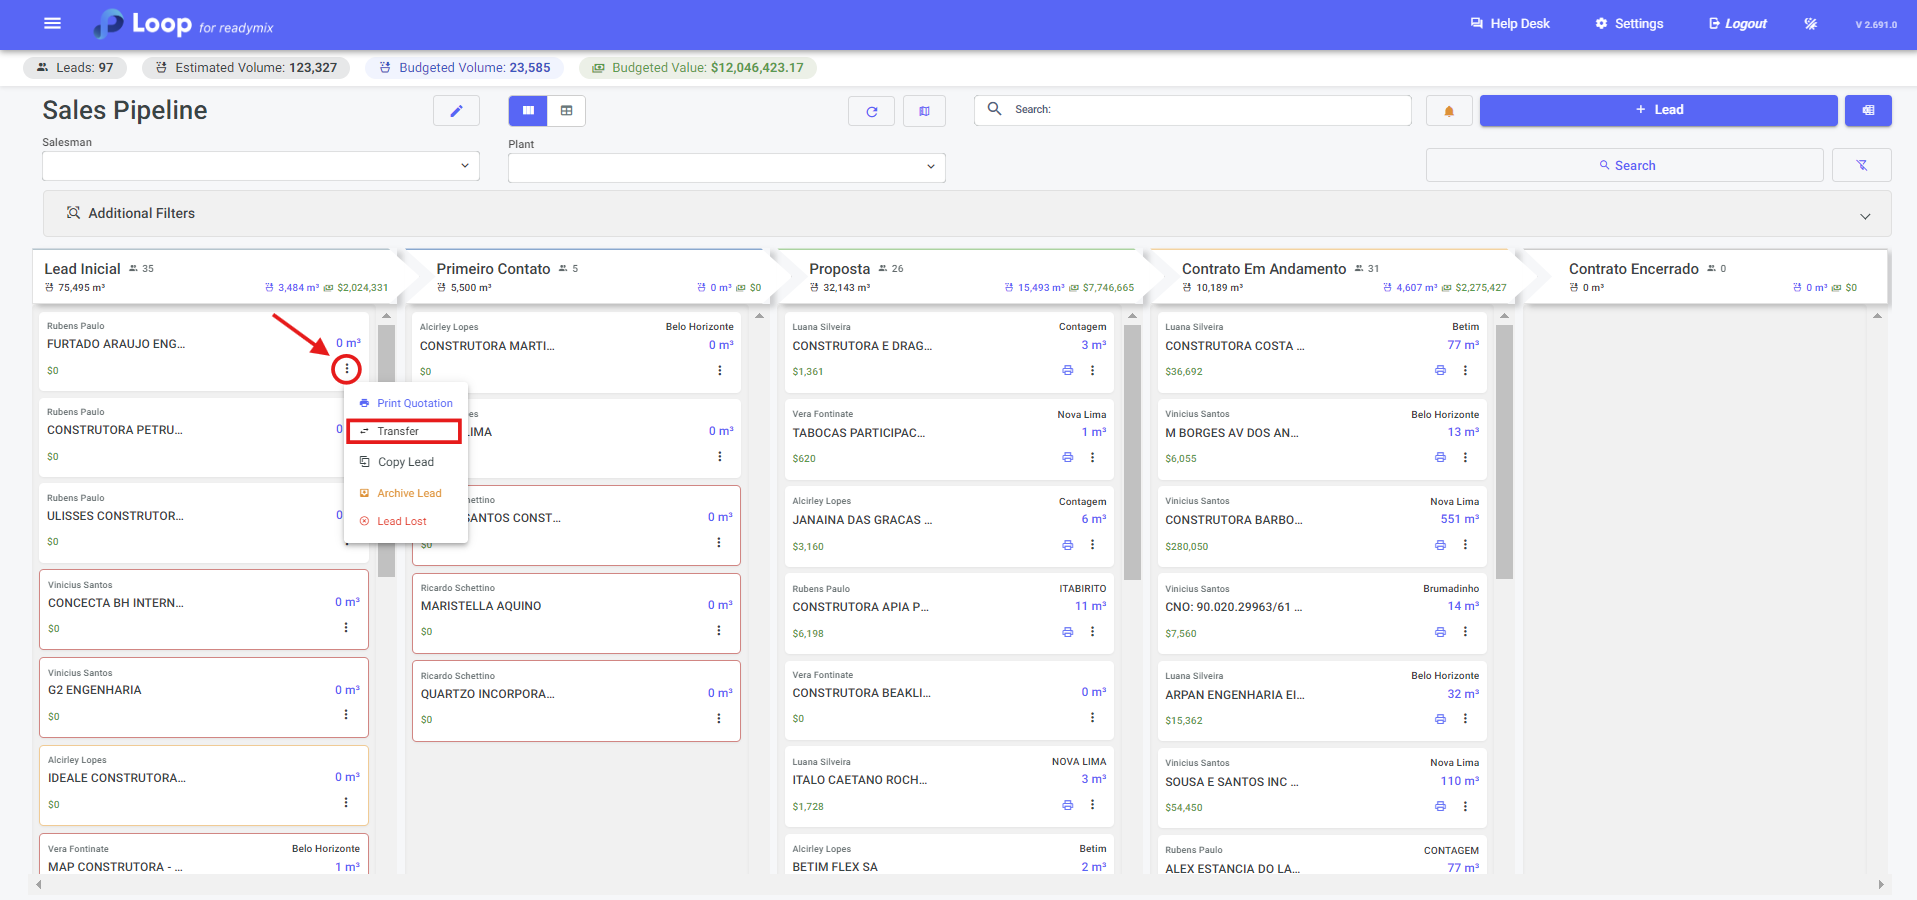
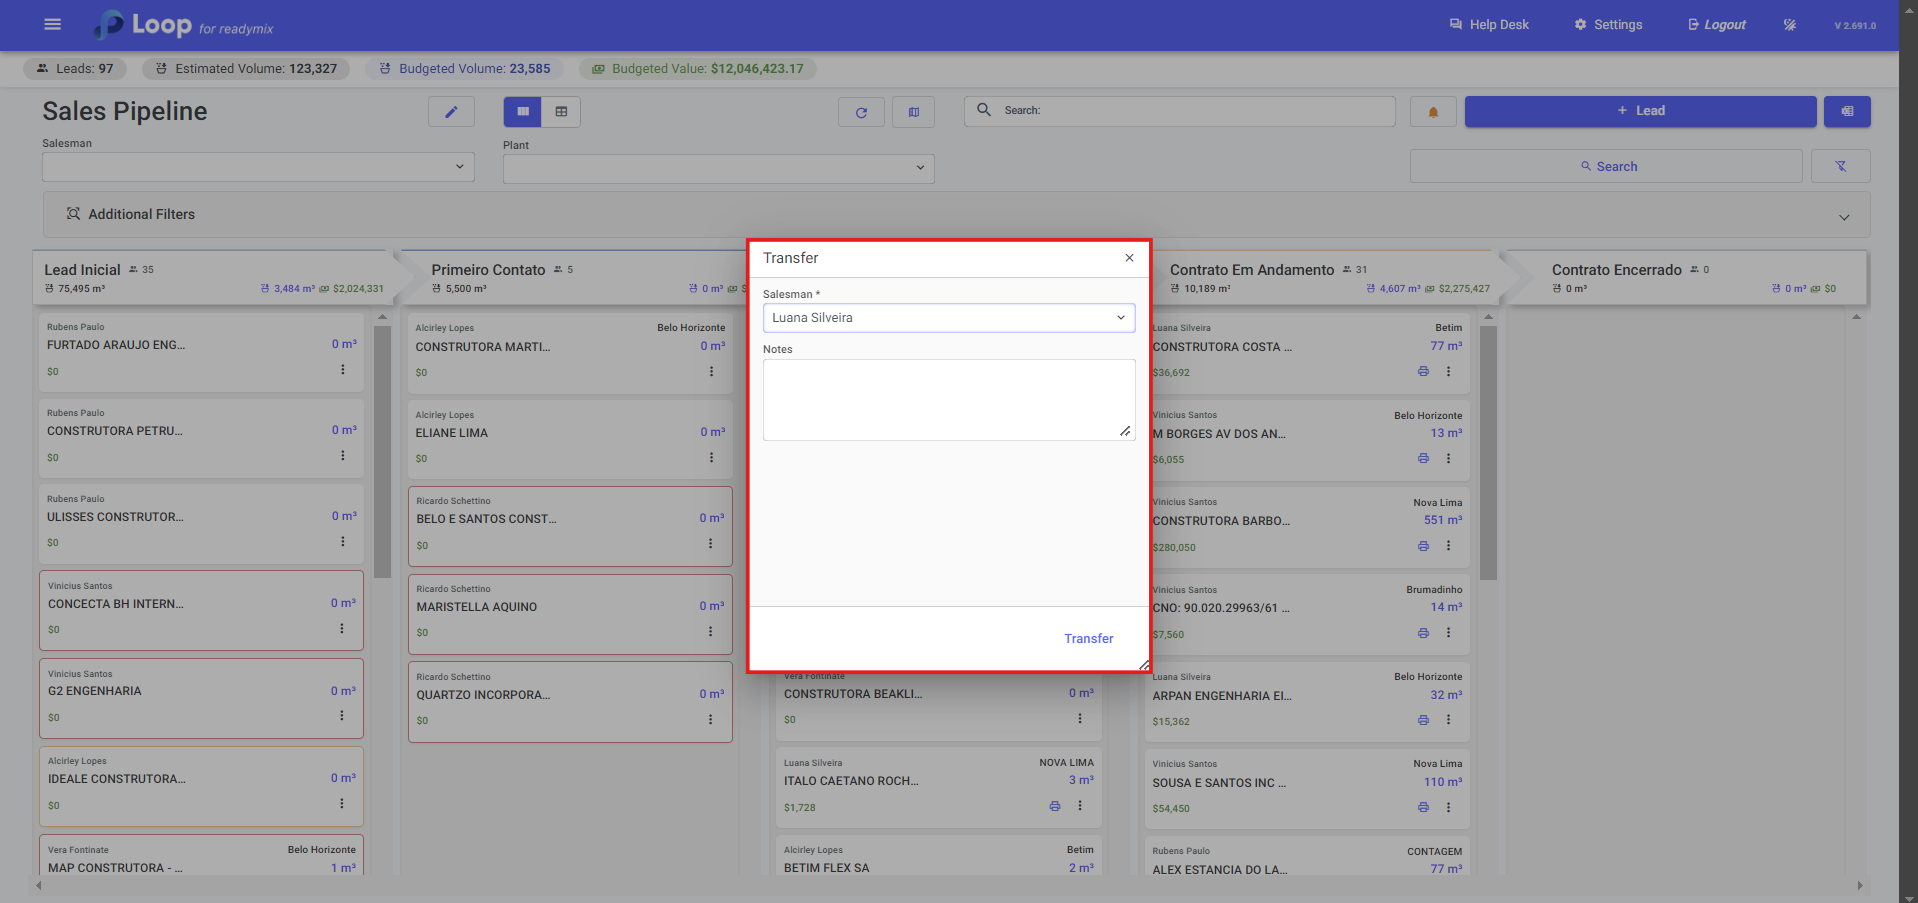
If necessary, you can transfer leads to another seller by clicking the "Transfer" option.
When selecting the "Transfer" option you must select the seller and a note if necessary, when finished you can click transfer.
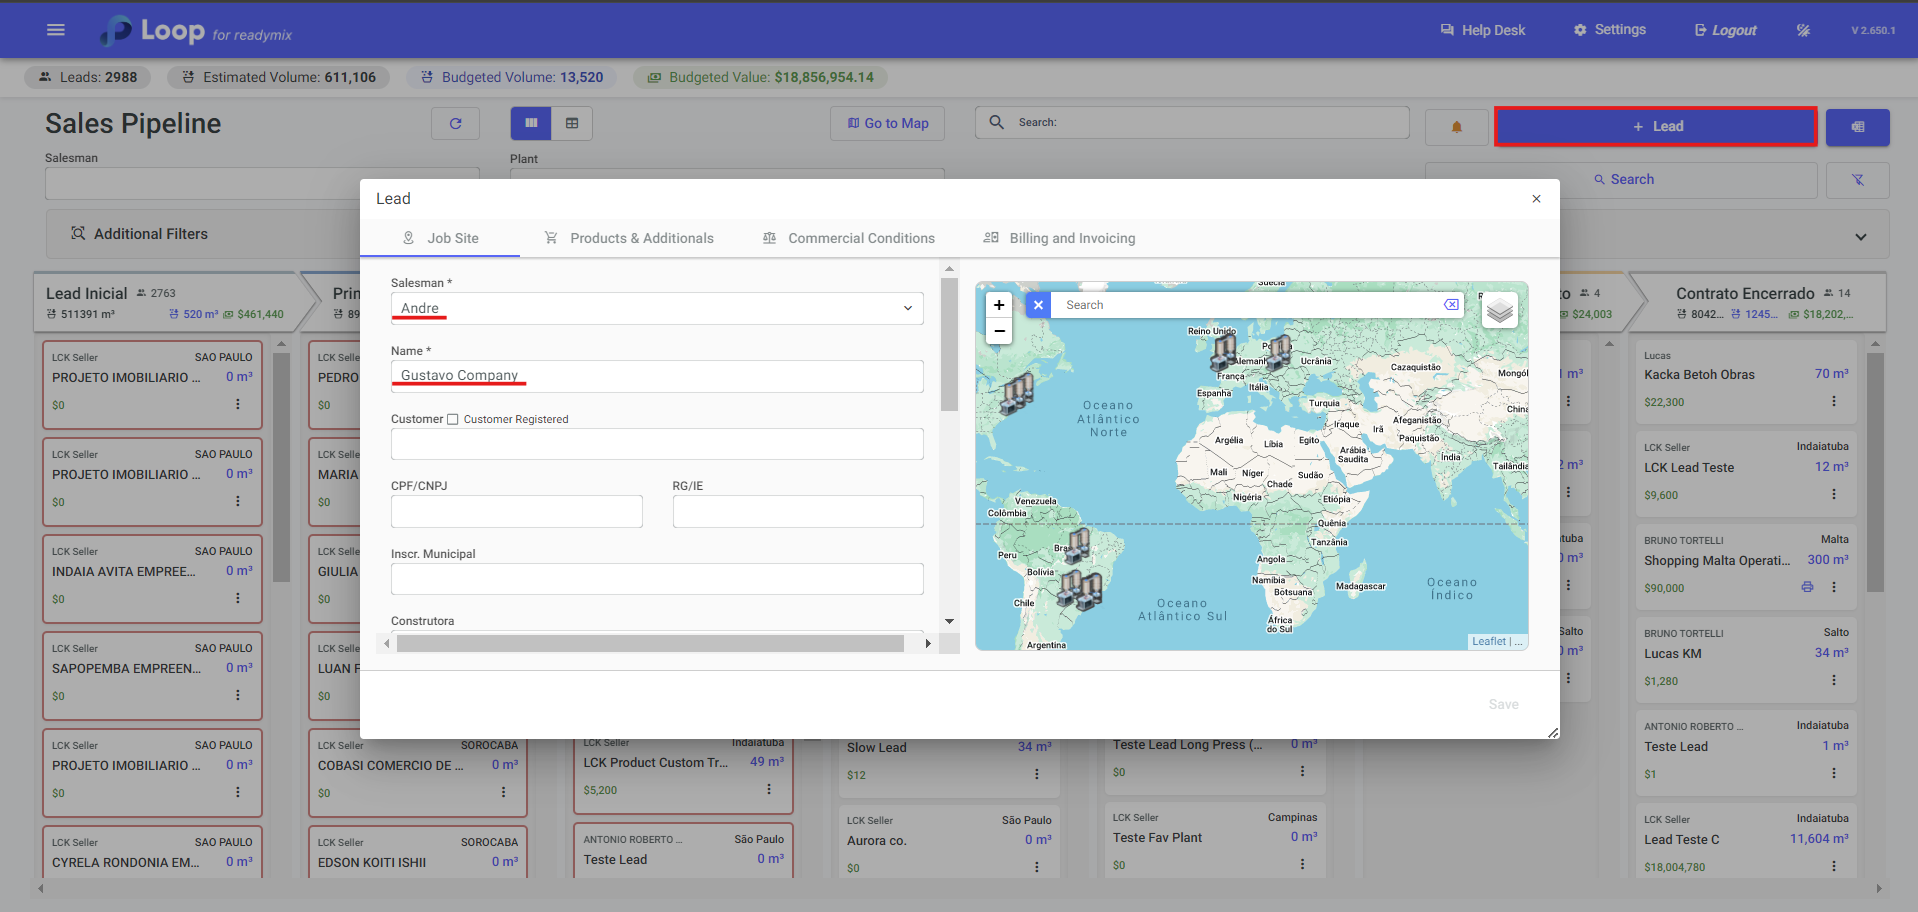
To add a new lead, you need to provide some basic information, such as: the responsible salesperson, the lead's name, the current stage of the sales process, and a pin on the map to set the approximate location of the lead.
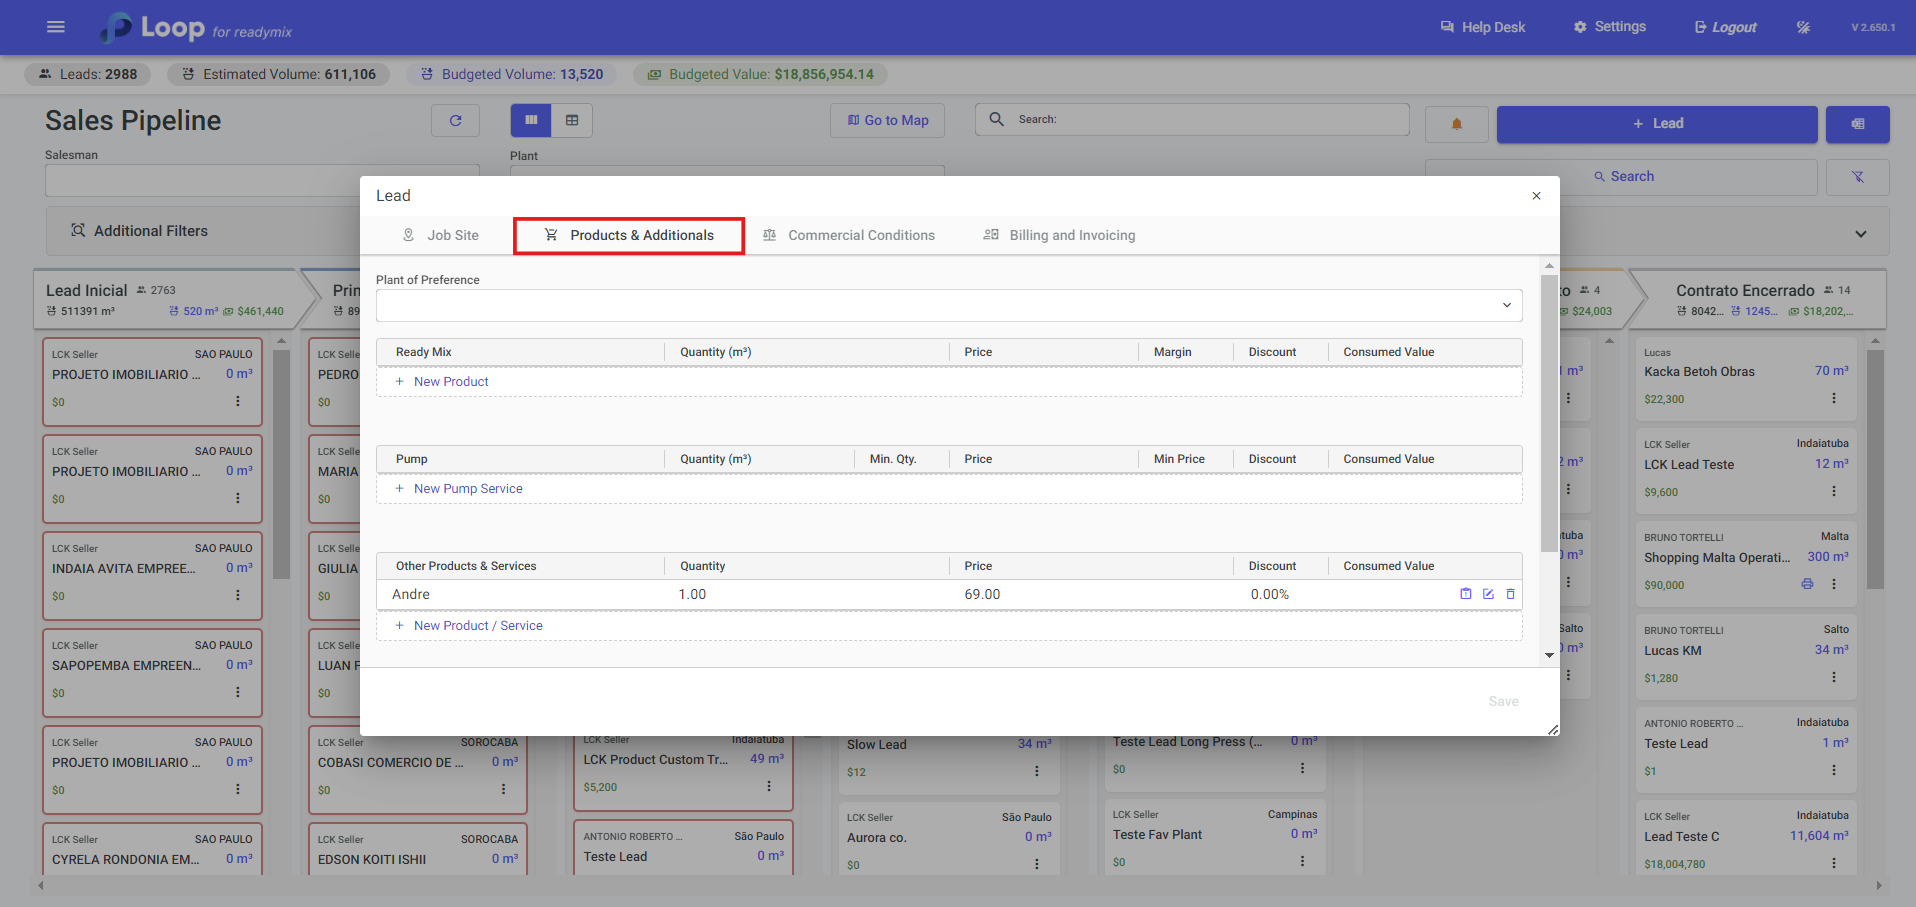
Products & Add-ons: You can select the products, contract rules, and plant that will provide products initially. This offers an efficient way to customize and specify the details related to the products and contracts associated with each lead.
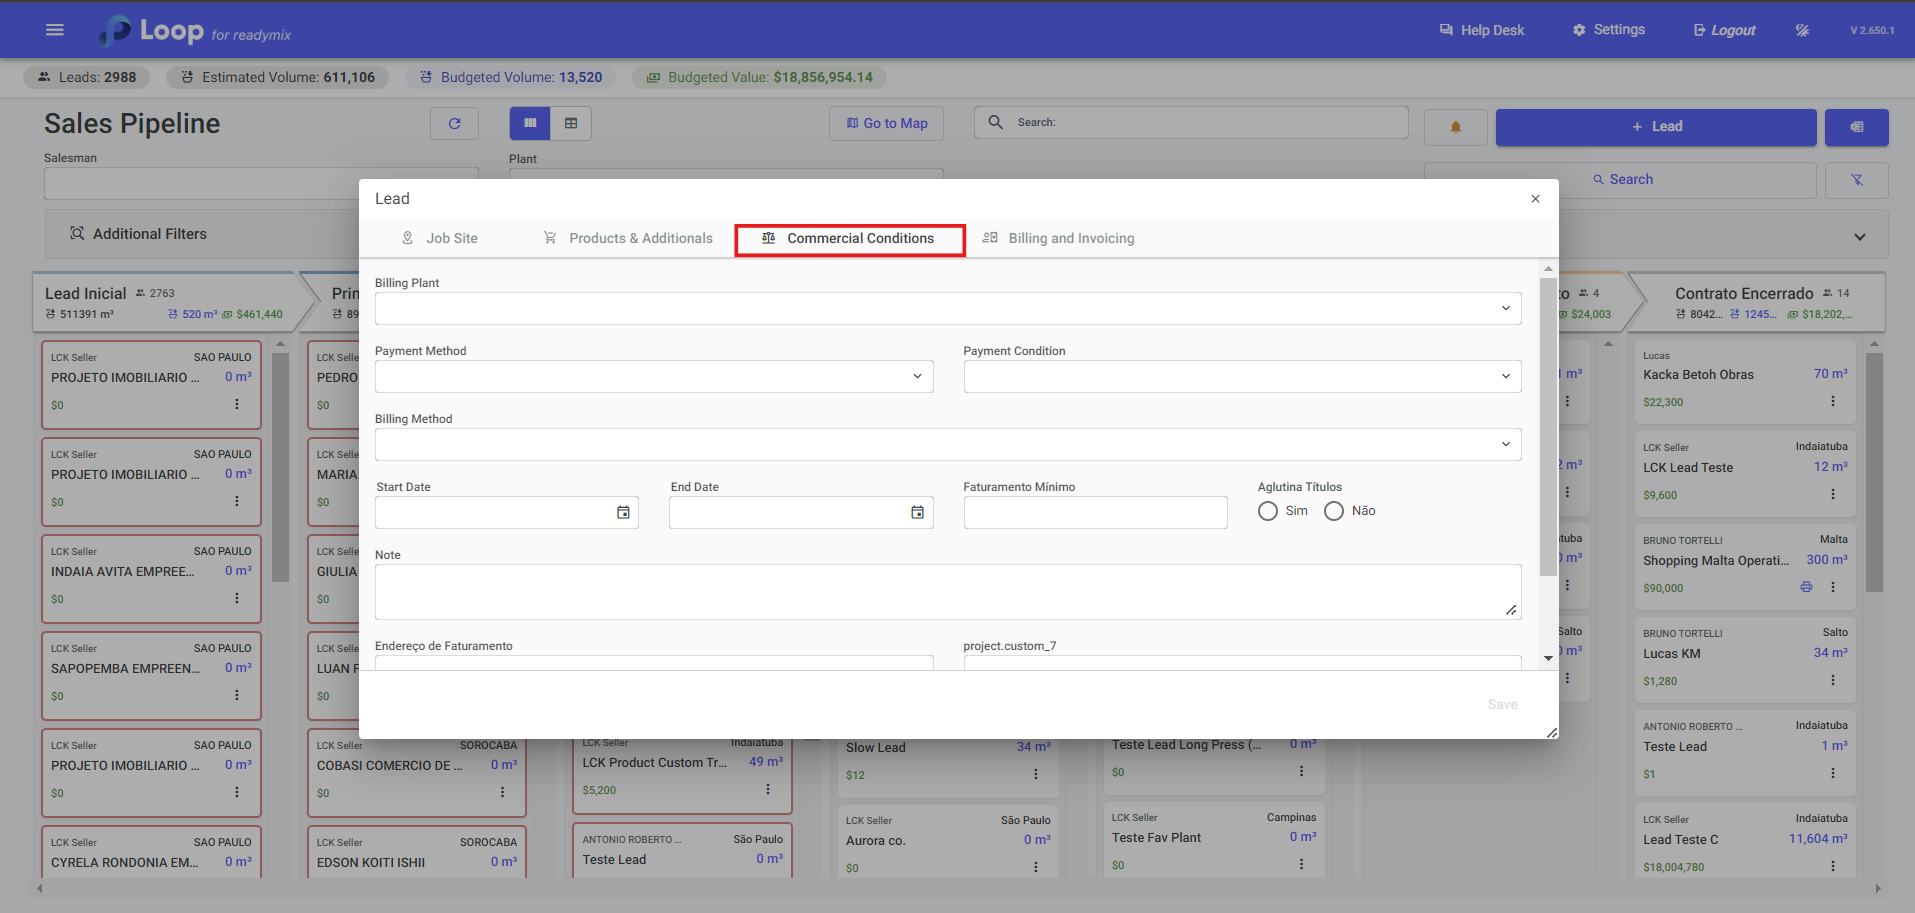
Commercial Conditions: It is possible to configure payment methods, as well as rules and conditions related to contract volume, and start and end dates of the project. This facilitates negotiation and business closure.
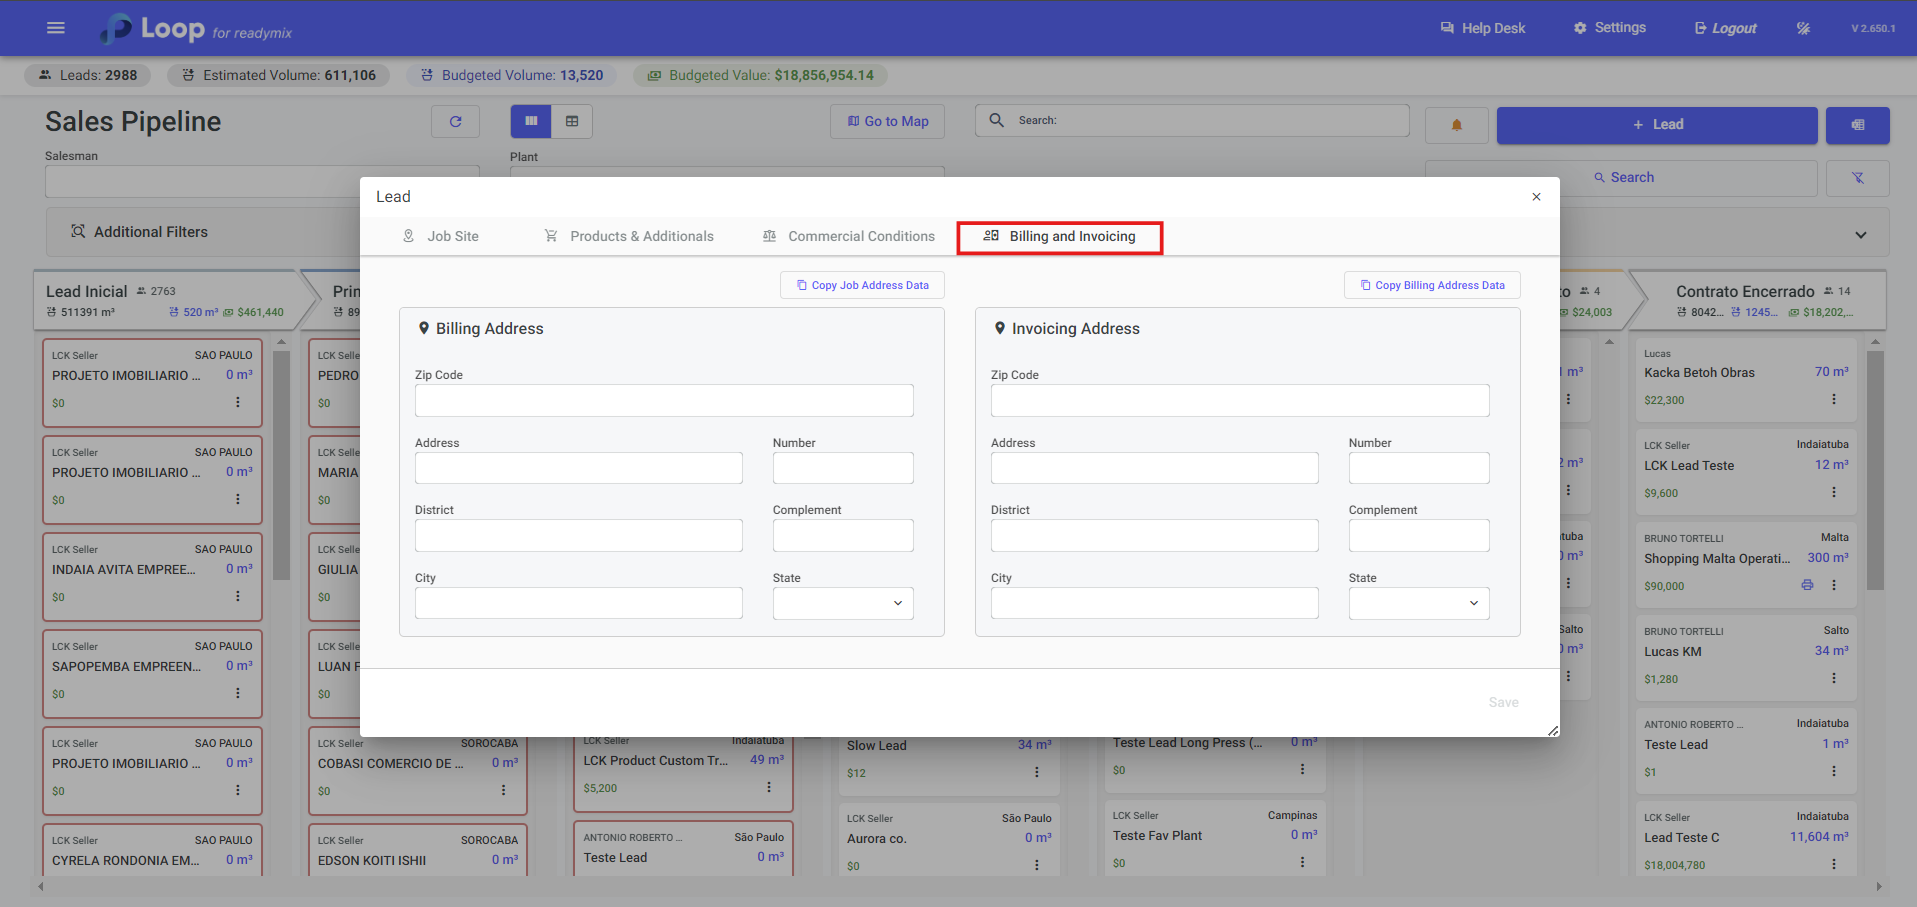
Billing and Invoicing: in this tab, you fill in the Billing Address and Invoicing Address, with fields like zip code, street, number, complement, district, city, and state. If the addresses are the same, use the "Copy Billing Address Data" button to copy the billing information to the invoicing address, or "Copy Job Address Data" to copy the job site address.
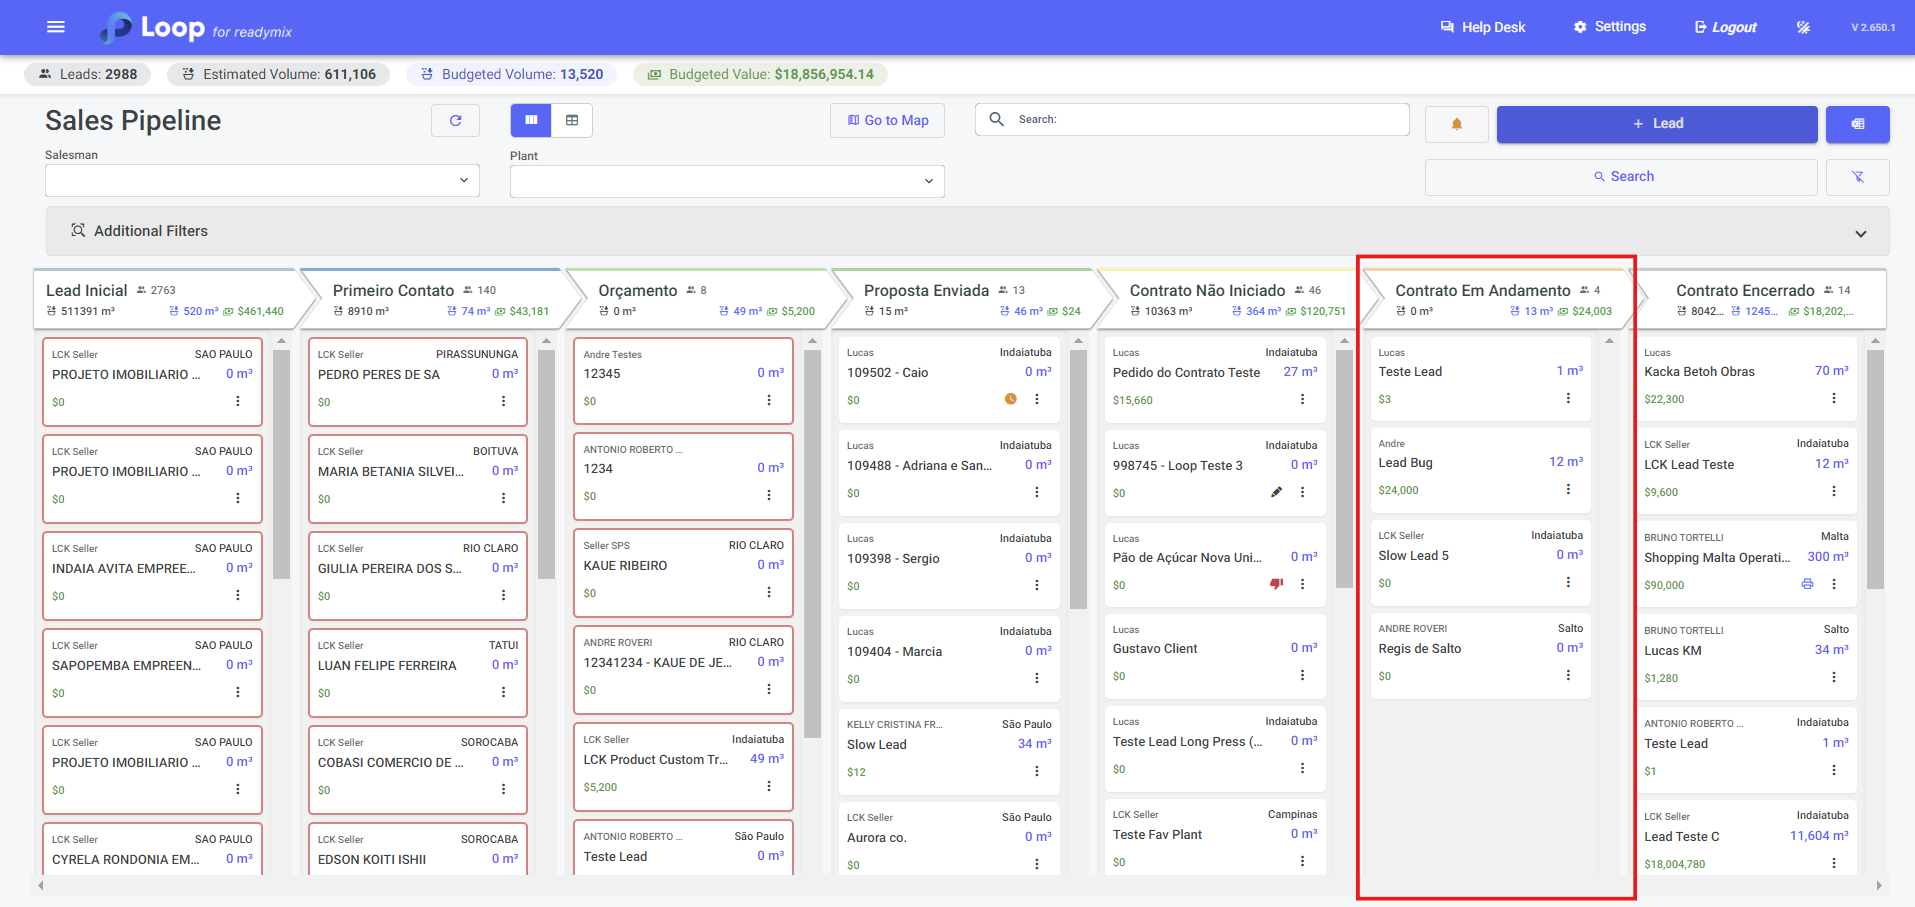
Once a lead's products are defined and its stage is moved to "Contract in Progress," it's possible to schedule and dispatch directly through the Loop system. This significantly simplifies the process of acquiring customers and closing sales, offering an integrated solution for the entire sales cycle.
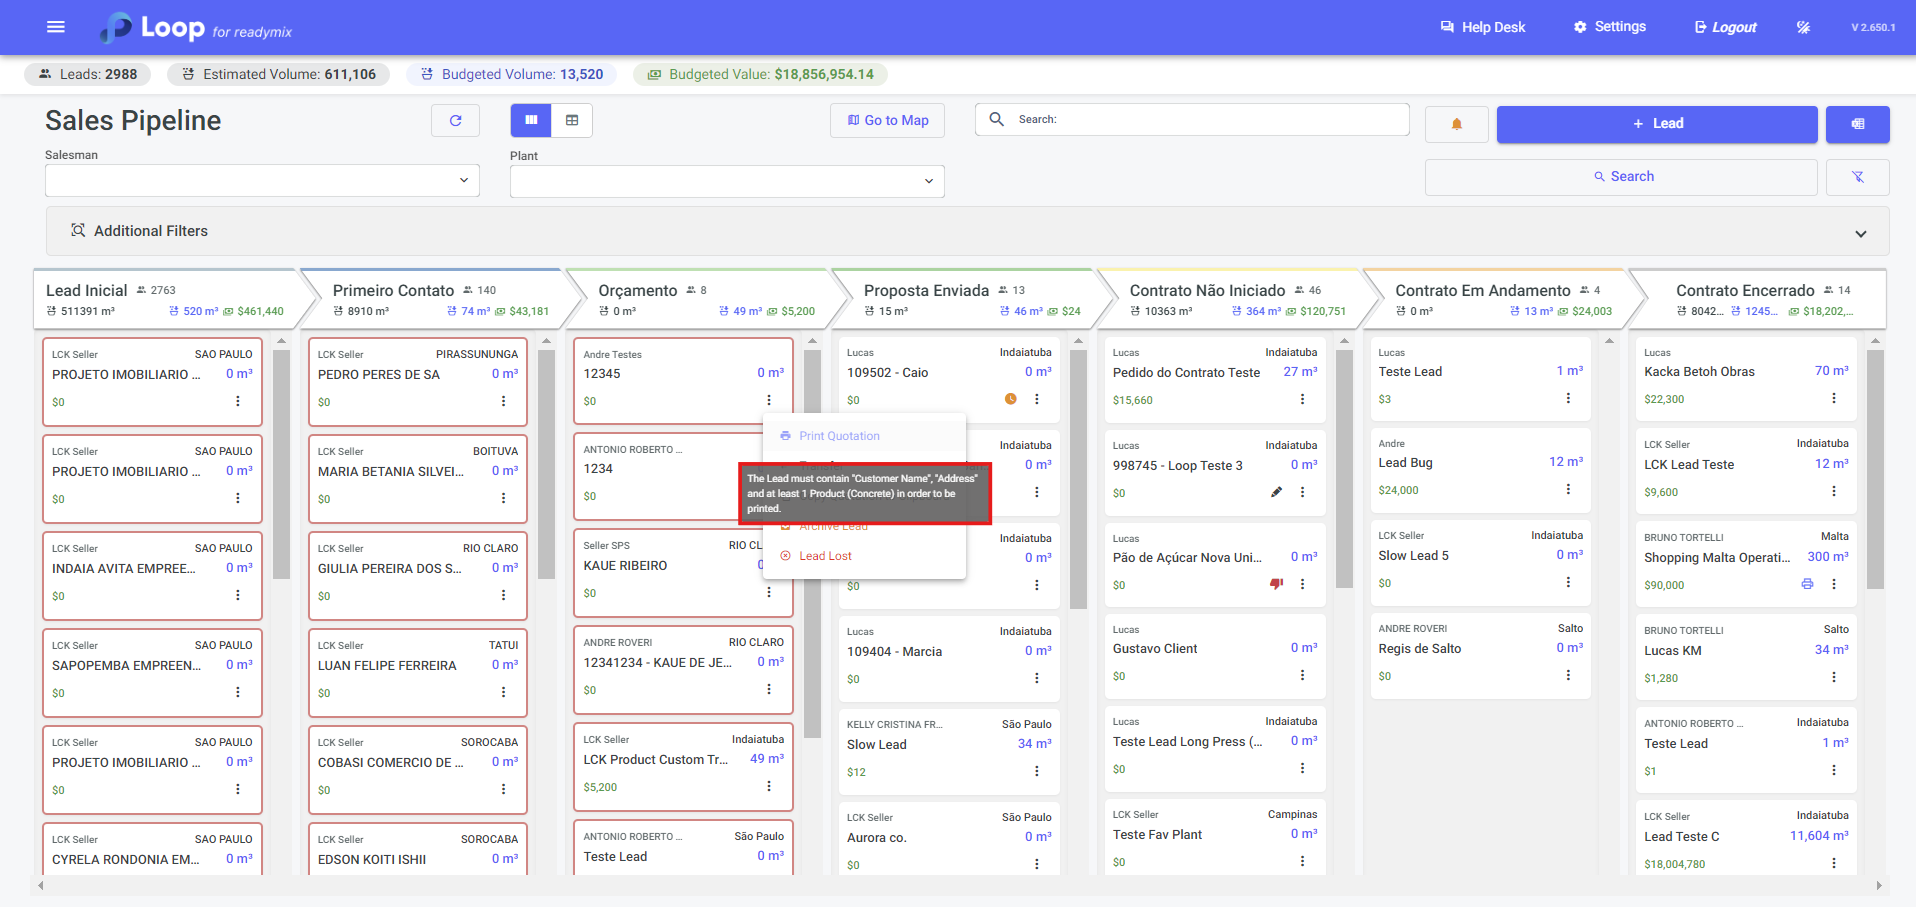
Once we reach the Proposal stage, we have the lead printing functionality. It allows us to document proposals for clients formally. This provides a concrete way to present information, making the process more transparent and professional. By providing printed documentation, clients have a physical reference to review, which can increase trust and credibility during negotiations. To print a lead, it's necessary to define some information, such as the client's name, address, and at least one related product. This ensures that the proposal is comprehensive and provides the client with all the relevant information to make a decision.
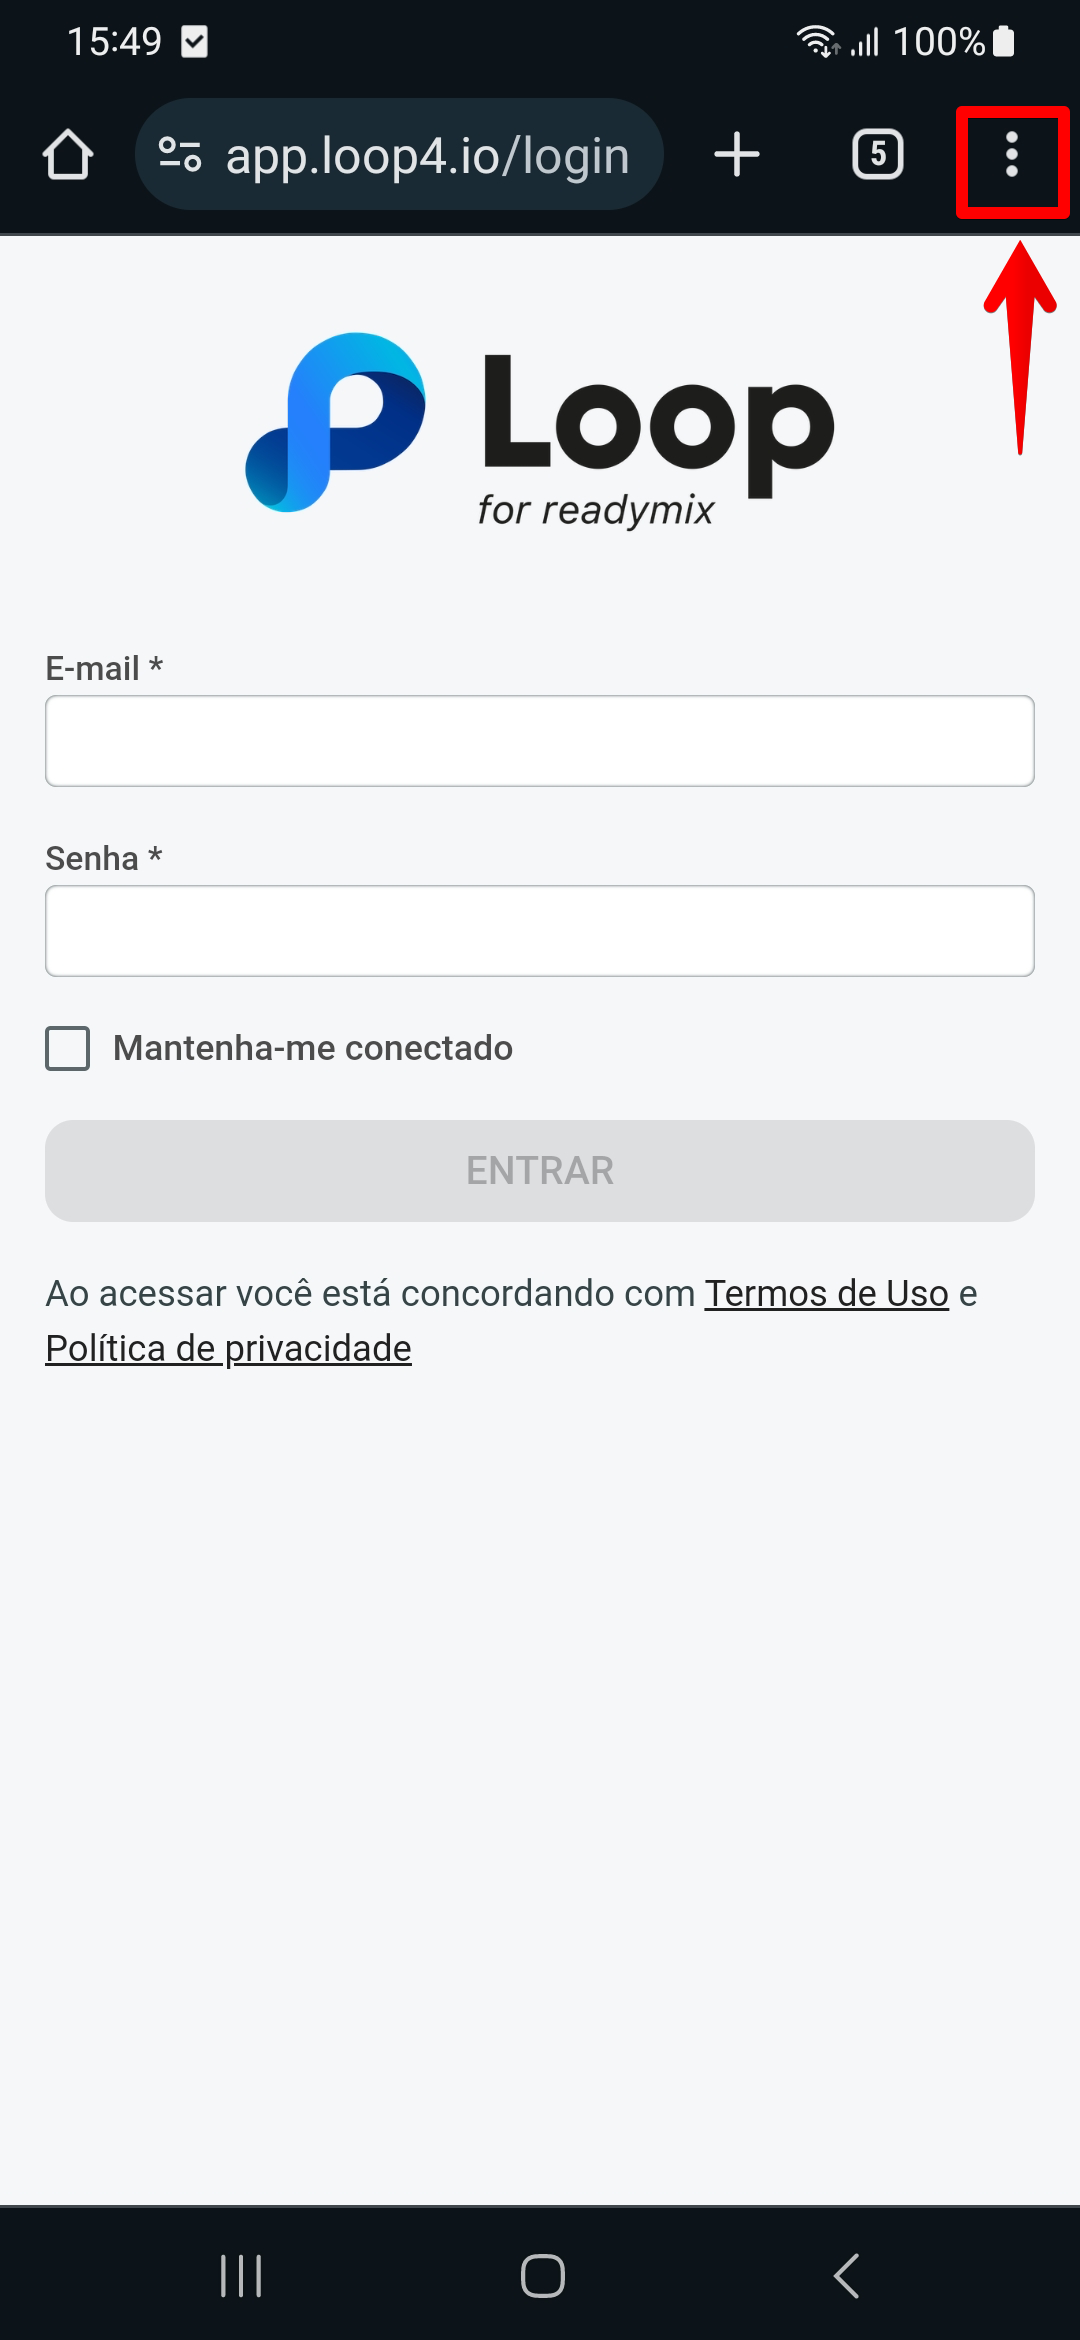
It is also possible to access the Leads screen via cell phone, which provides significant flexibility and facilitates company management. This allows you to track and update leads' progress from anywhere, at any time, increasing efficiency and productivity.
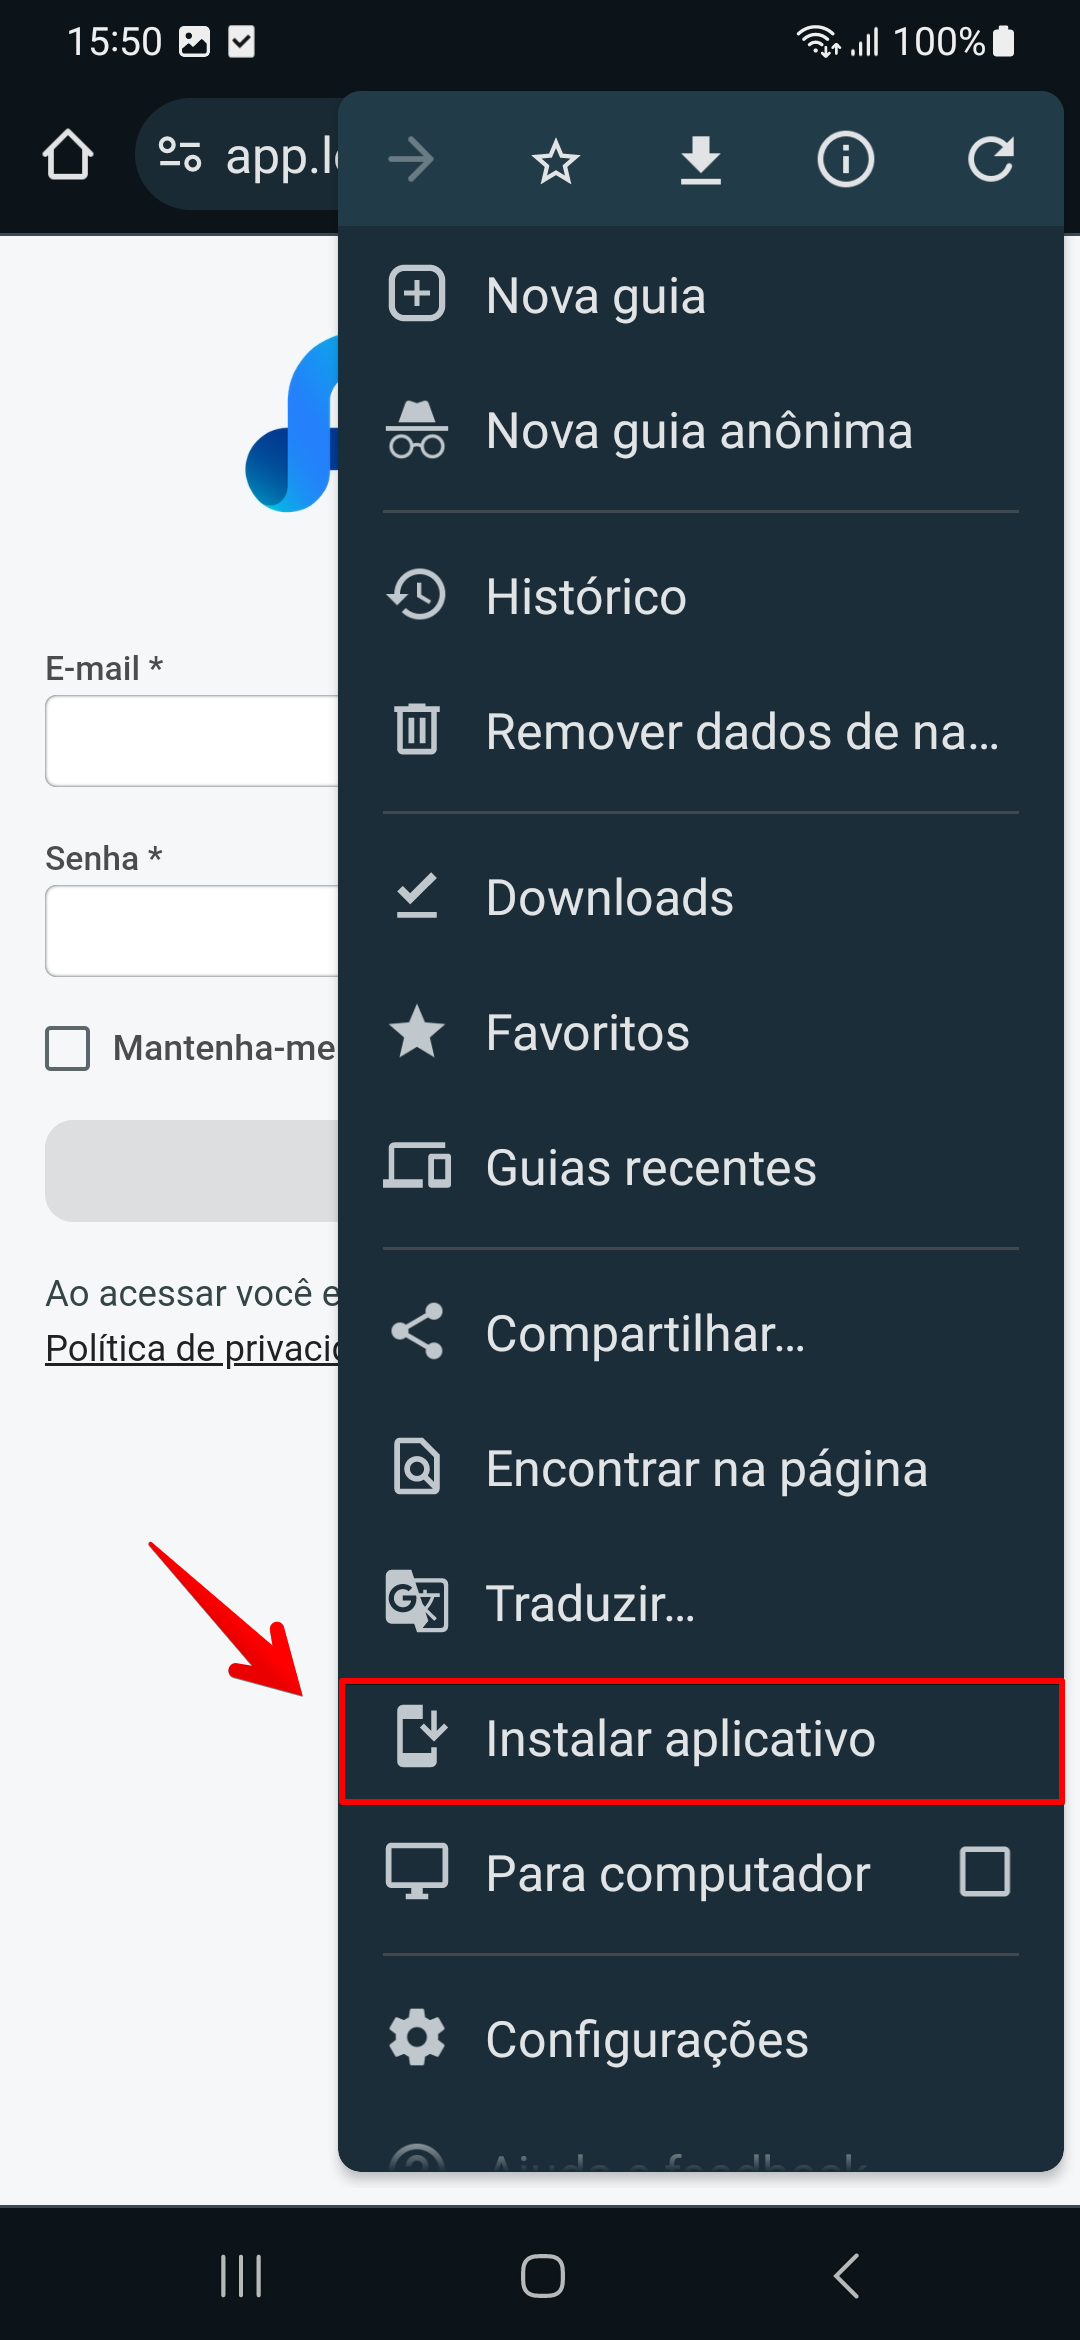
Open the Loop website in the browser: https://app.loop4.io/login - Click on browser options.
Select the "Install application" option so that the application is saved on the application's home screen.
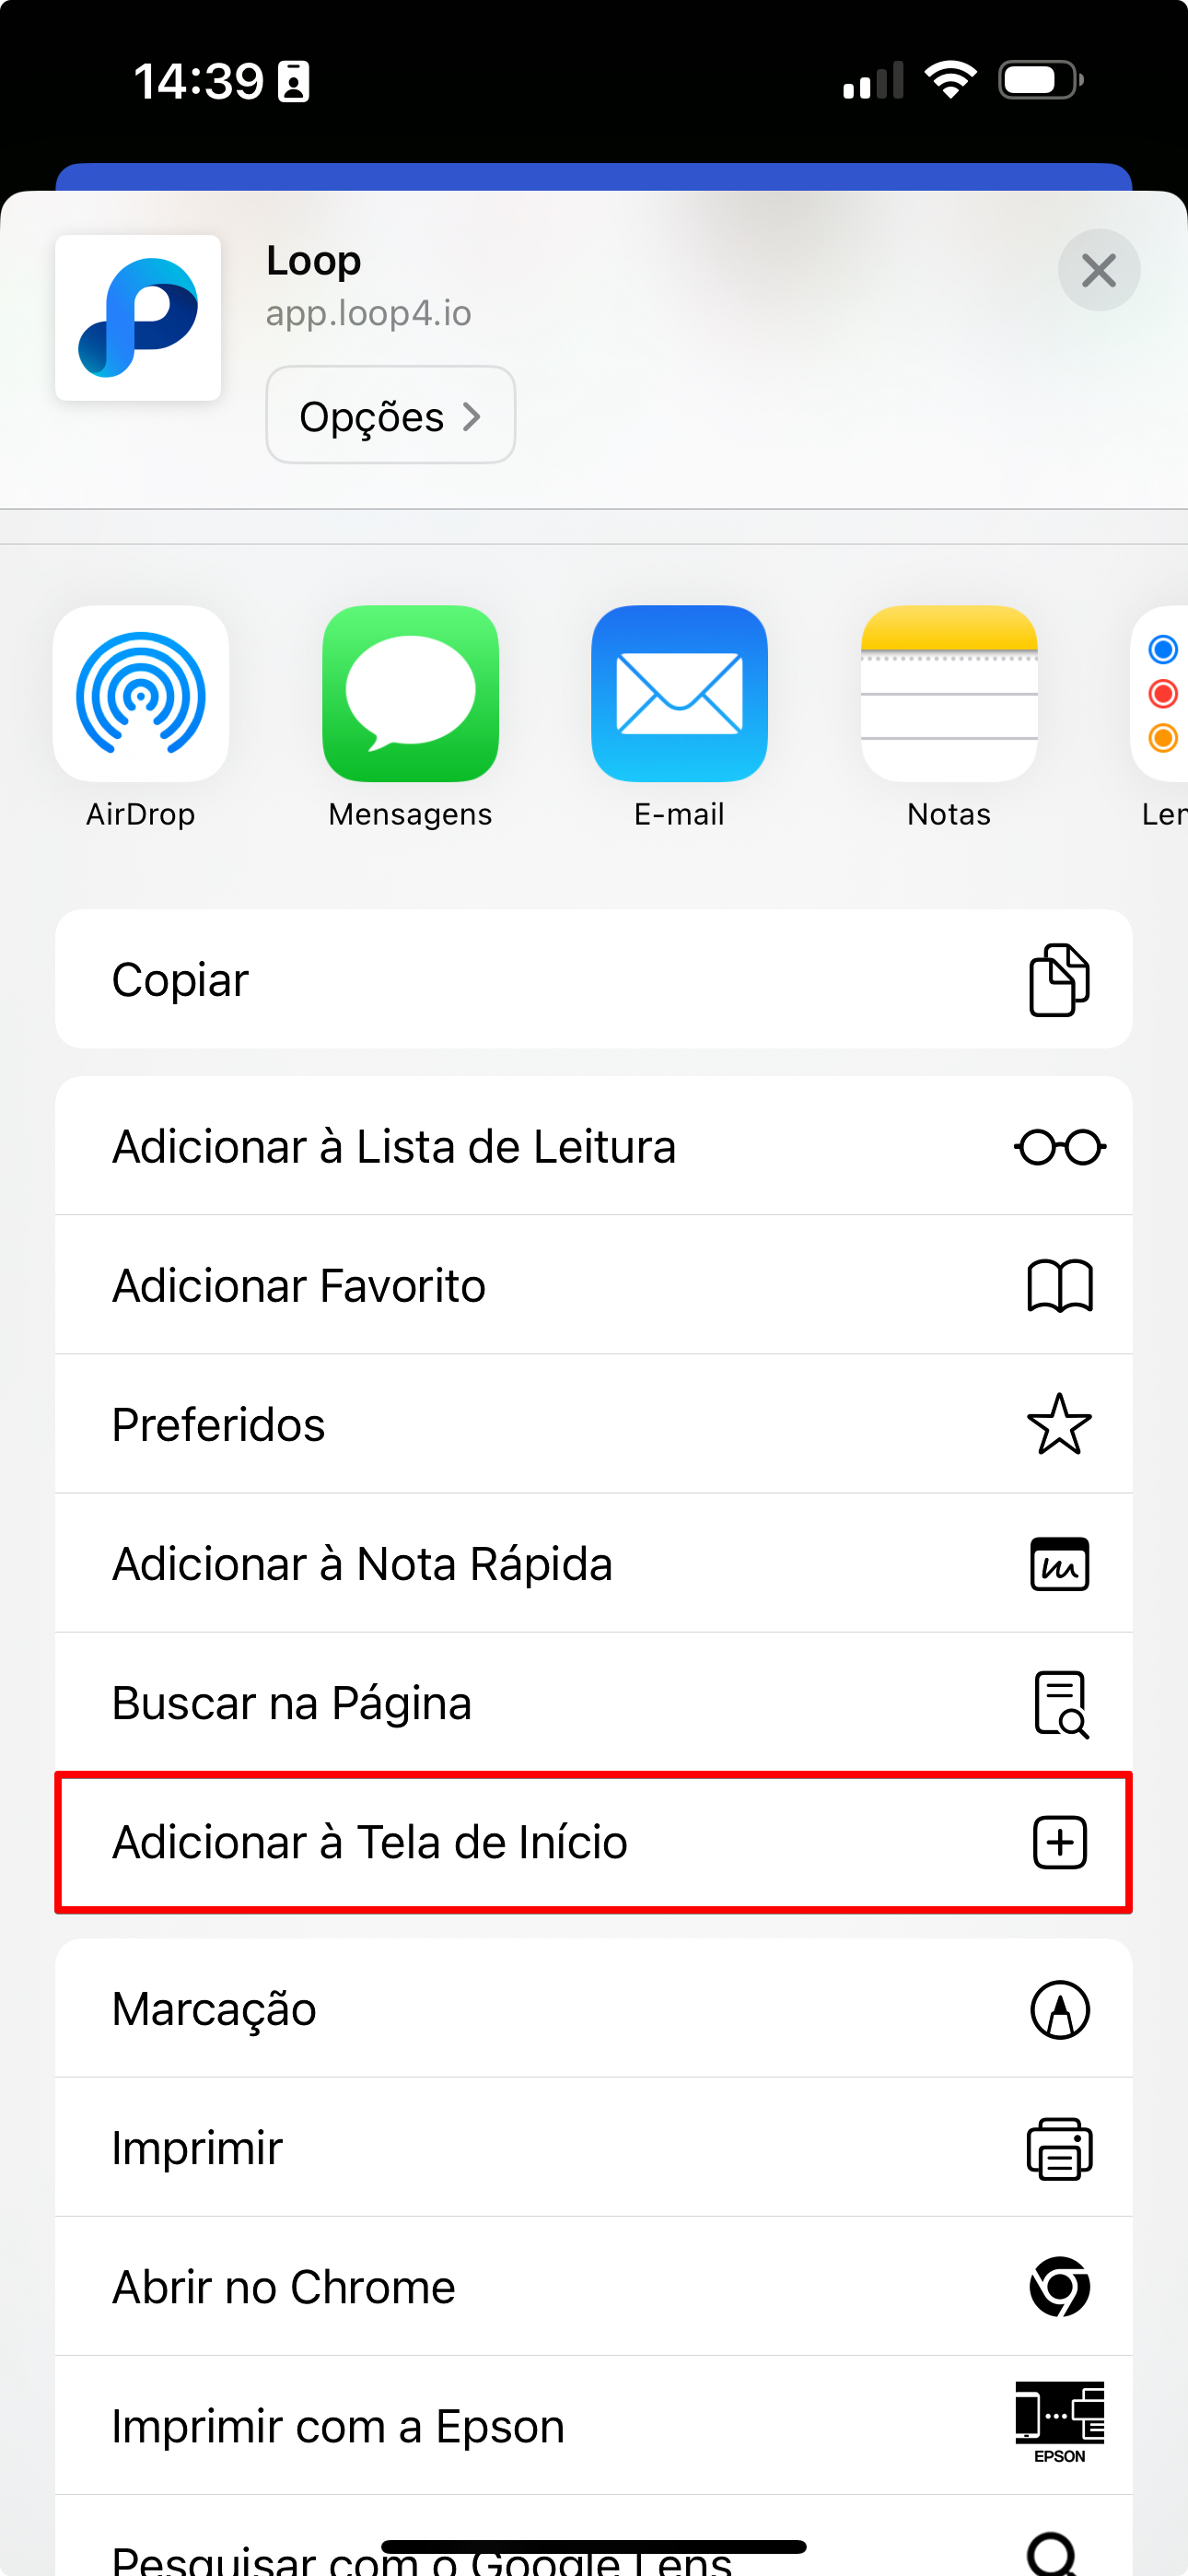
Open the Loop website in the safari browser: https://app.loop4.io/login - Click on browser options.
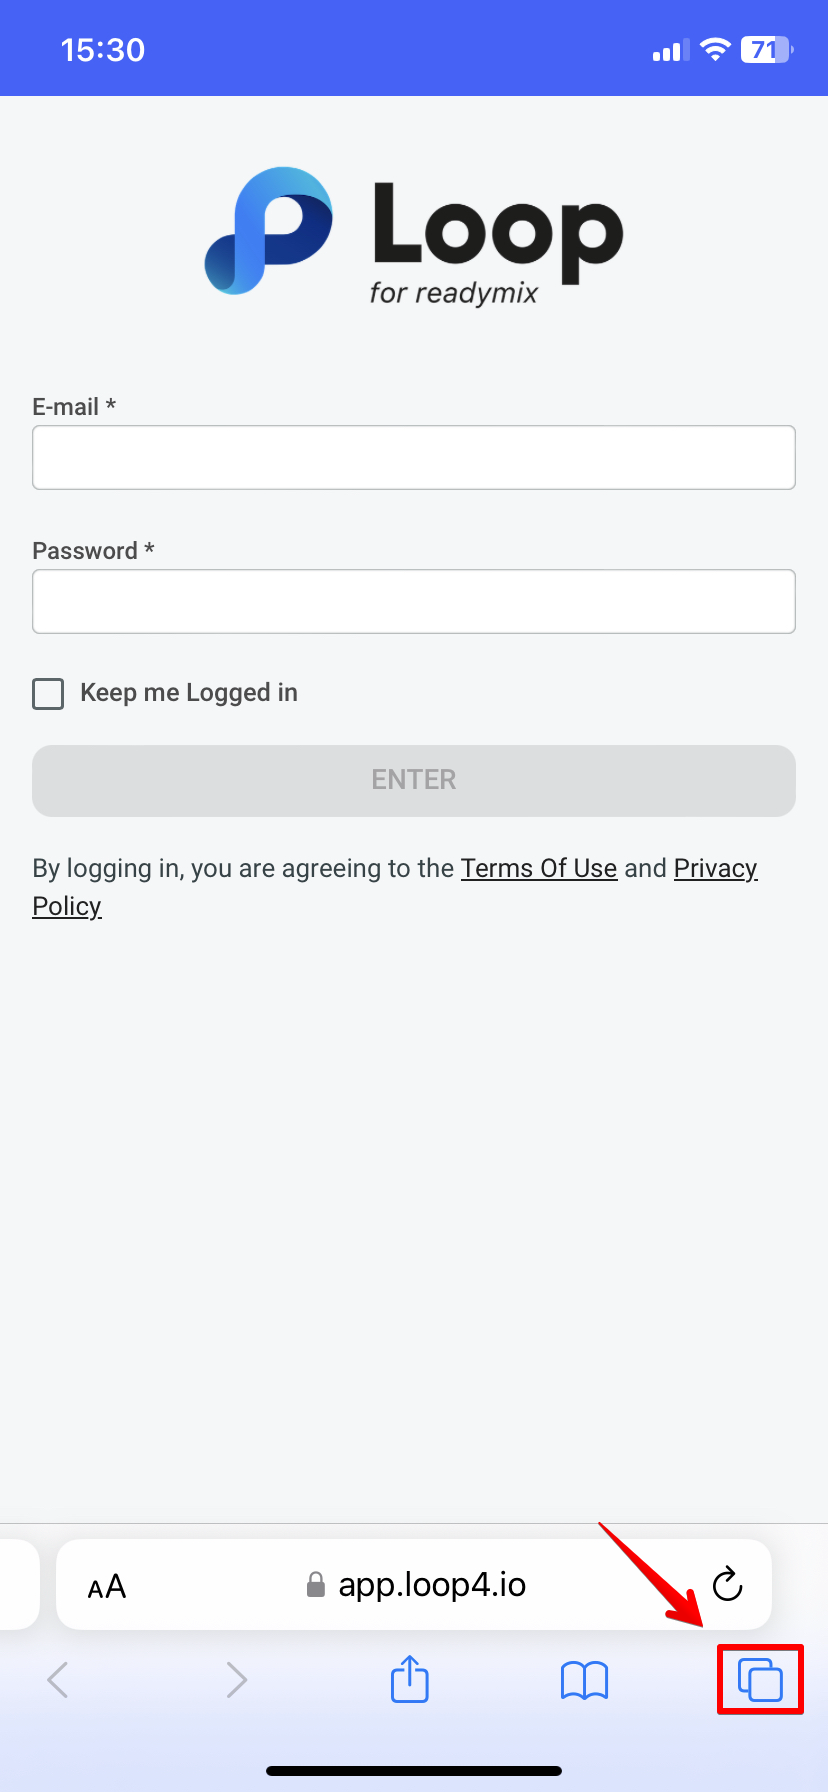
Select the "Add to Home Screen" option so that the application is saved on the application's home screen.
